3RRL
Super Member
- Joined
- Oct 20, 2005
- Messages
- 6,931
- Tractor
- 55HP 4WD KAMA 554 and 4 x 4 Jinma 284
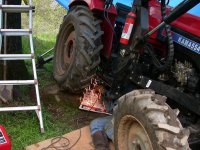
I couldn't find a source to buy a subframe that fit my KAMA 554 going to the Nardi Backhoe so I made my own. I've read posts about guys who made their own and that gave me the idea. D Krug was a lot of help giving me hints and pictures of the ones he made and what to look for.
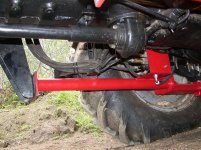
One of the things I wanted was to use the factory 3 point in my design. That makes it a lot easier when switching to other implements. Even though the 55hp Kama is sturdy enough to handle the backhoe on the 3 point mount, I wanted to increase the stability to re-assure myself and avoid any damage to the tractor. Especially when digging to the side, where the 3 point is most vulnerable to the sideways forces of the backhoe. I also wanted a 2 piece subframe with very little of it except what is necessary remaining on the tractor.
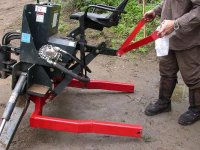
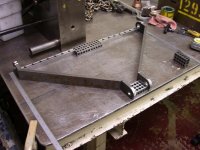
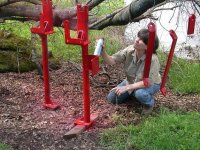
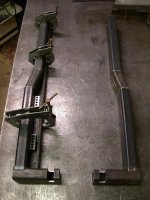
I have a lot of pictures in doing this project but I'll start by showing the finished subframe and mounts, and some of the machining and welding later.
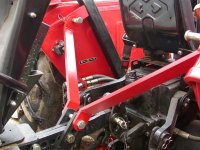
Here is the first one that shows the lower leg portions that are welded to the underside of the backhoe. The welds are re-inforced and gusseted for strength. Notice the top brackets. They are not going to be connected where I have them here. That is the top link hole that fits the tractor. They will be connected to those holes in the brackets just below the seat.
One of the things I wanted was to use the factory 3 point in my design. That makes it a lot easier when switching to other implements. Even though the 55hp Kama is sturdy enough to handle the backhoe on the 3 point mount, I wanted to increase the stability to re-assure myself and avoid any damage to the tractor. Especially when digging to the side, where the 3 point is most vulnerable to the sideways forces of the backhoe. I also wanted a 2 piece subframe with very little of it except what is necessary remaining on the tractor.
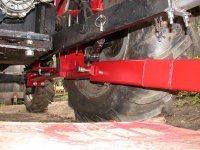
I have a lot of pictures in doing this project but I'll start by showing the finished subframe and mounts, and some of the machining and welding later.
Here is the first one that shows the lower leg portions that are welded to the underside of the backhoe. The welds are re-inforced and gusseted for strength. Notice the top brackets. They are not going to be connected where I have them here. That is the top link hole that fits the tractor. They will be connected to those holes in the brackets just below the seat.