Solar Electric Project

   / Solar Electric Project
  • Thread Starter
#41  
varmint said:
About the only thing I can add is this: your diesel generator can provide a good source of heat as well as electricity

Funny you should mention that - I've been thinking about ways to accomplish just what you describe. My shop/garage is split into two parts. You guessed it, one part is a shop and the other part is garage space. The garage part is uninsulated and unheated, and the shop will be both insulated and heated. The gen set will be in the garage part but will be backed up against the wall dividing the two spaces. The default will be for intake air (combustion and cooling) to be drawn from the open garage space and exhaused through a duct to the outside. The duct will carry only cooling air - the exhaust will go straight outside through some sort of insulated piping.

The options I'm considering involve automatic duct controls that will be controlled by a thermostate in the space to be heated. The options when heat is called for are:

1) Draw intake air from the shop and exhaust waste heat to the shop. This will provide max heating in the shop since it's heating the warm air already in the shop. The down side is that I need to have duct controls on both the intake and exhaust side. There also is risk of fume leakage into my work space which would be dangerous. The danger can be mitigated with monoxide detectors, but there's still risk.

2) I could duct only the exhaust air (but not intake) to the shop. This is simpler ducting since it's on the exhaust side only, but it's less effective heating and when the gen set is cold I'd be blowing cold air into the shop, so I'd have to add another control to only open the duct when there is both a call for heat and the gen set is above some temp.

3) Switch the exhaust duct so it blows into the garage, not the shop. Now my un heated garage would be randomly heated based on gen usage.

Right now I'm leaning towards #1. It's the best solution and isn't a whole lot more work, but I probably won't actually do it until later - I'll just arrange the ducting to the exterior so it can be enhanced later when I have more of an appetite for yet another project.

Actually, as I think about #2 is DOA since exhausting into the shop without also drawing from the shop will pressurize the shop. I'd end up pushing all the hot air out of the space. Bad idea. Strike that option.
 
   / Solar Electric Project #42  
Haden
I would look at using the colant you should get more heat out of it.
You would need a coiled for (water) air handler divertor valve and some sort thermostat to control valve when shop would warm up it would divert flow back to original raditor.

tommu
 
   / Solar Electric Project #43  
Hayden, great updates and progress on your project.
I have a suggestion for your battery trays if you are have not thought about it yet. You'll need to pull your battery bank out to service the them, I presume. I used light weight furniture movers that hold about 2,000lbs each. Mount a set under/to the tray (upside down) and have a steel angle plate or something for the little rollers to ride on. Your tray will slide out for easy access. You can get them at any hardware store.
 
   / Solar Electric Project
  • Thread Starter
#44  
Rob, thanks for the suggestion. I was very interested in the way you racked your's with the slide out trays and tried to find a way to do something similar. In the end I went with all 12 batteries on the ground in a 6 wide x 2 deep layout. There's only 5 1/2' of headroom in my basement (if you want to call it that) and I decided that going vertical wouldn't provide enough clearance for easy service. I also chickened out on building a rack that would hold nearly 4000 lbs of batteries including 2000 lbs on a slide out tray. And then it would have to be enclosed to provide proper venting.

I went through 4 or 5 different layout configurations for the batteries and for better or worse picked the one I did. At least with all batteries on the ground I don't have to worriy too much about structural integrity. The batteries sit directly on the box floor which is 3/4 plywood, and that sides on 4 2x6 pressure treated boards lying flat as skids on top of crushed stone. I calculated 2 PSI on the stone/skids. The rest of the enclosure serves no structural role, but only provides for protections and containment/venting of charge gases. It's butt-ugly, but hopefully functional.

I should be able to report out in a couple of days on how it works. I hope to get the box and power panel set, conduit run, and batteries in place by mid week.
 
   / Solar Electric Project
  • Thread Starter
#45  
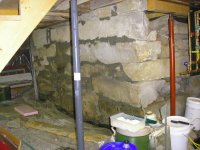
The battery box and power panel are going in my basement. As I mentioned earlier, the house is 200 years old and the foundation is granite blocks laid up dry. I've subsequently mortared up the joints in the walls to keep critters out and to cut down on the drafts, but there is also a center foundation that supports the fireplaces. All the solar equipment will be backed up against this central foundation, but I've never mortared it. I need to now that I won't have access to it after the solar gear is installed.

Here's a picture of the wall all mortared up. Tomorrow I'll haul the battery box down and get it leveled and set in place, then build the power panel.
 

Attachments

  • PCH_2008-07-15-0271.JPG
    PCH_2008-07-15-0271.JPG
    72.1 KB · Views: 232
   / Solar Electric Project
  • Thread Starter
#46  
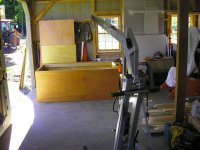
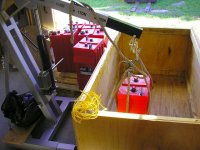
Before setting the battery box in position in the basement and dragging the batteries down, I wanted to be sure my approach to lifting the batteries into the box would work. The approach I'm following is to use an engine hoist to lift the batteries, roll forward, then lower them into the box. The hoist has retracting legs which enables me to get it close enough to the battery box with the lift boom hanging far enough over the box to reach the back row. However, counter weighting is needed to keep the hoist from tipping forward. I wanted to figure out the whole counter weight thing in the comfort of my garage and be sure it would work.

The first picture is of the box in the background and the lift in the foreground.

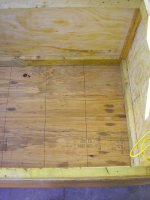
Next shows the inside of the box with a grid marked off for positioning each battery

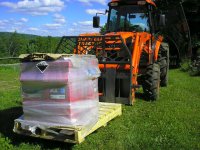
Next are the two pallets of batteries covered in the yard

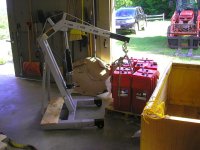
And, so we don't forget this is all about tractors, here are the batteries on the tractor forks on their way into the garage.

The last two show one battery being lifted and lowered into the box. I was able to reach the first row with an 80lb bag of cement on the back of the lift. To reach the second row I had to extend the boom further and with two bags of cement the lift was just balanced. I'll add something else to be sure it's fully counter weighted.
 

Attachments

  • PCH_2008-07-15-0272.JPG
    PCH_2008-07-15-0272.JPG
    65.8 KB · Views: 169
  • PCH_2008-07-15-0273.JPG
    PCH_2008-07-15-0273.JPG
    56.6 KB · Views: 141
  • PCH_2008-07-15-0274.JPG
    PCH_2008-07-15-0274.JPG
    93 KB · Views: 146
  • PCH_2008-07-15-0276.JPG
    PCH_2008-07-15-0276.JPG
    95.3 KB · Views: 177
  • PCH_2008-07-15-0277.JPG
    PCH_2008-07-15-0277.JPG
    70.5 KB · Views: 199
  • PCH_2008-07-15-0278.JPG
    PCH_2008-07-15-0278.JPG
    73.7 KB · Views: 187
   / Solar Electric Project #47  
looking at the pics and reading the posts, I was wondering if you have enough head room to raise up the box higher so the batteries will still clear the top of box when installing/removing them and have the wheels of the engine lift will roll under the box??? may have to play a little slide around to clear the under box supports that raise UP the box but might be safer than the counter weights on the lift?

Nice post I been reading and watching it a while now.!

mark M
 
   / Solar Electric Project
  • Thread Starter
#48  
SPIKER said:
looking at the pics and reading the posts, I was wondering if you have enough head room to raise up the box higher so the batteries will still clear the top of box when installing/removing them and have the wheels of the engine lift will roll under the box??? may have to play a little slide around to clear the under box supports that raise UP the box but might be safer than the counter weights on the lift?

I wrote you a reply yesterday but fat-fingered it, so here goes again.

I like your thinking, but the problem is just as you suspect. I'm just going to clear the joists as it is now when I load the batteries. Any more height and it wouldn't make it. In fact, I discovered a little oops in my box design and placement related to this. It turns out that there isn't enough height to open the lid completely. I was hoping to have it open fully and park leaning back against the wall. I'm about 6" short on headroom. Darn :confused: . Fortunately it opens enough to load the batteries, though for the back row I'll need to lower them most of the way down in the front, then roll back and set them in place. If I need to replace a battery in the back row I'll have to pull the one in front of it first to gain access. If necessary, I'll segment the lid and use a second piano hinge so it opens/folds onto itself.
 
   / Solar Electric Project
  • Thread Starter
#49  
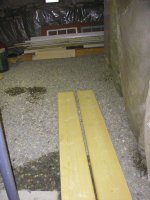
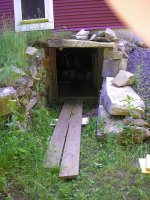
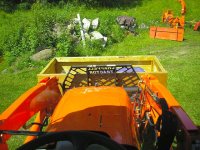
More progress on the solar system. After confirming that the engine lift could get the batteries into my battery box, it was time to start hauling everything to the basement. The first picture is the battery box loaded on the forks, and full of tools and supplies making it's way around the back of the house.

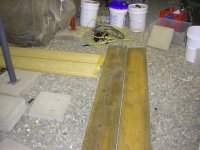
The next show my plank walkway for getting everything in. I just dragged the battery box. At first I tried a dolly, but it was impossible to control and keep on the planks. Dragging worked fine.

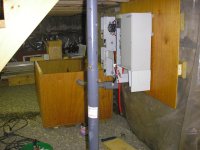
The last pictures show the box in place and my power backing panel installed. To mount the panel I used 2x6 pressure treated boards against the granite and used masonry anchors to secure it. Man on man is granite hard stuff. It took forever to drill the 4 holes (3/8") for the anchors even using a hammer drill.
 

Attachments

  • PCH_2008-07-16-0282.JPG
    PCH_2008-07-16-0282.JPG
    67.7 KB · Views: 115
  • PCH_2008-07-16-0281.JPG
    PCH_2008-07-16-0281.JPG
    59 KB · Views: 115
  • PCH_2008-07-16-0280.JPG
    PCH_2008-07-16-0280.JPG
    109.4 KB · Views: 131
  • PCH_2008-07-16-0279.JPG
    PCH_2008-07-16-0279.JPG
    107.1 KB · Views: 130
  • PCH_2008-07-16-0283.JPG
    PCH_2008-07-16-0283.JPG
    72.5 KB · Views: 111
  • PCH_2008-07-17-0285.JPG
    PCH_2008-07-17-0285.JPG
    62 KB · Views: 137
   / Solar Electric Project
  • Thread Starter
#50  
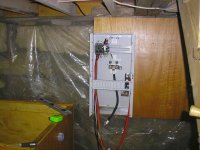
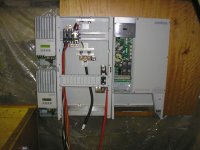
Then it was time to start assembling the electronics and get the conduit run between the battery box and wiring panel.

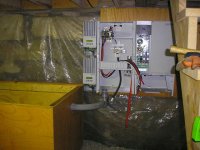
The first picture shows the breaker box. I placed it first so I could get the conduit run between it and the battery box. I had to move the box slightly to get the conduit in, but afterwards everything is in place to stay. The conduit run was critical because the battery cables are only 5 feet long and it's real close getting them to reach so every inch counted.

Then the rest of the gear gets installed. To the left are the two solar charge controllers, and to the right is the 6KW 120/240V inverter. I left the open panel space to the right and will mount the generator start controller and communications gateway there, plus other stuff over time.
 

Attachments

  • PCH_2008-07-17-0286.JPG
    PCH_2008-07-17-0286.JPG
    66.3 KB · Views: 143
  • PCH_2008-07-17-0287.JPG
    PCH_2008-07-17-0287.JPG
    58.8 KB · Views: 158
  • PCH_2008-07-18-0288.JPG
    PCH_2008-07-18-0288.JPG
    64.4 KB · Views: 124
  • PCH_2008-07-18-0290.JPG
    PCH_2008-07-18-0290.JPG
    64.5 KB · Views: 162

Tractor & Equipment Auctions

2010 Ford Edge SE SUV (A51694)
2010 Ford Edge SE...
66" Skidloader Tooth Bucket (A50774)
66" Skidloader...
2025 20ft. G70 Cargo Transport Chain (A51692)
2025 20ft. G70...
2010 Chevrolet Equinox SUV (A51694)
2010 Chevrolet...
2013 Chevrolet Caprice Sedan (A50324)
2013 Chevrolet...
Cat TH407C Telehandler (A52748)
Cat TH407C...
 
Top