SSQA fork build

   / SSQA fork build #81  
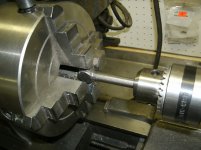
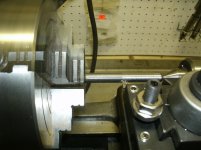
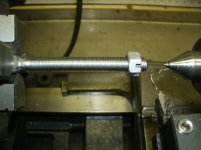
90 degree nothing - run it right off a sprocket from the middle or end. You could also run these off RH threaded rod if you put an outside driven sprocket on the chain drive so the two sides are driven opposite directions.

Still need to worry about dirt, but it'd be a slick setup.
 
   / SSQA fork build
  • Thread Starter
#82  
Reason the speed reducer popped in my head is I have a collection of them and some have a dual output shaft. Makes it simple and clean.
 
   / SSQA fork build #84  
Have you priced out a LH acme rod of sufficient diameter?
I bought some 1" acme rod 3 feet long on sale for $16. I think full price was $40.
 
   / SSQA fork build #86  
That's still not bad.
 
   / SSQA fork build #87  
Cheaper than turning it yourself, yes. It's still a chunk of change for a steel bar.
 
   / SSQA fork build #88  
And cheaper than hydraulic cylinders or electric actuators.
 
   / SSQA fork build
  • Thread Starter
#89  
Well, like I mentioned in the beginning that this was my first project that was drawn up in 3D cad, so I expected a few bumps in the road and sure enough, they happened. I tacked up the pieces being careful where I placed them knowing that it may come apart. Once I got it to the point where I could check fit, in came the queen for a fitting and......Doh! I got the angle for the top of the catch plate wrong. Probably one of those should have subtracted from 180 instead of adding to 90 type of things with a protractor. Ended up being 15 degrees off (hard to tell from the picture) but the good news is it really isn't catastrophic. Made up a new plate with the right angle but had to eliminate the locating tabs-no biggie. Also need to widen the latch opening on the bottom.
 

Attachments

  • ssqa 1-24-16 012.JPG
    ssqa 1-24-16 012.JPG
    240.3 KB · Views: 168
  • ssqa 1-24-16 013.JPG
    ssqa 1-24-16 013.JPG
    216 KB · Views: 167
  • ssqa 1-24-16 014.JPG
    ssqa 1-24-16 014.JPG
    226.6 KB · Views: 168
  • ssqa 1-24-16 017.JPG
    ssqa 1-24-16 017.JPG
    230.4 KB · Views: 168
  • ssqa 1-24-16 019.JPG
    ssqa 1-24-16 019.JPG
    225.3 KB · Views: 154
   / SSQA fork build
  • Thread Starter
#90  
Now I'm going back to the school I came from. We'll fit the parts to the tractor and then move to the bench. Got the critical parts fitted up and checked the lock mechanism and all parts are a go. Move over to the set up table and located and tacked up all the parts. The plan is to start from the center and weld with the .035 hard wire to minimize distortion by skipping around. Time to start laying down some beads.
 

Attachments

  • SSQA 1-25-16 001.JPG
    SSQA 1-25-16 001.JPG
    240.6 KB · Views: 166
  • SSQA 1-25-16 002.JPG
    SSQA 1-25-16 002.JPG
    249.8 KB · Views: 159
  • SSQA 1-25-16 003.JPG
    SSQA 1-25-16 003.JPG
    180.2 KB · Views: 151
  • SSQA 1-25-16 004.JPG
    SSQA 1-25-16 004.JPG
    211.6 KB · Views: 161
  • SSQA 1-25-16 005.JPG
    SSQA 1-25-16 005.JPG
    260 KB · Views: 167
  • SSQA 1-25-16 006.JPG
    SSQA 1-25-16 006.JPG
    195.9 KB · Views: 154
   / SSQA fork build
  • Thread Starter
#91  
Just some more pictures of the welding. When I was done, time to test fit the fork support bar and it slid right in without a hiccup. Good sign that the flux core didn't twist the weldment. Next up will be honing the fork supports to the support bar.
 

Attachments

  • SSQA 1-25-16 008.JPG
    SSQA 1-25-16 008.JPG
    279 KB · Views: 178
  • SSQA 1-25-16 009.JPG
    SSQA 1-25-16 009.JPG
    232.3 KB · Views: 177
  • SSQA 1-25-16 010.JPG
    SSQA 1-25-16 010.JPG
    264.7 KB · Views: 148
  • SSQA 1-25-16 012.JPG
    SSQA 1-25-16 012.JPG
    284.3 KB · Views: 169
  • SSQA 1-25-16 015.JPG
    SSQA 1-25-16 015.JPG
    252.6 KB · Views: 216
   / SSQA fork build #92  
Looking good. :thumbsup:

Don't know if you will need it, but you might consider some gussets on the top lip.

This happened to my light weight fork frame with too much weight on the forks:

P6060006m.jpg


This is the way Blue Diamond did it on the stump bucket:

P6060031.JPG
 
   / SSQA fork build
  • Thread Starter
#93  
Thanks Xfaxman. I think I'll be OK because the top lip is tied into the side plate and also tied into the bottom crossmember with the gusset plates towards the insides of the mount. Kind of copying what Kubota did on their bucket.
 
   / SSQA fork build
  • Thread Starter
#94  
Wanted to contain the mess of honing somehow so I came up with the idea of cutting a slot in a 5 gal plastic pail that the fork would slide into. Worked pretty good. Honing went a lot faster than I anticipated it would. From starting with the bucket to getting both honed to spec (3-4 thousandths), only took half an hour.

Getting down to the home stretch of the build. My saying is the last 10% of a build should take 90% of the time.
 

Attachments

  • SSQA 1-26-16 002.JPG
    SSQA 1-26-16 002.JPG
    205.9 KB · Views: 176
  • SSQA 1-26-16 004.JPG
    SSQA 1-26-16 004.JPG
    197.2 KB · Views: 177
  • SSQA 1-26-16 005.JPG
    SSQA 1-26-16 005.JPG
    182.4 KB · Views: 175
   / SSQA fork build
  • Thread Starter
#95  
Cut the support bar to length which was no simple task. It is case hardened to begin with plus it has an industrial hard chrome surface. Had to grind off the chrome and then watch the sparks until they showed I was into the softer metal. Still took a lot of life out of the band saw blade, though. Assembled the forks onto the bar and then attached the cylinder. For those of you who have built anything with hydraulic cylinders, you know what's coming next. Grab the air line and hook up air pressure to see if it works, which it did. Cycled it several times to convince myself it wasn't a fluke, which is encouraging.

Like to say thank you to Jim T and the Xfaxman for pointing out about increasing the angle when tilting back!
 

Attachments

  • SSQA 1-27-16 003.JPG
    SSQA 1-27-16 003.JPG
    210.2 KB · Views: 183
  • SSQA 1-27-16 001.JPG
    SSQA 1-27-16 001.JPG
    215 KB · Views: 176
  • SSQA 1-27-16 002.JPG
    SSQA 1-27-16 002.JPG
    233.8 KB · Views: 192
  • SSQA 1-27-16 004.JPG
    SSQA 1-27-16 004.JPG
    215.3 KB · Views: 197
   / SSQA fork build
  • Thread Starter
#96  
Working on the chain attachment bolts here. Found these in McMaster for only a few bucks each and they are made out of 4140 steel, which is some pretty tough stuff. Going to have some fun threading these on the small bench lathe. First, I drill centers on the ends using a 3 jaw chuck and then 'cheat' a little bit by holding them in a drill chuck on the tailstock to save some time getting the 4 jaw set up. Turn to the proper OD and then thread. Not exactly CNC quality, but they will work fine. Next will be over to the mill to get the chain end finalized.
 

Attachments

  • SSQA 1-27-16 005.JPG
    SSQA 1-27-16 005.JPG
    300.7 KB · Views: 175
  • SSQA 1-27-16 006.JPG
    SSQA 1-27-16 006.JPG
    196.8 KB · Views: 161
  • SSQA 1-27-16 007.JPG
    SSQA 1-27-16 007.JPG
    214.9 KB · Views: 150
  • SSQA 1-27-16 008.JPG
    SSQA 1-27-16 008.JPG
    185.2 KB · Views: 161
  • SSQA 1-27-16 009.JPG
    SSQA 1-27-16 009.JPG
    179.1 KB · Views: 166
   / SSQA fork build #97  
Good progress. :thumbsup:

It sure looks better than mine! :D

There is a little more clearance on my rod. But they slide easily by hand!

P8080003.JPG


P8110007.JPG
 
   / SSQA fork build
  • Thread Starter
#98  
You rolled up your sleeves and built it yourself and that gets my respect! People building things themselves is getting less and less with each generation and that's sad to see. My Dad's generation (the WW2 generation) were always making their own stuff to save money. Its harder to do today with stuff from places like China that is so cheap to purchase over here.
 
   / SSQA fork build #99  
Looking real good! Always fun to whip out the 4 jaw.

As for keeping it domestic: not everyone's got 10K for a lathe and mill either. Or the 5K in subsequent tooling to make them useful. ;)

I live to make stuff. I don't want to buy it if I can build it.
 
   / SSQA fork build #100  
Very nice work! One question - why did you want the fit on the chromed bar to the retainer blocks to be so tight? Looser here would seem to make sense as it would be easier to slide. I realize you could get into binding issues, but there are ways to fix that. Just thinking that these are forks that may live outside, and get rusty or otherwise crudded up. Tight clearances could be trouble in the long run. But then I've never seen a chromed bar on a a set of forks...

Surprised you did not cut that chromed rod with an abrasive disc rather than a BS. That is pretty much what abrasive discs were made for. Hard stuff. And it doesn't look like you should care what the ends look like in this situation as they are covered.
 

Tractor & Equipment Auctions

2005 MACK GRANITE CV713 DUMP TRUCK (A60430)
2005 MACK GRANITE...
PENDING SELLER CONFIRMATION  READ BEFORE BIDDING (A56438)
PENDING SELLER...
207272 (A52708)
207272 (A52708)
2018 INTERNATIONAL LT625 TANDEM AXLE SLEEPER (A59904)
2018 INTERNATIONAL...
2018 Toro Groundsmaster 4000D Batwing Commercial Rotary Mower (A59228)
2018 Toro...
KBH Tender (A56438)
KBH Tender (A56438)
 
Top