SSQA fork build

   / SSQA fork build #31  
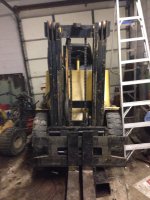
This forklift has it and yes, it is run by two cylinders. The forks are supported on the top and bottom where they slide by fairly wide supports to prevent binding, which is my biggest concern with my design. I'm guessing this forklift uses a flow divider between the two cylinders, but I don't know for sure.

Sweet, I'll definitely have to look for that on my next forklift. The one I have is pretty basic, single stage container lift that doesn't even have side shift.
 
   / SSQA fork build
  • Thread Starter
#32  
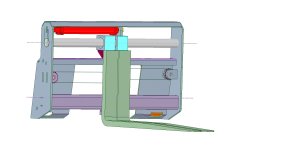
Well, here goes rev A. Not 100% fully drawn but it shows what I'm after. I included 10 degrees more tilt back along with adding the chain and sprockets. Chain I already have and the sprockets are from McMaster. I moved the cylinder up top to the block to reduce the leverage for binding the block on the support bar. I'm thinking maybe the chains will help keep the forks from binding by the pulling action when the cylinder moves. What do you think?
 

Attachments

  • SSQA plate rev A.jpg
    SSQA plate rev A.jpg
    171.5 KB · Views: 347
   / SSQA fork build #33  
If they do bind, you could probably fix it with another bar on the bottom and 2 more guide blocks.
 
   / SSQA fork build
  • Thread Starter
#34  
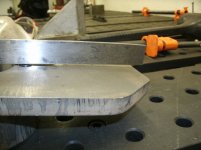
I welded the cylinder mount on top of the block and while that is cooling down, I set up the other fork on the mill and ran the boring head through it. I left several thousands so the reamer could take care of final sizing. The plan from here is to powder coat the forks and then hone the bore to final size for a sliding fit.
 

Attachments

  • SSQA 1-12-16 002.JPG
    SSQA 1-12-16 002.JPG
    163 KB · Views: 271
  • SSQA 1-12-16 003.JPG
    SSQA 1-12-16 003.JPG
    257.7 KB · Views: 251
  • SSQA 1-12-16 004.JPG
    SSQA 1-12-16 004.JPG
    255 KB · Views: 274
  • SSQA 1-12-16 006.JPG
    SSQA 1-12-16 006.JPG
    187.1 KB · Views: 196
  • SSQA 1-12-16 007.JPG
    SSQA 1-12-16 007.JPG
    192.3 KB · Views: 278
   / SSQA fork build #35  
I think painting or coating the forks themselves will be a waste of time. They get subjected to some pretty gnarly scraping forces. I've never seen a used set of forks with paint left on them, just light rust.

Nice build so far though.
 
   / SSQA fork build #36  
I think painting or coating the forks themselves will be a waste of time. They get subjected to some pretty gnarly scraping forces. I've never seen a used set of forks with paint left on them, just light rust.

Nice build so far though.

Mine were used. I was mildly amazed how the bottoms hadn't been ground off like the other 100+ pair of forks available for the same $100 bill price. Needless to say, my sorting process went pretty quick once I narrowed down the acceptable options to 4 pair. :laughing: They must've come from broken machines or stores where the manager didn't let drivers scrape them all over the floor.
 
   / SSQA fork build
  • Thread Starter
#37  
I think painting or coating the forks themselves will be a waste of time. They get subjected to some pretty gnarly scraping forces. I've never seen a used set of forks with paint left on them, just light rust.

Nice build so far though.
Reason for coating the forks is that I do not have any space to store them inside. In fact, I'm running out of room on my cement slab outside.
 
   / SSQA fork build
  • Thread Starter
#38  
Did the machining on the other fork today. One thing I want to be sure of is the alignment of the cylinder threads to the fork block. I left the hole smaller so I could bore it straight and also face it so the jam nut doesn't introduce a bind. I don't have a collet to hold the 1-14 tap so I had to tap it by hand. I use an 1/8" hardened rod sharpened to a point to act as a center on the tap while using a wrench to turn the tap. The bungee cord keeps down pressure on the tap to free up both hands.
 

Attachments

  • SSQA 1-13-16 002.JPG
    SSQA 1-13-16 002.JPG
    246.5 KB · Views: 248
  • SSQA 1-13-16 003.JPG
    SSQA 1-13-16 003.JPG
    250.4 KB · Views: 248
  • SSQA 1-13-16 004.JPG
    SSQA 1-13-16 004.JPG
    258 KB · Views: 246
  • SSQA 1-13-16 005.JPG
    SSQA 1-13-16 005.JPG
    180.1 KB · Views: 251
  • SSQA 1-13-16 007.JPG
    SSQA 1-13-16 007.JPG
    217.5 KB · Views: 273
   / SSQA fork build #39  
Nice :thumbsup:
 
   / SSQA fork build
  • Thread Starter
#40  
Located and welded the chain anchors to the back of the forks. Tried to keep the welds small here to minimize stresses and warping. This should be it for the forks except for coating and honing and my back is grateful. Welded the support bar collars to the side plates and tomorrow they go on the mill to get bored to size.
 

Attachments

  • SSQA 1-14-16 001.JPG
    SSQA 1-14-16 001.JPG
    249.7 KB · Views: 245
  • SSQA 1-14-16 002.JPG
    SSQA 1-14-16 002.JPG
    255.2 KB · Views: 241
  • SSQA 1-14-16 004.JPG
    SSQA 1-14-16 004.JPG
    217.8 KB · Views: 258
  • SSQA 1-14-16 009.JPG
    SSQA 1-14-16 009.JPG
    235.7 KB · Views: 274

Tractor & Equipment Auctions

2025 LandHonor LHR-CIA200 200lb Cast Iron Anvil (A49461)
2025 LandHonor...
2014 VOLVO VNM DAY CAB (A51222)
2014 VOLVO VNM DAY...
3in Poly Pipe (A49461)
MT-500 Tack Trailer (A49461)
MT-500 Tack...
GENERATOR HOUSE POEWERED BY TWIN 12.7 DETROITS (A50854)
GENERATOR HOUSE...
2015 MACK GU713 DAYCAB (INOPERABLE) (A50854)
2015 MACK GU713...
 
Top