Hooked_on_HP
Veteran Member
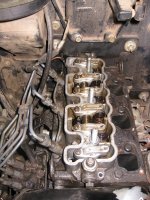
Unfortunatly you have a head or head gasket problem. Do not keep running the tractor. You could end up doing a lot more damage.
Bill
Bill

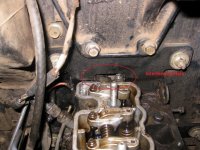
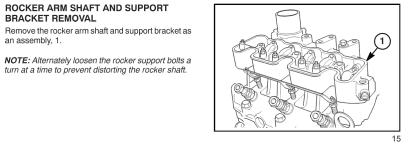
Can you remove the 3 studs and then slide the assembly forward. I am just guessing. There has to be a way.
Bill