Tired of Painting!

   / Tired of Painting! #11  
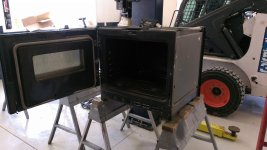
Well, tipping it on its side was a simple solution. There is a burner on the top, so fasting a sliding rack to the top when originating it in its original configuration is not going to be as easy when it was on its side. When the oven is in its original configuration you can not reach to the back of the oven with the door open. I do agree I am going to have to put the oven up right and deal with, make a rack that will slid out and I can hang parts on. Now, on a side note, why do the oven doors open down in the first place?

The top burner is usually a broiling element. The bottom burner is typically what provides the heat for baking. Might be able to simple remove or disconnect the top burner. You'd have to check if the top element needs to come on if you need very high paint baking temps though.

As for why they open down, I suppose half the answer is that if they opened up it might be rather inconvenient to crawl under the raised door to put things in or out!:eek:

As for why they don't open sideways, not sure but having a very hot door right at your shoulder while you reach in to remove something seems like an accident waiting to happen.

Now, why they are not clamshell is probably just due to cost as some commercial ovens do open like that (thinking of professional baking ovens).
 
   / Tired of Painting! #12  
I would definitely keep it upright. The heating elements/thermostat were designed to heat that way. If loading is an issue I am with others that say build some auxiliary rack or tray the eases the work. I could see something that straddles the door and can roll up to the front edge, maybe the oven rack pulls directly on/off that.
 
   / Tired of Painting!
  • Thread Starter
#13  
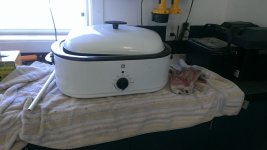
Thanks for the input. Its up right now and opens to the left.
IMAG0229.jpg
 
   / Tired of Painting! #14  
There you go! :thumbsup: Now I know what to do with my old oven that I was thinking of replacing.
 
   / Tired of Painting! #15  
Just remember power coating can be fun, but it can also make you pull your hair out. If your plan it to play around with small home projects you should be fine with that gun.

If you don't have a sand blaster get some MEK and clean your parts good. Make sure you have a good ground. I would also suggest that you spray your parts hot. This will help eliminate coverage issues. Go head and research out gassing as you are going to have it sooner or later.

We buy mostly TCI and Tiger powder (55 lbs at a time), but there are times when we need a small amount or a unique color and we use powder365. They have a large selection of power and are good to work with.

Look them up at power365.com.
 
   / Tired of Painting!
  • Thread Starter
#16  
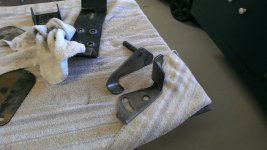
New stove so why not new roster.
IMAG0264.jpg
Bake the parts in soapy water at about 200 for 5 hours and scrape the paint right off.
IMAG0255.jpg
This is before
IMAG0263.jpg
Never thought it would work let alone this well. Came right off with putty knife and little wire brushing. Did a whole bunch of other parts. Worked just as well on the rest. And its not like the paint wasn't one there. Will bake them, this week. that de-gases them and allows me to get time it takes to get to cure temp. Then I will bead blast then powder coat, and back into the oven. Now that your are on the edge of your seats, i'll keep you posted on how that goes.:crossfingers:
 
   / Tired of Painting!
  • Thread Starter
#17  
Its worth the effort.:thumbsup:
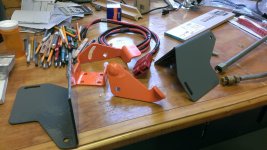
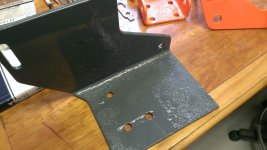
IMAG0271.jpgIMAG0272.jpg
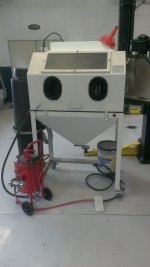
Flat surface smooth as glass, coating is hard almost scratch proof. Fills in nicely on the rusted portions of the parts. Not an easy process getting there. To get the coverage I needed to preheat the part to get the coverage to fill in the rust areas. Had a better gun might not have to do that. To get good paint have to do the same prep. I am striping down to bare metal in the roster. Then degassing in the oven, then bead blast, pre -heat, and powder coat. Getting the bead blaster to work right was even a project.
IMAG0270.jpg
That is a pressure tank with a vibrator attached to the side. Took a while to get that right.
In the end, beats painting. There is an art to it! After I get this project done, it will be new gun, larger oven, and I am going to have to come up with some type of spray booth for the smaller parts. Larger stuff I can do in middle of shop and sweep up.
 
   / Tired of Painting! #18  
Looks like your off to a good start. How big of a oven do you want? I just might have one for you.
 
   / Tired of Painting! #19  
Once you get the hang of this powder coating you will never go back! Good advice so far and I'll throw in to change from glass beads (I'm assuming this is what your using in the bead blaster) to steel grit or aluminum oxide. Glass beads are round and tend to 'peen' the surface which closes it up. You want a media that will etch the surface and open it up for the powder to grab on to.
 
   / Tired of Painting!
  • Thread Starter
#20  
I'm using a 70 grit aluminum oxide. Like it, use small amount run through a couple time then turns into powder and pitch it. Apologize used bead blaster as generic term. Like the RAL powder, on the smaller oblong parts preheating works well, however, can't let parts cool, need to get back into oven. Been preheating to 200. Having the oven door open to the left did prove to be smart idea, your leaning in, and moving parts around and getting PMT temps a lot. Did get a small toaster oven for bolt heads that works real well. If i can fit it in my oven I'll never paint again. I will be building a bigger oven. Will need better gun, leaning towards, powder 365's Nitro Faze cup gun. thanks for the input.
 

Tractor & Equipment Auctions

Pickup Truck Bed (A51691)
Pickup Truck Bed...
2013 International WorkStar 7400 4x4 Altec DMA71 Insulated Digger Derrick Truck (A51692)
2013 International...
2020 Ford F-150 XL (A50120)
2020 Ford F-150 XL...
2022 Forest River Cherokee Grey Wolf 26BRB Patriotic Edition 32ft. T/A Travel Trailer (A51694)
2022 Forest River...
Unused 2025 CFG Industrial QNT50R Mini Excavator (A50322)
Unused 2025 CFG...
2010 Toyota Camry Sedan (A50324)
2010 Toyota Camry...
 
Top