Waste oil heater for my garage.

   / Waste oil heater for my garage. #21  
Letsroll I am curious, how is your burner doing?

Pretty good. Only downside, I have to clean the 1 inch pipe inside of the burner before using it each time. Which only takes about a minute.

Also dngspot, when you get the your stove done and up and running. Post a youtube video of it running (man I hope you got high speed internet). :D
 
   / Waste oil heater for my garage.
  • Thread Starter
#22  
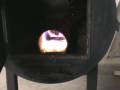
I can post a u tube video but, my camera does a lousy job. I have not needed a video camera, so I have not bought one. I guess I need to rethink that. The camera that was used to take the earlier pictures is my old point and shoot. It does the job but as you can see it may give little polka dots. My Canon SXI is much better and I will use this to give clear pics of the unit in operation.

I too own an infrared thermometer. I will post the temp of the outer skin during testing.

I have given thought to atomizing the oil in a heater but do not see the need for the additional work and design for the little shop that I have.

As for the garage cleanup, I almost forgot, today is my wife’s birthday. I do not dare go out there and work on any project, this day is for her. She wants to help clean up tomorrow; she has an idea how to organize it. Surely she will have it look sharp but, I will be lost in there. I am one of those guys that work best in a little chaos.
 
   / Waste oil heater for my garage. #23  
LetsRoll,

I am looking into doing a stove much like you have there for my shop that I intend to build in the summer. I like the idea that yours is a dual type of furnace, either wood or oil burner. Only problem I have is the lack of used oil around for me to use at any frequency. I have followed your build but am not clear on your burner itself.

Can you show a detailed drawing of how you built the burner??

Dngspot,

I have seen these type of double heaters in large farm shops that entirely run on wood and coal. They produce high amount of heat. Especially with an exchanger in the top barrel of the furnace.
 
   / Waste oil heater for my garage. #24  
alltoys...

Have you seen my latest video. You can see inside of the burner. Hopefully, it will explain or answer your question's about my burner. If there is still some questions, I'll try to answer them the best that I can.

Sorry dngspot, I didn't mean to take over your thread.

YouTube Video


   / Waste oil heater for my garage. #25  
LetsRoll,

Sent you a PM.
 
   / Waste oil heater for my garage. #26  
alltoys

I sent you an email. :D
 
   / Waste oil heater for my garage.
  • Thread Starter
#27  
Just about 30 minutes of work today. I cut the hole in the top of the heater, cut the stack and welded it into place. Dad always told me to clean metal before I weld. Yea he is right the weld is not pretty but, it will not leak.

As for the tank I have a pic of it finally. This thing is upside down, the fitting on top is the drain into the heater.

Side note. My wife had that garage looking pretty nice. A half of an hour, now I am feeling at home. :D

The heater.

DSCF0018-1.jpg


The oil tank.

DSCF0019-1.jpg
 
   / Waste oil heater for my garage.
  • Thread Starter
#28  
No real progress today. I was held up at work.
I did start on the hinges. They are made from a tube that was used as a push tube for valve rockers in a 3406 Cat engine. The pin is a 3/8 inch bolt that I lathed the head to be round and its o.d. the same size as the o.d. of the tube.
I also built inner frame for the door opening. I cut the material and welded the ends to make a square. I bent the frame as best I could on the outside of the heater then clamped it into the inside of the heater. I used a torch to shape it the rest of the way. It is cooling now.
That is all. Tomorrow may be a better day to finish more.
 
   / Waste oil heater for my garage.
  • Thread Starter
#29  
I have drilled 28 holes and mounted the door frame. I measured each side of the frame and found the center, then marked them. I did the same on the outside of the door. I then clamped the frame into place. I spaced 5/8 outside the door and drilled the center marks. Then put bolts in and tightened them. I marked every two inches and drilled for a bolt.

After the frame was in and tight it was not quite the same shape as the door. To fix this I used a 3 lbs sledge to beat it into shape.

The heater with the door.

Dooranddoorframe.jpg


The door removed.

Doorframe.jpg


Close up of the frame.

Framecloseup.jpg
 
   / Waste oil heater for my garage.
  • Thread Starter
#30  
Today I installed the hinges and welded them to the door. They are made from the handles of a R-12 Freon tank. The tank is the white tank I am using as my oil tank. They also are made from 3/8 inch bolts with the heads lathed down and the 3406 engine push tubes, as mentioned before. I used a piece of 3/8 round stock to align the hinge tubes. Sorry folks, this is going slowly, I am putting about 1.5 hours a night into the project.
Here is the pic.

Hinges.jpg
 

Tractor & Equipment Auctions

Adams Load Out Conveyor - Stainless Steel Assembly - Baldor Electric Motor (A52748)
Adams Load Out...
2010 Ford F-150 XL (A50120)
2010 Ford F-150 XL...
2011 INTERNATIONAL MA025 ROUSTABOUT TRUCK(INOPERABLE) (A52472)
2011 INTERNATIONAL...
2010 Ford Edge SE SUV (A51694)
2010 Ford Edge SE...
2020 John Deere XUV 835M Gator 4x4 Utility Cart (A51691)
2020 John Deere...
2012 Jaguar XJ Sedan (A50324)
2012 Jaguar XJ...
 
Top