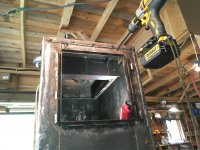
Wood stove rebuild 101-5.9

   / Wood stove rebuild 101-5.9
  • Thread Starter
#11  
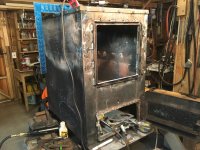
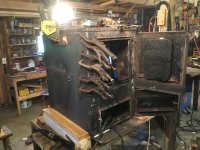
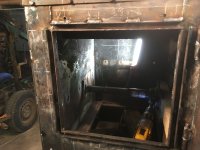
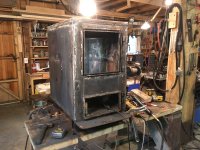
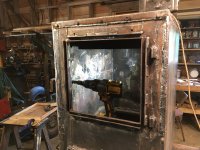
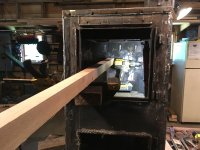
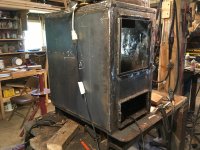
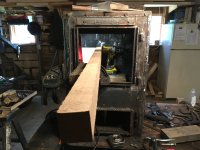
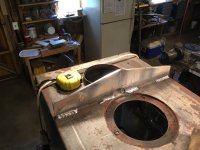
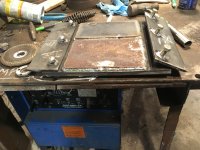
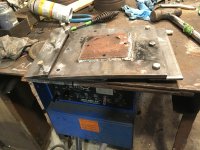
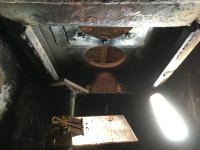
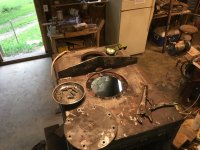
Made some headway this weekend, after struggling welding the inside front top corners of the stove because of the lack of pin point lighting, I search online from here to Timbuktu trying to find a magnetic flashlight holder with flashlight that can be articulated in any direction, I found one that fit the requirements cept the flashlight that the holder came with is not quite as pinpoint as I would've like so I swapped it with the one I had that has an adjustable beam, now I can see when doing mirror welding or any welding in dark places where a big light wont fit.
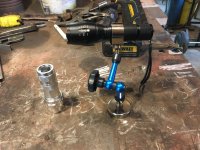
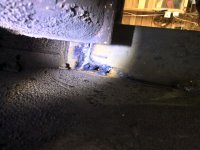
IMG-0763.JPG IMG-0765.JPG

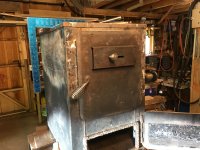
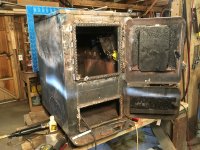
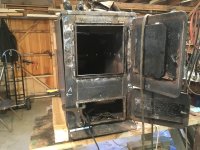
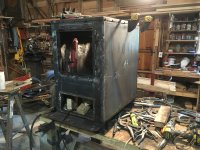
Also I got the door fitting better, changed the gasket outer slot from an 18 ga trof/channel to a 1/8"x1/2" flat bar, had to cut a few tack welds on the surrounding channel and slice a 1/8"x1" flat in half, into 4 pc> 12" long, clamp and tack on, then I realigned the door, tested the door closing with some spare rope.
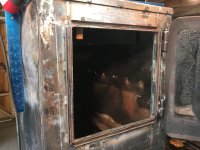
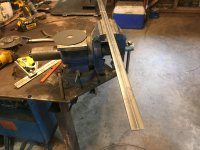
IMG-0767.JPG IMG-0770.JPG IMG-0775.JPG

IMG-0776.JPG IMG-0777.JPG

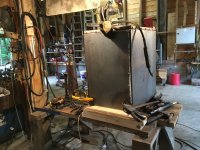
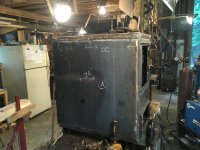
Now that the front is done it's time to start the side and back, 2> 1/4"x 27"x 26-1/4" and one for the back 18-1/8"x27"<<<<I put that last cut on video, my torch burning skills are lacking, find something for straight edge, try to hold the torch against the straight edge and move at a constant speed is not that easy for a amuter>>>>>> Cutting torch - YouTube The first plate I cut I thoght would stay on my small bench, not quite it fell on the floor and ring my ears, next cut I clamped it on the bench so the next plate wouldn't fall.
 
   / Wood stove rebuild 101-5.9 #12  
Nice.. I was going to do the same to my papa bear a few years back but when I went to buy the steel from Browns welding in Skowhegan they told me they could do it because it was a slow time of year for them, it didn't cost much more than me buying the steel to let them do it, and they did a nice job on it..
 
   / Wood stove rebuild 101-5.9
  • Thread Starter
#13  
I got the 1/4" plates on 3 sides, next will be making new inside brick holders, debating on whether to use 1/4" angle or 3/8", doing most of the welding with .030 70s, vice grips, bar clamps and jacks helps a lot...........
IMG-0789.JPG IMG-0794.JPG IMG-0796.JPG

IMG-0798.JPG IMG-0799.JPG IMG-0807.JPG

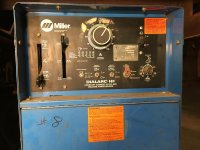
Then on the top I wanted to try some 3/16 6011 that I had and it's a lot of molten metal in the out of position. It differently welds easier on DC than AC, I had the big dial down to 50 and it was harder to start the arc on AC than DC, with the dial at 60 it was plenty of heat whatever the heat was, I have to ask a guy at work again who knows how that dial works, told me once last year when I bought the Miller but I forgot what he said, I remember setting the amperage on these Miller's are konfusing...........
IMG-0805.JPG IMG-0811.JPG
 
   / Wood stove rebuild 101-5.9 #14  
Oldpath

Be weary of plating the thicker material over the outside of the thinner.
The air gap will act as an insulator and run the temperature up considerably on that inner sheet.
Warping and burn out will follow. Not that burn out is an issue if the plating is welded in all around. But it makes for a bad looking interior. Ask me how I know? ;-)

I've run the same Fisher log wood stove for winter heat in the house for more than thirty years. Relined the bricks a few times. That steel is thick enough. It's been the lesser models out in the shop that have been the trouble. I'm in favor of a well lined firebrick box even if it does cut down size.
very true, but, you can thermally attach the 2 sheets with a bit of welding, say an X or + weld in the center of the sheet, to thermally couple the sheets.. just welding it around all 4 sides would still leave an air gap, although greatly reduced from not doing that.. more thermal coupling= less waste of firewood..
 
   / Wood stove rebuild 101-5.9
  • Thread Starter
#15  
Due to global warming this past weekend didn't do much on my stove fix, just drill some holes for the firebrick holder that I haven't made yet and jacked the top back up from a 3/8 sagging position, added a stiffener on top so it will stay, might trim some of that of not sure yet.

The front and back end holes was easy, the back side holes was hard so got a little extra push using a stick and still was going hard till I finally figured out the fulcrum point was wrong after 15 times of sharpening the drill bit, needed to be put the fulcrum point back near the drill, was using the door edge, then I just lean in the stick and the drill went right thru easy, didn't think I was that bad at sharpening bits.
IMG-0819.JPG IMG-0823.JPG

IMG-0824.JPG IMG-0836.JPG IMG-0838.JPG
 
   / Wood stove rebuild 101-5.9
  • Thread Starter
#16  
Would've been done by now but this sliding baffle idea is taking more time then it did when I in bed sleeping. For starting a fire the smoke goes straight up the stovepipe, after fire is going slide the baffle back by the handle that's not engineered yet then the fire has to loop around to go up the stove pipe, works real good in my dream, gonna need a couple more weekends.

IMG-0884.JPG IMG-0885.JPG IMG-0886.JPG

IMG-0888.JPG IMG-0891.JPG
 
   / Wood stove rebuild 101-5.9 #17  
Why have a baffle that you have to move? just wondering, my stove has a baffle that stays in place and works well.. I wouldn't want flames going straight up the pipe. Do you have a draft problem with your chimney setup?
 
   / Wood stove rebuild 101-5.9
  • Thread Starter
#18  
The way I was using the stove the smoke went straight up the stove pipe, plenty of draft that way but now I want a baffle to loop the smoke around and was afraid that I would loose draft, now if I did loose draft and the baffle is welded in a fixed position and the big 2' snow storm is on it's way and or another cold snap like the one last Christmas, wow that would really take the HO HO HO out of Dec 25.

Now that I have the stove in my shop and the fan is blowing and I'm sweating beat the ban, now's the the time to stave off any doubts of will the stove draw or not, but on the other hand if I slide the baffle in front of the stove pipe and I still get all kinds of draft, it could only mean one thing, I wasted 25 hrs and $25.00+ and learned whether or not making a sliding baffle is or isn't possible. Right now I'm too embarrassed to say how many hours I have in this stove fix project, safe to say by now I could've made a whole new stove.
 
   / Wood stove rebuild 101-5.9 #19  
Gotcha, my baffle is ceramic and I can take it out but I never have, I have a Hearthstone equinox and the baffle makes the smoke go up and around, cleans the glass quite nicely. Now that I think about it you’re idea of the removable baffle would give you the ability to pull it out and throw another one in if it warped over time and needed replacing and would take you no time to do it..
 
   / Wood stove rebuild 101-5.9 #20  
Then on the top I wanted to try some 3/16 6011 that I had and it's a lot of molten metal in the out of position. It differently welds easier on DC than AC, I had the big dial down to 50 and it was harder to start the arc on AC than DC, with the dial at 60 it was plenty of heat whatever the heat was, I have to ask a guy at work again who knows how that dial works, told me once last year when I bought the Miller but I forgot what he said, I remember setting the amperage on these Miller's are konfusing...........
View attachment 563855 View attachment 563856

This "detail" is an important aspect when setting AMPERAGE.
(Taken from Lincoln)

Quote:
A welder should know the meaning of polarity, and recognize what effect it has on the welding process. With few exceptions, electrode-positive (reversed polarity) results in deeper penetration. Electrode-negative (straight polarity) results in faster melt-off of the electrode and, therefore, faster deposition rate. The effect of different chemicals in the covering may change this condition. The high cellulose covered mild-steel rod, such as Fleetweld 5P or Fleetweld 5P+, is recommended for use on positive polarity for general welding. Some types of shielded electrodes function on either polarity, though some operate on only one polarity. End Quote.
 

Tractor & Equipment Auctions

2003 Pace American Trailer, VIN # 4FPW540373G068816 (A51572)
2003 Pace American...
2004 FORD F-650 SUPER DUTY DUMP TRUCK (A51406)
2004 FORD F-650...
2025 New/Unused Wolverine Snow Pusher (A51573)
2025 New/Unused...
80in HD Tooth Bucket with Side Cutters ONE PER LOT (A53472)
80in HD Tooth...
2008 Chevrolet Impala Sedan (A51694)
2008 Chevrolet...
1972 Volkswagon Beetle (A51572)
1972 Volkswagon...
 
Top