The Log house Project begins........

   / The Log house Project begins........ #1,451  
Amazon.com: Patina Basics: Tim McCreight, Gary Robinov: Movies & TV
has a dvd on patinas, tim mccreight also wrote a few books on metal working and has a few formulas in his books.
About Patina - Copperhand Studio has a some great ideas for what can be done with patinas
Copperhead Art: Copper Patina Fine Art Painting another copper patina artist
Patina Formulas for Brass, Bronze and Copper has a list of 32 different patinas the offer.

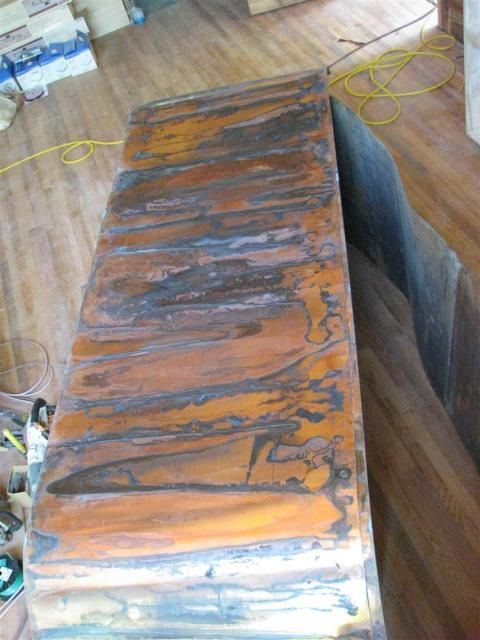
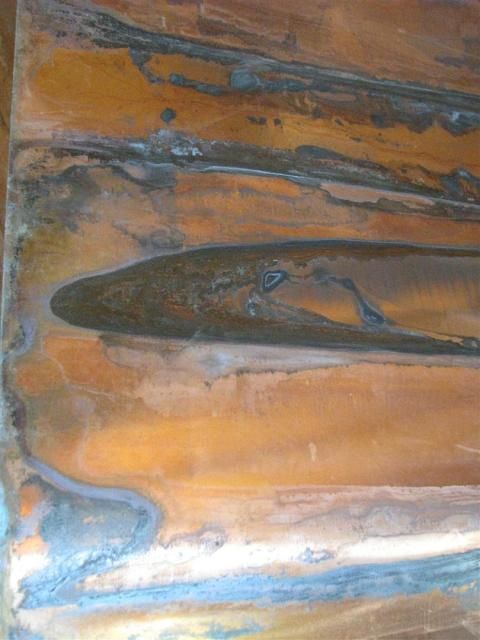
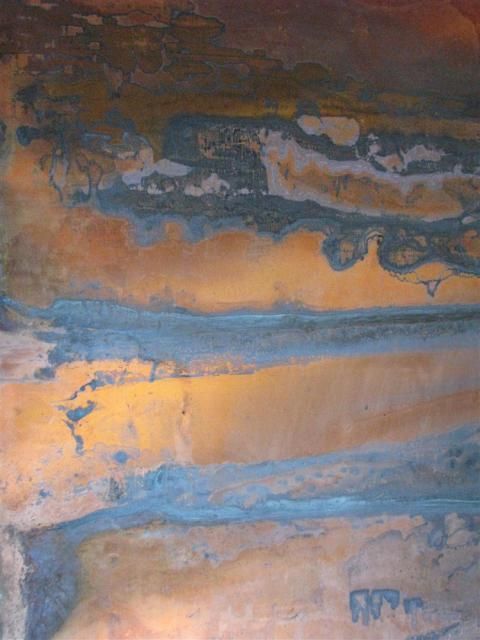
I did some copper patina work, I made some copper horse armor heads and developed a patina on them using salt, and water and sealed in a garbage bag. after a few days I would get what I wanted. Ill see if I have any pics of them. For a few I tried different "spices" to see what they would do with the copper but I ended up brushing them off and just using the water and salt. Also if you are just going to do it yourself remember that different sized grains of salt, table, up to rock salt will give you different sizes. You could also put stencils down to mask off areas if you wanted to develop a pattern or image that way. (cardboard and an exacto blade work great). Things like cheese cloth after the patina is on there will give you a net pattern, and if you use plastic wrap and squish it up it will give you some harder edges.
Good luck and great find.
 
   / The Log house Project begins........ #1,452  
Ever have a day that started out ho hum and ended great?

Now for a lesson on copper sheeting.....:

I spent a lot of time googling and calling across the country for prices. Copper is a but confusing as the thickness is measured using several different methods. The minimum recommended for counter tops is 16oz(that's 16oz in weight for one square foot), or .0216" thick, or 24 gauge, or MM which I have not found a conversion chart for. Anyway, thicker is better and I was targeting 24oz, or .0320" thick and the price picked up is around $300 a 3x10' sheet. Shipping is huge because it has to be crated due to it's malleability.

I had found a local Craigslist ad that had two sheets of "real heavy duty" copper for sale- $275. I emailed the lady and she didn't know the weight, gauge or measurements & made a tentative appointment to meet. I asked her to measure the width & length and she responded it was 36'x69" each. This is rather short since my "L" shaped counter is 9'on one leg & 8' on the other. I could make the short one work on the island if I build it to fit, then build a chopping block in the corner to meet the two short sheets(are y'all dizzy yet:). Her price is just a little under retail for a 16oz 3x10' sheet at $200. So, after some measuring and thought I emailed her that I was going to pass on the two sheets.

Then I get a response that she just loaded it in her truck and discovered that there were 3 sheets, not 2. This is a game changer, and I immediately grab the micrometer & jump in the truck for the 1.5 hr trip to see it. It turns out to be .0863 thick or 64oz! I give her an opportunity to re-negotiate the price and she says, "no, but I won't take less that my asking price". Fare enough, I pay, load and drive back home. I can't wait to take a look at it since it was sitting in a barn and has some interesting patina already on it.

I roll it out, and low and behold all 3 sheets are 10' long:cool2: The patina is amazing, no green(yet) but lot's of black, dark blue and purple striped with shiny copper.

If your interested here are two websites that explain the chemicals needed to add color and result photo's.

Copper Counter Tops | Copper Countertop

Patina Formulas for Brass, Bronze and Copper

I will be trying for some green in the top...frog green:frog: to compliment the pale green translucent stain that's going on the Cherry wood.

Oh yeah.. and no pic's until tomorrow...it was dark thirty when I got home:wave:

Might check Farmers Copper in Galveston Texas.
 
   / The Log house Project begins........
  • Thread Starter
#1,453  
Here are the cabinet bases:
Coppercountertops090.jpg


The wall oven/micro cabinet:
Coppercountertops092.jpg


The island:
Coppercountertops091.jpg
 
   / The Log house Project begins........
  • Thread Starter
#1,454  
I wanted to curve the two ends of the island, so I made a "bow" out of plastic EMT & wire. That way I could repeat exact same arch:
Coppercountertops094.jpg


Coppercountertops096.jpg


4 wheel drive sawhorse:
Coppercountertops093.jpg
 
   / The Log house Project begins........
  • Thread Starter
#1,455  
Building a full length box for the outlets:
Coppercountertops099.jpg


And it's cedar shelf/cover/window sill:
Coppercountertops101.jpg


And the copper... looks even better in the daylight..........
 
   / The Log house Project begins........ #1,457  
Rick,
Are you using a table saw, or just skil saw? clamps and glue on the cabinets?
Awesome job as usual. Been starting to tentively look for used Woodmizer Sawmills nearby. Seems there are around folks don't want.
hugs, Brandi
 
   / The Log house Project begins........ #1,458  
Rick,
Are you using a table saw, or just skil saw? clamps and glue on the cabinets?
Awesome job as usual. Been starting to tentively look for used Woodmizer Sawmills nearby. Seems there are around folks don't want.
hugs, Brandi
 
   / The Log house Project begins........
  • Thread Starter
#1,459  
Brandi I have two table saws, one radial and two skil saws & two routers & a biscuit joiner. Mostly have been using the skil & radial so far. But, I almost have the all Cherry face pieces up(glued and screwed) so next I have to set up all my saws/router/joiner to make the raised panel doors.
 
   / The Log house Project begins........
  • Thread Starter
#1,460  
So I was playing around with the saws & router.......raised panel doors....nahhh...too common. I have an idea though for something a little different.............
 
 
Top