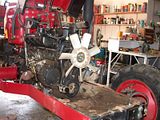
Engine Overhaul Kama 554

   / Engine Overhaul Kama 554 #131  
Rob, get a cat for the rats and mice. I hated cats until 2 years ago when I let my little girl bring home 2 barn cats that were 6 weeks old. They catch and eat some type of a critter every day. Cost me all of $15 for a kitty door(like a doggy door) and about $10 in food each month.

Chris
 
   / Engine Overhaul Kama 554 #132  
If you are going to balance the rods with the cap bolted to it, I'd start by removing all the forging scrap from the rod beams and the same from the cap. If you still need to remove more, I'd take it from the beam of the rods, equally off each side. If the forging is any good, you can usually get them in balance without having to take much off.
 
   / Engine Overhaul Kama 554 #133  
Hello Rob, and good thinking with your purchases. I have both also, plus one very heavy duty stand, and a lighter duty stand for smaller engines up to 4 cylinders. Also a small workbench mount stand. All come in handy, even for other duties such as transmissions, odd shapped things you can bolt to them for working on at a comfortable level.

Rod balancing. My engine machinist buddy has one of them there new fangled rod balancers. I'm going to post a few links for you to read and digest. Toadhill may chime in and add a few more tidbits. I got smarter after doing the Porsche engine, and now make every thing weight the same. You can sometimes bring assemblies into balance just by swapping wrist pins. I understand completely if you are uncomfortable with that. Keeping all parts mated to the components as they came out of the engine is fine. I would just besure that all assemblies weight within 1 gram of each other as a minimum standard. Exact if you are willing to invest the time. I must warn you that a lot of time will be spent making it exact. I do such things as make one file stroke, and then reweight piece.

Here is some good reading Rob.

http://en.wikipedia.org/wiki/Engine_balance

Good Video on rod balancing

http://www.youtube.com/watch?v=QLpiF0E0EJU

http://www.angelfire.com/ca4/CorvAIRCRAFT/RodBalance.html

Connecting Rod Balancing Page 2

The Rotating Assembly - Engine Masters Magazine

Eaton Balancing Engine Balancing, Part 4

And for those who love math:
Connecting rod balance in Continental and Lycoming Aircraft engine
 
Last edited:
   / Engine Overhaul Kama 554 #134  
If you are going to balance the rods with the cap bolted to it, I'd start by removing all the forging scrap from the rod beams and the same from the cap. If you still need to remove more, I'd take it from the beam of the rods, equally off each side. If the forging is any good, you can usually get them in balance without having to take much off.
first off knock off any ratty loose flashing hunks that looks like it might break off someday...

for the rod balance, you need to balance it in 3 parts overall weight and big end and little end. there are methods of doing this but easiest is to use a fixed height bolt to balance one end on and weigh the other end through the rod opening. you need to weigh each and every one first and record the weights. on all 3 points (overall, big end little end) then find the lightest weight and lightest end of that and start making them all the same.

you should have a flexible sanding tool preferable one of those spring loaded 1" wide band/belt type sanders. HF has them for 30 or so bucks usually.

http://www.harborfreightusa.com/usa...o?itemid=34951&CategoryName=&SubCategoryName=

these will work great. the rods should have a fat flat area on top and bottom that are sued for the balancing purpose. sand/grind very little off at a time, and keep them cool when going through the process. check them often...
I think HF had these for 9 bucks this week?
http://www.harborfreightusa.com/usa...do?search.keyword=pocket+scale&submit=find+it

(the one above is kind of low in weight) try this one maybe more though
http://www.harborfreightusa.com/usa...o?itemid=97920&CategoryName=&SubCategoryName=


anyhow same goes for pistons ect. there are some flat heavy spots that you can clear off a small amount of material from them to get them close enough on the inside tops usually.

Mark M
 
   / Engine Overhaul Kama 554 #135  
Rob, I see you are going whole hog on this, and that is safe - but perhaps all unecessary. Your oil pressure subsidence is not all that bad, but is a worry because you dont know what its coming from. If it is wear in the oil pump, that needs correction. The relief valve adjustments are not appropriate because the oil pump is not in relief when the engine is warm/hot. Then, all of its flow should be going to the bearings if the manufacturer has sized the pump capacity and bearing clearances synergetically. You want good flow thru the bearings to take away the heat inherent in the hydrodynamic shearing. The key unknown I see pertaining to your engines present health is whether the oil is flowing proportionally well to all the bearings, or whether you have some high clearance leakers. You have enuf oil pressure in the former case, but if the latter exists then the leakers are getting far more than their share and the tighter ones are being starved and running hot. ?:eek:? ... but If not too bad a descrepancy it will be able self correct benignly as these wear a little so they will let more oil flow thru them.

The fact that you had a knock in the 1st place is worrisome. That essentially says that particular bearing did not get proper oil. So where was the oil going? ..to the other crank bearings and the cam bearings. Suppose the cam bearings are worn and taking more than their share of the flow. Your crank and cylinder bores will suffer, and the journals with the tightest clearances will suffer most [along with their associated cylinders]. When youre in there take a look at those cam bearings.

Balancing rods will be easy for someone of your eminent qualifications. In order to account for the reciprocating and rotational components the rods have to weigh the same and have the same end to end balance. To do this you need to make a fixture journal to slip fit into the assembled big end. Thru the center you put a dowel pin extending out each side. You then weigh all the rods normally, and then find the effective portion on the big end by orienting the rod horizontal with the small end suspended off scale by a vertical thread. On scale the fixtured big end sits on //s on the thru pin. Take weight off strategically until all have equal respective weights. I prefer to "polish" the weight off using a Scotchbrite type of soft cushioned abrasive wheel. Done with care this blends sharp edges while removing the metal, leaving a more durable form. Then get all the pistons the same weight too. ... I really dont think all that is worthwhile in a tractor engine you know... but you might have fun doing it.:)
larry
 
   / Engine Overhaul Kama 554
  • Thread Starter
#136  
You guys are awesome!
Thanks for tips using the engine stand.
Especially about bolting the base of the engine stand to the motor first and then putting that into the base. It took me a little while to get through all the connecting rod instructional links, but I pretty much understand now. I'll have to buy the 1000 gram scale and make a fixture for the connecting rods.

Question about the connecting rod fixture...
Is it desirable to have the center lines of the big and small ends the same height? Or is the idea to have the rod sit parallel to the ground. In that case, the centers of the big and small ends are not necessarily the height, right?
I noticed all the fixtures in the examples had the same chain set up for the big end. I looked to me that one of the fixtures used a different locating device on the big end rather than a spud with a dowel through the center. Ultimately, it achieves the same thing as long as each rod end locates in the exact same place.

Many thanks to all for taking the time to share all this information with me.

I started draining the fluids out of the tractor this afternoon.
Then I got as far as removing/disconnecting a bunch of electrical and hydraulic lines, the battery, and finally the air filter and radiator.


Next week I'll be taking it apart further.
Taking all the geared and timed stuff off the front of the engine will be new to me. I suppose I will mark the mating gears tooth for tooth how it sat together before removing them completely. I'm not so much worried about the rear of the engine, because I had it split to replace a throw out bearing and set the clutch pack.
 
   / Engine Overhaul Kama 554 #137  
Rob, I see you are going whole hog on this, and that is safe - but perhaps all unecessary. Your oil pressure subsidence is not all that bad, but is a worry because you dont know what its coming from. If it is wear in the oil pump, that needs correction. The relief valve adjustments are not appropriate because the oil pump is not in relief when the engine is warm/hot. Then, all of its flow should be going to the bearings if the manufacturer has sized the pump capacity and bearing clearances synergetically. You want good flow thru the bearings to take away the heat inherent in the hydrodynamic shearing. The key unknown I see pertaining to your engines present health is whether the oil is flowing proportionally well to all the bearings, or whether you have some high clearance leakers. You have enuf oil pressure in the former case, but if the latter exists then the leakers are getting far more than their share and the tighter ones are being starved and running
larry

I agree with this statement that the un-even flow may be the only real issue you have at this point. I am not sure if there is a real way to TEST this to make sure that the flow is going where it should be going. I could imagine that you should be able to test this flow somehow but not sure how. Maybe open the pan up and put a hose into the pump pressure port to pressurize the system and visually look at the flow form each bearing as best as you can to see if the flows seem to be similar to to getr a real accurate flow through each bearing into a catch .pan and pour into a container test flow for one min.

At this point though if you are going to go through the expense of buying new crank and all that then you might as well run the machine until the parts arrive.
The Heads should be fine same with Pistons & liners that were just all new and just started to get broken in. The oil is a minor cost compared to the other parts so I would not worry much about that minor cost. The break in lube / assembly lube will already be off the parts and into the oil... replace it when you get the new parts and tear it open again.

THE OIL PRESSURE IS STILL NOT ALL THAT BAD, 7~10 PSI per 1000 rpms rule of thumb remember.


When/if you balance the rods remember to keep them parallel to the ground with one end on a fixed pin (or suspended with a string) and other end on the scale level...

Mark M
 
   / Engine Overhaul Kama 554 #138  
Next week I'll be taking it apart further.
Taking all the geared and timed stuff off the front of the engine will be new to me. I suppose I will mark the mating gears tooth for tooth how it sat together before removing them completely. I'm not so much worried about the rear of the engine, because I had it split to replace a throw out bearing and set the clutch pack.

If you are not familiar with the injector pump timing, check with Dave and the others before you disassemble anything associated with it. I know that there are alignments that should be checked and recorded so that it can be put back together properly. Or so I have gathered from reading other posts. Worth checking first.
 
   / Engine Overhaul Kama 554 #139  
Question about the connecting rod fixture...
Is it desirable Yes! to have the center lines of the big and small ends the same height? Or is the idea to have the rod sit parallel to the ground. In that case, the centers of the big and small ends are not necessarily the height, right?
Since all pivot actions of the rod are around the 2 centers it is these centers that should be at the same height. Do you have access to 3beam balance? I find them much more confidence inspiring than a digital.
larry
 
   / Engine Overhaul Kama 554
  • Thread Starter
#140  
Mark,
Checking the oil flow is a good idea.
I'll figure out some way to at least "see" the flow to the bearings and cam, etc. But I don't think there is a problem there...at least I'm hoping. When I had it apart last time, the other bearings and components all looked clean and new ... no scoring or residue from burnt oil. Plus, I had excellent oil pressure before. I still have good pressure even now except after it warms up and the oil thins. I'm leaning towards that one scored rod journal that was scored. My money is on that one was losing oil pressure through the bit of scoring. Even though I thoroughly polished it to make it smooth, the scoring was still visible. I could feel it with my fingernail. So I suspect that's where the oil flow wants to get out. Nevertheless, I will check the oil passages and flow like you said.

As you can see by the last photos I posted, I've already started the dis-assembly process. I'll be out of town until Wednesday, so I won't be running the tractor anyway. We have the Jinma to do odds and ends. I just smoothed out our 1/2 mile long dirt driveway with it. Took a couple more passes than the Kama, but it's quite capable except smaller in size and capacity.

Cyril,
I have read several threads about the injector pump timing and also talked to Chip about it. He said as long as I mark (exactly) how it was assembled before, where the gears line up, and if I put it back together the exact same way, I should have no problems. So that's what I plan to do.

Larry,
I don't have a balance beam scale.
I was planning on buying a decent digital scale. I will make the rod weighing fixture to have the centers parallel. I'll take photos of it when done. I also have several metal removal tools. A belt sander, 12" disc sander and several bench grinders. Plus the machine shop, but from what I saw in those videos and photos, the grinders will do.

See you guys next week!
 

Tractor & Equipment Auctions

2010 Ford Edge SE SUV (A51694)
2010 Ford Edge SE...
12' UTILITY SERVICE TRUCK BODY (A51244)
12' UTILITY...
Lull Highlander 1044C-54 Series II 10,000LB 4x4 Rough Terrain Telehandler (A50322)
Lull Highlander...
2015 Dodge Charger Sedan (A50324)
2015 Dodge Charger...
2021 CATERPILLAR 259D3 SKID STEER (A51242)
2021 CATERPILLAR...
UNUSED KIVEL HANG ON WHEEL LOADER PALLET FORKS (A51244)
UNUSED KIVEL HANG...
 
Top