Engine Overhaul Kama 554

   / Engine Overhaul Kama 554
  • Thread Starter
#201  
1st oil and then wipe off the gasket. Then....A thin patina of rtv silicone rubber on one slde and grease or nothing on the other. If you ever take it apart again the silicone will release cleanly leaving the gasket stuck intact on the other side. Reapply rtv for reuse.
larry
Hmmm, great idea Larry.
I noticed how the gaskets (every one of them) have to be razor-bladed off and wire-brushed cleaned on every surface. What a pain. Not only that, but every gasket is destroyed so you have to make or buy a new one every time.
Your suggestion would save a lot of time and effort for future endeavors.

Anybody have other suggestions about that? Is that how ya'll do it?
Thanks,
Rob-
 
   / Engine Overhaul Kama 554 #202  
Anybody have other suggestions about that? Is that how ya'll do it?
Thanks,
Rob-
I use the "green death" Cat cement on the removable part side of the gasket (coat gasket and part). and anti-seize or Teflon thread sealant, sparingly, (depending on application) on the major component side. The gasket always remains in perfect condition.
 
   / Engine Overhaul Kama 554 #203  
Ya know what? You folks could have given me that hint a long time ago, it could have saved me a lot of pain.

Thanks for sharing.

Now, I gotta go find a hammer and beat my head for not thinking of it myself.
 
   / Engine Overhaul Kama 554 #204  
I use the "green death" Cat cement on the removable part side of the gasket (coat gasket and part). and anti-seize or Teflon thread sealant, sparingly, (depending on application) on the major component side. The gasket always remains in perfect condition.
Your choice. I like mine, usually, to stay on the major component because when removing the cover sometimes it will slip sideways and encounter something on the major component. If the gasket is sticking out it can be easily damaged in collusion with Murphy.:(
larry
 
   / Engine Overhaul Kama 554 #205  
........... to stay on the major component because when removing the cover sometimes it will slip sideways and encounter something on the major component.
If you use the Cat gasket cement, the gasket is going nowhere - period. My logic for NOT cementing to the major component is in the very rare case the gasket has to be removed, it is much more convenient to scrape away on a small flange than hang by your feet next to an immovable object (figuratively speaking). When I worked for Cat we had a standing joke about the "green death", in that if you made up an assembly with it on both sides of the gasket it would render the bolts redundant. It should be noted that this does not apply to head gaskets.


In the case where there was no gasket used (ie. fuel pump flanges - metal-to-metal), the Cat red brushable gasket material was used. Both great products.
 
   / Engine Overhaul Kama 554 #206  
Ya know what? You folks could have given me that hint a long time ago, it could have saved me a lot of pain.

Thanks for sharing.

Now, I gotta go find a hammer and beat my head for not thinking of it myself.

Being a mechanic with many certs and an engineer for the past twenty-odd years can produce volumes of trivia, but the main thing is to ask the right questions. There are always answers waiting for the right question to be asked......but not necessarily by me.
:)
 
   / Engine Overhaul Kama 554
  • Thread Starter
#207  
Good to know both sides of the story...

OK, today I got the oil pump and crankshaft out.
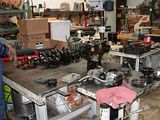
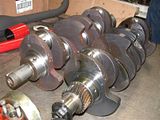
Shown are the old and new of each, and a mess on my steel breakdown table.

 
   / Engine Overhaul Kama 554 #208  
Good to know both sides of the story...

OK, today I got the oil pump and crankshaft out.
Shown are the old and new of each, and a mess on my steel breakdown table.


Rob, if that's what you call a mess... you're welcome to come over and make a mess out of my shop anytime!:D
 
   / Engine Overhaul Kama 554
  • Thread Starter
#209  
Well, OK maybe not as big a mess as I thought.:D

I removed all the crankshaft and connecting rod caps.
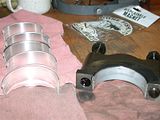
You can see from the photos below that the bolts come off with the caps. I had marked each of the rod caps before, and the main caps are numbered 1 through 5. The numbering pad is shaped like an arrow (sort of), and all the arrows must face towards the front of the engine. Also shown below are the new main bearings. One half (the bottom half) has the oil galley hole and internal groove and the other has the start of the oil groove on each end only. That bearing goes into the cap. When installing the bottom ones, be sure to line up the oil galley holes.


Tractor & Equipment Auctions

Gator (A50324)
Gator (A50324)
2016 FREIGHTLINER 2500 SPRINTER VAN (A51222)
2016 FREIGHTLINER...
2019 CATERPILLAR D6 LGP CRAWLER DOZER (A51242)
2019 CATERPILLAR...
SCAN TO RECEIVE TEXT UPDATES (A51242)
SCAN TO RECEIVE...
2019 VOLVO EC350 EXCAVATOR (A51242)
2019 VOLVO EC350...
1981 CASE 580D BACKHOE (A51242)
1981 CASE 580D...
 
Top