EddieWalker
Epic Contributor
I use a coil nail gun for shingles, but I'm not a roofer and don't want to be. I've done quite a bit of repair work and find staples to be the very worse. They consistantly go right through though the shingle. With the nail gun, two things seem to cause most of the problems. Too much pressure that drives the nailhead through the shingle, and using too short of a nail. If the shank doesn't go through the underlayment, it won't hold. With every roof, here will be those soft spots were the nail goes all the way through the shingle. I use a product called "Through the Roof" that's clear and very good at roof repairs, for fixing those areas that didn't nail properly.
There is one guy around here that I know of who does hand nailed roofs. He's more money, but of the few people that I know who have hired him, they are all extremely pleased with the results. Of the dozens and dozens of roofers in my area, there are only a few that I know of that I'd recomend to my clients.
When hiring a roofer, you must specify every detail. Never rely on the roofer to do it the best way possible. He has all sorts of ways to cut corners that you will not know about for the next ten years. He bids the job at a price and every corner that he cuts, he makes more money.
On existing homes, always strip it down to the wood. Too many leave the paper on and can't inspect the sheething. You have to put new paper down anyway, so there's not good reason to leave the old paper on there except to make sure NOT to find any existing issues.
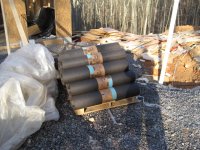
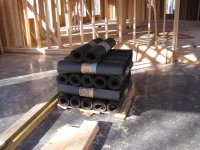
Require the use of the best, heaviest paper available. A good shortcut is to use 15lb paper. It's half the price, but it's junk and the life of the roof will be greatly affected.
Require valley flashing. Here, they try to use paper and shingles witout any metal in the valleys. This leads to leaks. It's not expensive or complicated to do, but it does add to time and materials to the job that the contractor can avoid doing and make more profit.
Specify nail length. Sadly, some will use 1 inch nails to save money. A one inch nail has to go through the shingles and the full thickness of the sheeting to be effective. The point of the nail needs to go completely through the wood in order for the shaft of the nail to have any holding power. If the tip of the nail is all that's in the wood, then it will come right out.
Specify exactly what shingles you want. Don't rely on the contractor to suggest any to you. Ask him what he has access to, and go take a look at them for yourself. If you don't like any of them, go find what you do like and specify that he use those. He can get anything that you can find, and there is no reason to settle for anything that you do not want.
The roof is the last place to save money. You don't need to go crazy, but to do it right, it will cost a bit more. Spend the money now and never have to worry about it later.
I had a client who told me they had 7 years experience roofing houses in Houston. I did the framing and sheething, but they were to do the shingles. They did everything wrong, cut every corner they could and when it was all said and done, they had ruined the house. Then the following year, they called me back to complain about several leaks. I went and looked, and it was because they cut the shingles in place after nailing them down. You can't cut shingles in place with a knife and not cut through the paper under the shingles !!!!
Ceilings are now stained and it's going to cost quite a bit to fix all of what's happened. I refused to get involved and haven't heard from them again.
Eddie
There is one guy around here that I know of who does hand nailed roofs. He's more money, but of the few people that I know who have hired him, they are all extremely pleased with the results. Of the dozens and dozens of roofers in my area, there are only a few that I know of that I'd recomend to my clients.
When hiring a roofer, you must specify every detail. Never rely on the roofer to do it the best way possible. He has all sorts of ways to cut corners that you will not know about for the next ten years. He bids the job at a price and every corner that he cuts, he makes more money.
On existing homes, always strip it down to the wood. Too many leave the paper on and can't inspect the sheething. You have to put new paper down anyway, so there's not good reason to leave the old paper on there except to make sure NOT to find any existing issues.
Require the use of the best, heaviest paper available. A good shortcut is to use 15lb paper. It's half the price, but it's junk and the life of the roof will be greatly affected.
Require valley flashing. Here, they try to use paper and shingles witout any metal in the valleys. This leads to leaks. It's not expensive or complicated to do, but it does add to time and materials to the job that the contractor can avoid doing and make more profit.
Specify nail length. Sadly, some will use 1 inch nails to save money. A one inch nail has to go through the shingles and the full thickness of the sheeting to be effective. The point of the nail needs to go completely through the wood in order for the shaft of the nail to have any holding power. If the tip of the nail is all that's in the wood, then it will come right out.
Specify exactly what shingles you want. Don't rely on the contractor to suggest any to you. Ask him what he has access to, and go take a look at them for yourself. If you don't like any of them, go find what you do like and specify that he use those. He can get anything that you can find, and there is no reason to settle for anything that you do not want.
The roof is the last place to save money. You don't need to go crazy, but to do it right, it will cost a bit more. Spend the money now and never have to worry about it later.
I had a client who told me they had 7 years experience roofing houses in Houston. I did the framing and sheething, but they were to do the shingles. They did everything wrong, cut every corner they could and when it was all said and done, they had ruined the house. Then the following year, they called me back to complain about several leaks. I went and looked, and it was because they cut the shingles in place after nailing them down. You can't cut shingles in place with a knife and not cut through the paper under the shingles !!!!
Ceilings are now stained and it's going to cost quite a bit to fix all of what's happened. I refused to get involved and haven't heard from them again.
Eddie
")