ASV Undercarriage design 4500/4810

   / ASV Undercarriage design 4500/4810
  • Thread Starter
#61  
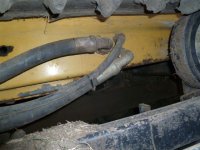
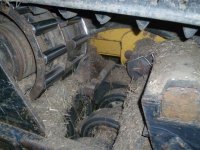
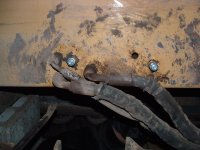
Try looking just in front of each sprocket on the top of the undercarriage frame toward the inside close to the machine. You should see a bracket welded in there that looks like a saddle with two bolts holes on each side to mount the brake cylinder. Mine has one of these brackets on both sides but only a brake cylinder on one side. So I guess if you haven't missed the brake then it must not be too necessary. Do you ever trailer you machine? That is where I would think being able to lock up the sprockets would be good. I might just make a solid sprocket locking device that bolts into the same spot and can be manually moved to engage the sprocket when needed. That way I can lock the sprockets when I want to.
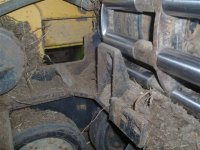
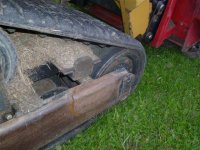
Got the rest of my machine apart today, the sprocket support bearing and sprocket. Now I just need to rebuild that sprocket like I did the other one and she's all ready to reassemble. I did find one real bad front wheel that I've decided to replace. It's only one bad one but I'm going to replace both the two outside ones and leave the inside split one in place. I figure you really should replace all three at once but I think the outer two would be good enough which puts the smallest diameter worn one in the middle. Dealer wants $90 for one 14 inch wheel, ASVparts.com gets $70. Got them ordered.
 
   / ASV Undercarriage design 4500/4810
  • Thread Starter
#62  
Just finished taking apart the remaining sprocket. This one was a bear! For some reason there was much more corrosion holding the bolts into the sprocket forging. This made it much harder to take apart. The first sprocket I managed to take completely apart without damaging any of the long 12 inch bolts. Had to press each bolt out of the sprocket. On this sprocket, I bent and had to cut off 6 of them. I will be replacing them with bolts I found from my cheap source. Instead of $17 on line I'm paying $4 at my source. I managed also to ruin one of the sprocket rings that are on inboard and outboard edge of sprocket. This will cost $50 and take 4 days to get. Another short holdup.
I have decided to remove my hydraulic brake. It is removed and the hydraulic lines have been plugged. I plan to make a manual parking brake that will bolt into the same location and work the same by locking the sprockeet but it will be manually operated.
All I have left to do on this machine is re-install all the axles on the left side and the sprocket and then install the new track. Then this machine will be done. I hope to finish it the day after I get the sprocket ring that I ordered.
 
   / ASV Undercarriage design 4500/4810 #63  
I noticed that the brackets holding the Park brake on my machine was torched off on one side completely and partly on the other.
Cant find no plugged ports though ?.
I was lucky to go back to the PO and obtain a partsmachine after i had bought mine.
It has 2 complete sets of good axles and wheels, so i'll be good for a while ;).
Tracks where gone though.
 
   / ASV Undercarriage design 4500/4810
  • Thread Starter
#64  
Interesting on your brakes. I guess that means your machine has no brakes at all then and I guess you haven't missed them? I wonder why someone would torch them off? That is great that you found a parts machine. That will greatly reduce the cost of replacement parts. How much did you have to pay for a parts machine?

I was at the dealer the other day and inquired about the plugs I would need to plug up the hydraulic lines to the brake. They did not know what size plugs to sell me so we went out and looked at a used 4500 machine they had on the lot. To my surprise it did not have ports on the side of the machine like mine does. The motor drive hoses and the brake hoses were routed into the machine via an opening in the frame down inside of the track. My machine does not have an opening like that but rather all the hydraulic lines exiting from inside the machine frame are accomplised via bulkhead fittings fastened into the side plate of the machine. So on each side there are five bulkhead fittings, three for the hydraulic motors and two for the brake. So they showed me the different sized JIC plug fittings and I bought the ones that looked the right size, they were #8 size and they fit perfectly. Does your machine have the hoses running into the frame via some kind of opening like the 4500 I saw? If so those hoses must have been removed from somewhere inside the machine frame and capped off in there.

I have a question regarding the hydraulic lines to the drive motors. There are three lines. From the schematic it looks as though the two large lines are pressure lines, probably one for forward and one for reverse rotation. The third line is called the "case" line. Do you know what that line does? I'm thinking that the two large lines act as pressure and return to tank alternately depending on whether you are going in forward or reverse. If so, what is the smaller third line. Is it just case drain back to tank for any internal leakage in the motor? Does it have much pressure in it?
 
   / ASV Undercarriage design 4500/4810 #65  
The parts machine i negotiated that thing in when i found out the machine i bought had a bunch of dry(no oil) axles and bad brgs,when i had been asured that the machine was 100% "gone trough" ,Okayed and field ready.
Lying A-hole:mad:

Dumb F i was,i wanted to gave the thing back instead,but he wouldn't take it,and i wasn't interested in going to court.

As usual pics are worth a 1000 words.
Drivemotor hoses(yes i'm pretty sure the small hose is just a case drain/press relief line.

Both sides of the brake supports(one cut off)(looked for but can't find plugged ports.
In the cab there a parkbrake switch(wonder if mine was equiped with electr park brake.(nothing to be found on the parts machine either but the switch)

Repair patch (3/8" plate) on front track frame,i did this on all 4 rails
 

Attachments

  • ASV hydr hoses 001.jpg
    ASV hydr hoses 001.jpg
    58.7 KB · Views: 351
  • ASV hydr hoses 002.jpg
    ASV hydr hoses 002.jpg
    68.3 KB · Views: 309
  • ASV hydr hoses 003.jpg
    ASV hydr hoses 003.jpg
    76.8 KB · Views: 327
  • ASV hydr hoses 004.jpg
    ASV hydr hoses 004.jpg
    75.4 KB · Views: 363
   / ASV Undercarriage design 4500/4810
  • Thread Starter
#66  
Your first pic looks like the right side showing the motor hoses. Looks just like mine (see pic) exept I have two more bulkhead fittings sticking out of the side wall for the brake. My pic shows the left side and you can see that silver colored caps I installed on the fittings. The right side is identical except only one bulkhead fitting for the brake (pressure hookup). The return line fitting is missing on the rights side but there is a hole in the machine where it would be if you needed one on that side. My second pic shows the brake mounting saddle that you are showing as torched off on your machine. Looks like you have the entire brake saddle on the rights side. Your sprockets look in really good shape too. Regarding the parking brake switch. What that switch is for is to override the automatic safety switches that engage the brake and allows you do manually engage the brake even if you are still in the seat and the machine is running. My manual says it activates an optional solenoid that engages the brake (i.e. cuts pressure to the brake). I forgot about that switch, my machine has one too. Obviously if I remove the brake I'll never use the switch.
Regading your track rail repair. Looks good but it's not where I imagined. I thought the cracks would be in the inside corner radius of the cross beam going from outer frame to inner frame. It looks like this repair was to fix cracks in the bend radius of the frame. Correct? I wouldn't expect a failure there.
 

Attachments

  • DSCF0034.JPG
    DSCF0034.JPG
    159.2 KB · Views: 306
  • DSCF0035.JPG
    DSCF0035.JPG
    165.9 KB · Views: 409
   / ASV Undercarriage design 4500/4810 #67  
Here an other angle of the frame repair.
Frame was cracked from the inside corners of the crossbrace right behind the frnt wheel and extended trough the round corner halfways down the side.
Its hard to try to strenghten the frame on the inside without taking the whole frame off the machine and turning it over. I felt by thorouhgly rewelding the cracked aea on both in and outside and putting a patch over the re-weld it would stiffen the frame so it won't crack ever again.
I did this on both frames in and outside.
 

Attachments

  • ASV hydr hoses.jpg
    ASV hydr hoses.jpg
    72.3 KB · Views: 326
   / ASV Undercarriage design 4500/4810
  • Thread Starter
#68  
Looks like you do good work Bison. What you say, can't weld upside down? I know a couple of guys who have turned their skid loaders over by accident. You'd think you could figure out a way to do it on purpose.
I finished everthing I can do on my machine for now until I get the new sprocket ring that I broke. All my axles are in place and just waiting to install the sprocket and new support bearing and then I'll be putting on the second track.
Since I'm waiting for a part I've been putzing around fixing odds and ends. My bucket fits the quick attach a little lossely so I took the bucket locking mechanism apart. The tapered bars that jam down into the bucket to lock it in place are worn to the point where the taper isn't hitting the bucket anymore so it doesn't hold it tight. The tapered bars are slightly bent too. So I straightened them and added some material by welding them up and grinding a new taper. Should be good as new now. When I get done with this machine she will be ready to go. I will truly be able to say I went through the whole machine and everything is in tip top shape.
 
   / ASV Undercarriage design 4500/4810 #69  
Oh i can weld upside down allright;),just no room for hand and stinger and helmet(looky see) to do it from underneath. Me tried,believe me;)

Yeah my quik atach is in sorry state as well,that Mulcher head is IMO a wee bit heavy for it.
I got a couple bolts in the bottom of both attach and mulcher frame to keep it from falling off.
 
   / ASV Undercarriage design 4500/4810
  • Thread Starter
#70  
Well, it's done. Picked up the sprocket ring from dealer today. Got the second sprocket assembled and rebuilt, installed it with new support bearing, and installed the new track on left side. After having done it once it only took 15 minutes to get the track on. Took the machine off the jack stands and I'm ready to go. I drove it a bit to get the track riding correctly and then checked track tension. After sitting the machine on the ground and taking the bottom slack out of the track the right side needs a little more tightening. The left seems to be OK. I'm currently at the first track tension position meaning that my track fits perfect.

My next project on this machine is to install an auxilary foot valve for operation of implements requiring hydrualic power. It appears this will be quite easy. I'm going to install a 3 position 4 way valve on the underside of the foot rest and run the control lever up through the foot rest so it can be operated with one foot. I'll cut the control rod off just the right length so it protrudes through the foot rest just enough to move it with one foot. Stay tuned.
 

Tractor & Equipment Auctions

2000 FORD F450 SUPER DUTY SINGLE CAB FLATBED TRUCK (A51406)
2000 FORD F450...
1996 Eager Beaver 44ft. 50 Ton Tri-Axle RGN Lowboy Trailer (A49461)
1996 Eager Beaver...
KNOW BEFORE YOU BID - DO YOUR HOMEWORK AND BE HAPPY WITH YOUR PURCHASE (A51406)
KNOW BEFORE YOU...
2017 Wacker Neuson ST31 Compact Track Loader Skid Steer (A49461)
2017 Wacker Neuson...
2016 WESTERN STAR 5700XE TANDEM AXLE SLEEPER (A51219)
2016 WESTERN STAR...
2015 DODGE RAM 1500 CREW CAB TRUCK (A51406)
2015 DODGE RAM...
 
Top