Summary: The weekend lumber harvest was successful. The saw was run at full throttle for a total of five hours (15 rip cuts at about 20 minutes per cut). Nearly three gallons of 2-cycle fuel mix and 1.5 gallons of bar chain oil were consumed. The harvest yielded thirteen 1" thick boards, 9.5' long and ~1' wide. Am I tired? I can barely move. Was it fun? You bet! Now the details ...
Early (well actually closer to 10 AM) Saturday morning, I met six curious guests at the base of the walnut tree. One lingered long enough for me to take a picture (Find Freddie).

The depth of cut of the Alaskan Saw Mill was first adjusted to just BELOW the rail bracket (~3") that I had attached a week earlier and a cut was made with the Saw Mill sliding on top of the UniStrut rails. The rate at which the first cut was made was about one foot of linear travel per minute. The log had been intentionally inclined so that the direction of the cut was slightly downhill, as suggested by MotorSeven, in order to take advantage of gravity; this inclination seemed to help reduce the operator effort required to cut. I stopped in the middle of the cut to take a picture.
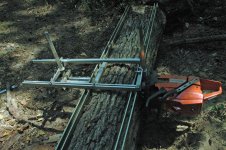
After completing the cut, I lifted the waste slab and the attached rails from the log thereby exposing for the first time a view of the rough cut lumber--a nice mixture of heart wood and sap wood. :thumbsup:
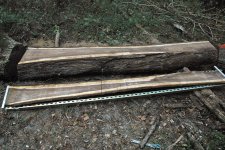
Notice how close to the tree stump the cutting actually occurs (~6"). This capability of the Alaskan Saw Mill reduces the need for heavy equipment to position and lift the heavy log--perhaps not such a good thing for someone trying to justify a tractor purchase. :duh:
Quick calculation: The density of green hardwood is nearly (and sometimes greater than) that of water (~62.4 lbs. / cu. ft.). The volume of this roughly cylindrical log is its length (9.5 ft.) times Pi (~3.1416) times half its average diameter (~8 in. or 0.67 ft.) squared (0.444 sq. ft.) or ~13.26 cu. ft. The weight of this log is its density (62.4) times its volume (13.26) or ~827 lbs.
The brackets and rails at this point were no longer needed and were put aside for the next log.
Because I was trying to maximize my lumber yield from the tree (walnut is usually considered "black gold" by furniture makers, and they can never have too much of it

), I adjusted the Saw Mill a little too high and nicked one of the aluminum brackets and one duplex steel bracket attachment nail when exiting the log. I guess I got a little too greedy. I examined the chain after this mishap, and it seemed ok. So after topping up the fuel and oil, I continued without re-sharpening.
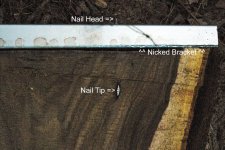
The Saw Mill was now adjusted to the desired rough thickness of the boards (in this case 1"), and boards were ripped with the Saw Mill sliding on top of the flat surface of the log made by the previous cut. The picture shows the center cut midway down into the log, after taking off three boards. As you can see, saw dust accumulation can be significant when slab cutting with a chain saw.
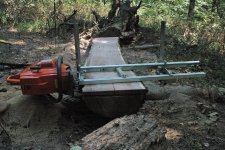

At the midway point, I was visited by another guest--my mother (no, NOT Freddie again!). She had heard the chainsaw running nearly continuously for more than an hour and decided to venture down the foot trail to investigate. I let her have some fun and cut a part of one slab, but only because it was her 86[SUP]th[/SUP] birthday. I guess you can always count on your mom for help when the going gets tough!
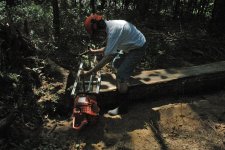
The remaining portion of the log was cut into 1" thick rough boards. The total yield for the log was seven 1" thick boards that were ~12" wide and 9' 6" long or ~66 board-feet. Waste consisted of the two end boards (pictured) and the saw dust from eight chainsaw cuts (chain kerf/ width ~3/8") or the equivalent of ~28 board-feet of lumber dust! In the foreground of the picture, the light brown is not dirt but is saw dust 4 to 8" deep.
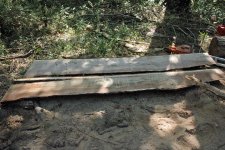
The total cutting time per cut was ~20 minutes which included fueling, oiling, and resting. About 1.5 gallons of gasoline were burned, and ~3 quarts of bar oil were consumed for this log. The boards were individually hand/leg carried up the hill to the house (remember my lack of a real tractor?) and displayed on the driveway while the second (slightly smaller) log was slab cut.
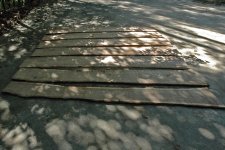
The second log yielded six 1" thick boards (~47 board-feet). Pictures of the second log cutting were unfortunately lost due to operator error by the camera man (me).
All the boards were then stacked and stickered in the garage. I used 24" grade stakes from Home Depot for the stickers and 1" nylon ratchet straps for binders.
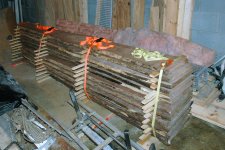
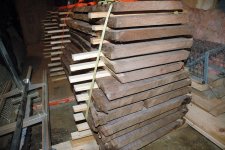
I intend to air dry the boards for about a year (depending on moisture content) before trimming and planing to 0.75" thick for furniture work. This plan has worked well for me in the past with a larger 28" diameter red oak log. During the initial drying, I will be on the lookout for mold. This was a problem earlier with the red oak, but not a problem with red cedar--perhaps not so surprising. I have box fans on standby in case mold becomes a problem.
Things I've learned from this project include the following:
a) Freshly cut walnut when drying smells really good (so do oak and cedar for that matter); imagine the bouquet of something similar to a mixture of pipe tobacco, leather, and horses;
b) Black walnut lumber is not dark in color when freshly cut but is rather a paler yellow/brown; the rich chocolate color takes hours/days/years (?) to fully develop. Maybe this should not be a surprise. [ Aside: As an experiment for the adventurous, try removing the green hulls of several dozen black walnuts with your bare hands (no rubber gloves allowed). The walnuts nuts here in Tennessee are just about perfect for this experiment right now. If needed, you can first stomp on the nuts with your feet to loosen the hulls, as long as you are either barefoot (as most of us folks in Tennessee are :us-tennessee: ) or wearing your good shoes. Then observe and record the color of your hands over the next several hours. At the end of this experiment, rinse off your hands/feet (cold water will probably be sufficient) and head off to Hancock County, Tennessee to MotorSeven's cabin with your results--I hear he needs someone to hold a bag for some kind of snipe hunt.

]
and c) The yield when slab cutting lumber from a log using a saw mill with a chain saw is low--only ~47% of the walnut logs was converted to rough lumber and after trimming and planing the boards, the yield will likely be less than one third.
Regardless of the yield, I did have fun (although I am rather sore) and have enough drying walnut for my daugther's dresser

. Expect a follow-up on the outcome of the drying lumber in about year.
-- LogChain


