HickOnACrick
New member
- Joined
- Jan 29, 2019
- Messages
- 9
- Tractor
- Mahindra 2655 HST
My 50-hour maintenance was due on my 2655 HST open station. I started by power-washing the machine the day before, just generally trying to make the machine as clean as possible to work on. I had called my local dealer earlier in the week and arranged to pick up all the filters and fluids.
This is what is needed in terms of filters and fluids:
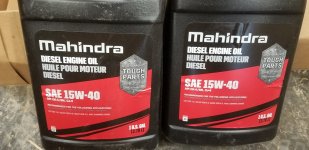
1. 2.5 gallons of 15W-40 motor oil. If you are operating in very cold climates, you may opt to go for a different weight. The 15W-40 is what my dealer recommended.
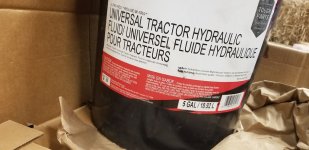
2. About 13 gallons of Mahindra Universal Tractor Fluid. 2.6 gallons will go into the front axle, and 9.2 gallons will go into the rear transmission case. The 2655 HST shares hydraulic fluid between the transmission and the hydraulic functions. Some tractors do not.
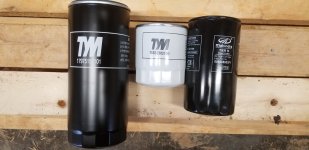
3. Three filters; the oil filter, the HST filter, and the hydraulic filter. The hydraulic filter is on the left, the HST filter is in the middle, and the oil filter is on the right.
Tools I used:
1. 7/8 socket with 1/2 inch driver
2. 24-inch breaker bar
3. Air compressor with blower wand for blowing out all the nooks and crannies
4. Oil filter wrench - I used a strap wrench but please read below about removing the oil filter
5. Cardboard boxes laid flat under the tractor to catch spills
6. A full roll of shop towels
7. Some carb-cleaner fluid
8. A pair of channel locks
9. A large crescent wrench
10. 3 small plastic buckets, 3-gallon size, purchased at Tractor Supply
11. A very large oil pan - the largest sold at Auto Zone. In total, you will have about 15 gallons of fluid to dispose of and you're going to need a way to catch it and transport it for recycling. 5-gallon buckets are too large to fit under the tractor.
12. A large funnel capable of reaching into the oil filler
13. A pump for pumping the hydraulic fluid into the tractor - Tractor Supply sells one that sits inside a 5-gallon bucket, pumps about 3 ounces per stroke, but leaks like crazy Traveller Transfer Pump for 5 gal. Pail at Tractor Supply Co.
So I started with a clean and dry tractor, raised and locked the front-end loader to make it easier to work on and around the tractor. I opened the hood, removed the side panels, and set the panels aside.

I then removed the radiator screen, cleaned it, and blew out all the fluff that accumulated between the screen and radiator. Using the air compressor wand, I generally blew out as much debris as possible around the engine and battery. There is a wing-nut that needs to be removed to remove the radiator screen and I swear the engineers thought, "where can we put this wing nut to make it as hard as possible to remove and put back?" It sits right under a hose, but just take your time and make sure you don't drop the wing nut or the washer.
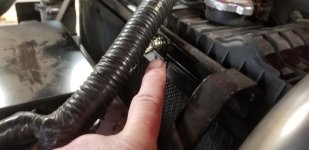
I removed the air filter. It is within a plastic cylindrical case that has 3 funky latches that are snapped open and shut. Once the clasps are open, remove the rubber strap securing the air filter housing and gently wiggle it forward to remove the cap of the plastic housing and the air filter. I used the air compressor to clean up the air filter. It was not very dirty, but a wasp had built a small nest in there that needed to be removed. Reverse the process to put the air filter back in.
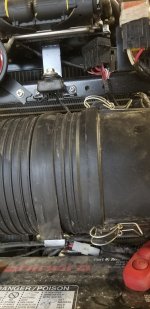
Now the easy part is finished. On to the fluids and filters. I first started the tractor and let it idle for about 10 minutes to warm up the engine oil. Turn off the engine and use the channel locks to gently open the oil filler cap. It is located on the right side of the tractor near the oil dipstick. It has yellow paint on it. In the photo, you can see the oil dipstick on the lower left and the oil filler on the upper right. Once the oil filler cap is off, clean it and barely thread it back into place. If you tighten it all the way, the oil won't drain well. If you leave it off, debris can fall into the filler hole.
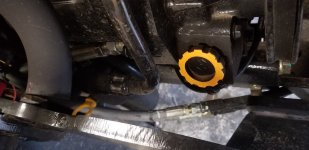
There are two drain plugs located underneath and toward the front of the tractor. They have some yellow paint on them. They require a 7/8 inch socket and I needed a 24-inch breaker bar to get them off.
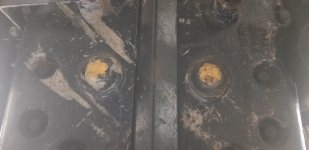
Get the oil pan ready because as soon as you remove the drain plugs, the oil comes out in a hurry. You need to be prepared to collect 2-3 gallons of engine oil. While the engine oil was draining, I cleaned the drain plugs with some carb-cleaner, shop towels, and compressed air. Once all the oil was drained, I cleaned the area around the drain plugs and re-installed the drain plugs. I have no idea what the torque-spec is on these drain plugs, but given that I needed a 24-inch breaker bar to get them off, I snugged them with the breaker bar as well.
Next was removing the oil filter. It is located on the right side of the tractor, near the oil dipstick.
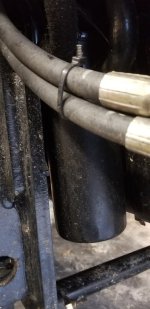
Let me start by saying I will not try and do this again without an end-cap wrench. On Monday I will be calling my local service center and see where I can buy the proper end-cap wrench. I first tried to just twist it off with my hands - no way. I then used a strap-type filter wrench; it wouldn't budge - it's just awkward to try and get the strap wrench into the right place to apply enough leverage. I then burned half a tank of gas, and half a day going to every auto parts store in town as well as Tractor Supply - none of them had an end cap wrench that was large enough for the filters. At the last auto parts store, the helpful cashier/specialist told me to drill a hole through the filter, then use a large screwdriver to get the leverage needed. So this is what I did. I DO NOT recommend this, but I was desperate and the day was a wasting. I pulled out my largest and longest screwdriver and carefully drilled a hole through the filter, taking care not to damage the hose behind the filter, or drill into the casing. I put the screwdriver all the way through the filter and tried to unscrew it. All that was happening was the entire housing was spinning. I saw this happening so I put a wedge of wood between the tractor frame and the top of the oil filter.
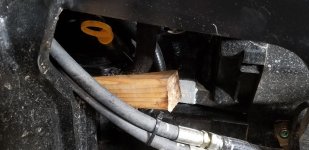
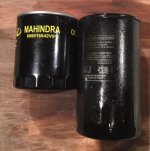
This worked and I finally felt the seal on the filter break. I then unscrewed about an 1/8th of a turn before the screwdriver hit the frame. I had to keep drilling new holes, inserting the screwdriver, turn an 1/8th turn, then repeat the process until it was loose enough to use the strap wrench. This is what the filter looked like when I finally got it off.
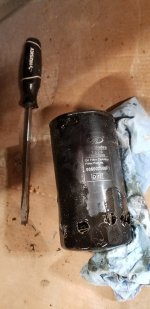
Needless to say, there was a lot of cussing and sweating during this time and I feel very lucky that I was able to pull it off. I DO NOT RECOMMEND doing it this way. Please, for the love of God, find an end-cap wrench before attempting to remove the oil filter, and make sure you have a wedge to keep the whole housing from spinning. I dipped my finger into the jug of new oil and oiled the gasket on the new oil filter. I put the new filter on using the strap wrench to make it snug, but not tight. I recommend cleaning the strap wrench and filter with some carb cleaner so it is clean and the strap wrench can get a good grip.
I then used a funnel to put 2.25 gallons of engine oil back into the engine, tightened the filler cap, started the engine, let it idle for a while, then used the dipstick to check the level - perfect.
Next was draining the front axle fluid. The yellow cap is the filler cap, use the channel locks to gently unscrew it, clean it, and lightly screw it back in place, just enough to not fall off and keep debris from falling into the hole.
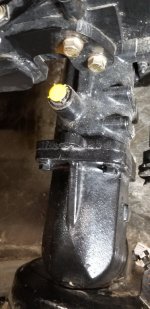
There are two drain plugs for the front axle - each are square, painted with yellow paint, and located near the front wheels facing the front of the tractor.
The one on the left:
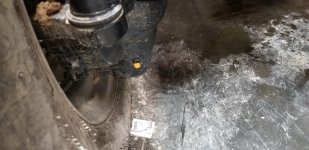
The one on the right:
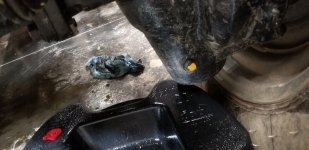
I used the 3-gallon buckets and kinda wedged them in there to collect the fluid. I don't know why these drain plugs are square, and not proper hexagonal bolts, but they are. I used a large crescent wrench to break the seal, then used a 15mm socket to unscrew them the rest of the way. The 15mm socket will strip the bolt if you try and use it to break the seal, but can be used to unscrew it after the crescent wrench gets it a little loose. Be careful here, the bolts are on very tight and crescent wrenches are notorious for stripping bolts.
The front axle holds 2.6 gallons of hydraulic fluid - be prepared to catch it. While it was draining, I cleaned and inspected the drain bolts. Once the axle fluid was all drained, I replaced the drain bolts...careful not to strip them. I used the hand pump to fill the front axle with hydraulic fluid. There is a trick to this - pump enough fluid until you see it at the top of the filler hole, then stop, walk away, eat a samich, come back, pump some more, walk away, wait, repeat until you are certain it is full. The filler cap has a dipstick for checking the level. Once I was certain it was full and had seeped all the way through the axle, I replaced the cap and gently tightened with the channel locks.
Next was draining the transmission case. There is 9-10 gallons of hydraulic fluid in the transmission case so be prepared to catch it all. I used the 3 3-gallon buckets and was prepared to transfer one bucket full of fluid to a 5-gallon bucket that is too large to go under the tractor.
This is the drain plug fo the transmission fluid. It is also a 7/8 inch bolt.
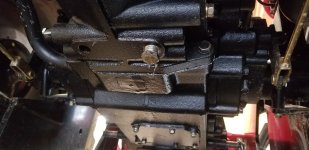
The transmission filler cap and dipstick are located on the back of the tractor. The filler cap looks like the oil filler cap, has yellow paint on it, and I gently used channel locks to unscrew it. I cleaned and inspected it, then lightly threaded it like I had done with the oil and front axle filler caps. I forgot to take a picture of the filler cap, but in this picture you can see the small yellow transmission fluid dipstick (lower left of photo) and the tube is being fed into the transmission filler hole.
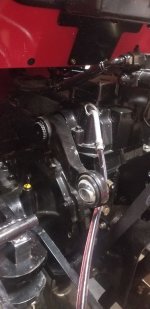
The drain plug for the transmission fluid is in the center and toward the rear of the tractor. It also required a 24-inch breaker bar to get it loose. Once it is off, the fluid comes out fast so be prepared. While the fluid was draining, I cleaned and inspected the drain plug - it is magnetic and I did not see too many metal shavings on it. While the fluid was draining, after the plug was cleaned, I added Teflon tape to the threads of the drain plug as there was Teflon tape on the threads when I removed it. Once all the fluid was drained, I replaced the plug, using the breaker bar to get it snug.
Next, I removed both the HST and hydraulic filters. This process was MUCH easier than the oil filter removal. I used the strap wrench but found that if I kept the strap wrench and outside of the filters clean with some carb-cleaner, the strap wrench gripped much better. I lubed both rubber gaskets of the new filters with a little clean hydraulic fluid, then screwed them both back into place. The HST filter is white, located under the tractor, on the left hand side. The hydraulic filter is big and black, and on the right side of the tractor, just behind the step. I snugged them up, but didn't get crazy making them too tight.
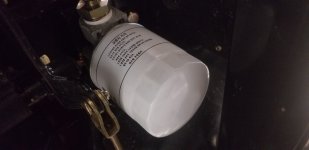
This is the new HST filter, back in place.
I then used the pump to transfer 9.6 gallons of hydraulic fluid into the hydraulic filler hole (see above photo of the rear of the tractor). Once I had the fluid in, I replaced the filler cap, gently tightening with channel locks, started the tractor, ran the FEL up and down a few times, then rested the FEL on the ground to relieve the pressure, turned off the tractor, let it sit for a while, then used the hydraulic fluid dipstick to check the level - perfect.
The next time I use the tractor, I will make sure to check all fluid levels after about 30 minutes of use, and make sure there is no oil or hydraulic fluid leaking from the filters.
I hope this helps someone. I spent a lot of time trying to find a step-by-step tutorial on the 50-hr maintenance of the 2655 HST, but could not find anything. The "User Manual" is not worth lining a bird cage, and my local dealer was not very helpful either. I will talk to the service counter Monday about whether a service manual is worth the investment, and try and find a filter cap wrench to make it easier next time I need to change the oil.
This is what is needed in terms of filters and fluids:
1. 2.5 gallons of 15W-40 motor oil. If you are operating in very cold climates, you may opt to go for a different weight. The 15W-40 is what my dealer recommended.

2. About 13 gallons of Mahindra Universal Tractor Fluid. 2.6 gallons will go into the front axle, and 9.2 gallons will go into the rear transmission case. The 2655 HST shares hydraulic fluid between the transmission and the hydraulic functions. Some tractors do not.

3. Three filters; the oil filter, the HST filter, and the hydraulic filter. The hydraulic filter is on the left, the HST filter is in the middle, and the oil filter is on the right.

Tools I used:
1. 7/8 socket with 1/2 inch driver
2. 24-inch breaker bar
3. Air compressor with blower wand for blowing out all the nooks and crannies
4. Oil filter wrench - I used a strap wrench but please read below about removing the oil filter
5. Cardboard boxes laid flat under the tractor to catch spills
6. A full roll of shop towels
7. Some carb-cleaner fluid
8. A pair of channel locks
9. A large crescent wrench
10. 3 small plastic buckets, 3-gallon size, purchased at Tractor Supply
11. A very large oil pan - the largest sold at Auto Zone. In total, you will have about 15 gallons of fluid to dispose of and you're going to need a way to catch it and transport it for recycling. 5-gallon buckets are too large to fit under the tractor.
12. A large funnel capable of reaching into the oil filler
13. A pump for pumping the hydraulic fluid into the tractor - Tractor Supply sells one that sits inside a 5-gallon bucket, pumps about 3 ounces per stroke, but leaks like crazy Traveller Transfer Pump for 5 gal. Pail at Tractor Supply Co.
So I started with a clean and dry tractor, raised and locked the front-end loader to make it easier to work on and around the tractor. I opened the hood, removed the side panels, and set the panels aside.

I then removed the radiator screen, cleaned it, and blew out all the fluff that accumulated between the screen and radiator. Using the air compressor wand, I generally blew out as much debris as possible around the engine and battery. There is a wing-nut that needs to be removed to remove the radiator screen and I swear the engineers thought, "where can we put this wing nut to make it as hard as possible to remove and put back?" It sits right under a hose, but just take your time and make sure you don't drop the wing nut or the washer.

I removed the air filter. It is within a plastic cylindrical case that has 3 funky latches that are snapped open and shut. Once the clasps are open, remove the rubber strap securing the air filter housing and gently wiggle it forward to remove the cap of the plastic housing and the air filter. I used the air compressor to clean up the air filter. It was not very dirty, but a wasp had built a small nest in there that needed to be removed. Reverse the process to put the air filter back in.

Now the easy part is finished. On to the fluids and filters. I first started the tractor and let it idle for about 10 minutes to warm up the engine oil. Turn off the engine and use the channel locks to gently open the oil filler cap. It is located on the right side of the tractor near the oil dipstick. It has yellow paint on it. In the photo, you can see the oil dipstick on the lower left and the oil filler on the upper right. Once the oil filler cap is off, clean it and barely thread it back into place. If you tighten it all the way, the oil won't drain well. If you leave it off, debris can fall into the filler hole.

There are two drain plugs located underneath and toward the front of the tractor. They have some yellow paint on them. They require a 7/8 inch socket and I needed a 24-inch breaker bar to get them off.

Get the oil pan ready because as soon as you remove the drain plugs, the oil comes out in a hurry. You need to be prepared to collect 2-3 gallons of engine oil. While the engine oil was draining, I cleaned the drain plugs with some carb-cleaner, shop towels, and compressed air. Once all the oil was drained, I cleaned the area around the drain plugs and re-installed the drain plugs. I have no idea what the torque-spec is on these drain plugs, but given that I needed a 24-inch breaker bar to get them off, I snugged them with the breaker bar as well.
Next was removing the oil filter. It is located on the right side of the tractor, near the oil dipstick.

Let me start by saying I will not try and do this again without an end-cap wrench. On Monday I will be calling my local service center and see where I can buy the proper end-cap wrench. I first tried to just twist it off with my hands - no way. I then used a strap-type filter wrench; it wouldn't budge - it's just awkward to try and get the strap wrench into the right place to apply enough leverage. I then burned half a tank of gas, and half a day going to every auto parts store in town as well as Tractor Supply - none of them had an end cap wrench that was large enough for the filters. At the last auto parts store, the helpful cashier/specialist told me to drill a hole through the filter, then use a large screwdriver to get the leverage needed. So this is what I did. I DO NOT recommend this, but I was desperate and the day was a wasting. I pulled out my largest and longest screwdriver and carefully drilled a hole through the filter, taking care not to damage the hose behind the filter, or drill into the casing. I put the screwdriver all the way through the filter and tried to unscrew it. All that was happening was the entire housing was spinning. I saw this happening so I put a wedge of wood between the tractor frame and the top of the oil filter.

This worked and I finally felt the seal on the filter break. I then unscrewed about an 1/8th of a turn before the screwdriver hit the frame. I had to keep drilling new holes, inserting the screwdriver, turn an 1/8th turn, then repeat the process until it was loose enough to use the strap wrench. This is what the filter looked like when I finally got it off.

Needless to say, there was a lot of cussing and sweating during this time and I feel very lucky that I was able to pull it off. I DO NOT RECOMMEND doing it this way. Please, for the love of God, find an end-cap wrench before attempting to remove the oil filter, and make sure you have a wedge to keep the whole housing from spinning. I dipped my finger into the jug of new oil and oiled the gasket on the new oil filter. I put the new filter on using the strap wrench to make it snug, but not tight. I recommend cleaning the strap wrench and filter with some carb cleaner so it is clean and the strap wrench can get a good grip.
I then used a funnel to put 2.25 gallons of engine oil back into the engine, tightened the filler cap, started the engine, let it idle for a while, then used the dipstick to check the level - perfect.
Next was draining the front axle fluid. The yellow cap is the filler cap, use the channel locks to gently unscrew it, clean it, and lightly screw it back in place, just enough to not fall off and keep debris from falling into the hole.

There are two drain plugs for the front axle - each are square, painted with yellow paint, and located near the front wheels facing the front of the tractor.
The one on the left:

The one on the right:

I used the 3-gallon buckets and kinda wedged them in there to collect the fluid. I don't know why these drain plugs are square, and not proper hexagonal bolts, but they are. I used a large crescent wrench to break the seal, then used a 15mm socket to unscrew them the rest of the way. The 15mm socket will strip the bolt if you try and use it to break the seal, but can be used to unscrew it after the crescent wrench gets it a little loose. Be careful here, the bolts are on very tight and crescent wrenches are notorious for stripping bolts.
The front axle holds 2.6 gallons of hydraulic fluid - be prepared to catch it. While it was draining, I cleaned and inspected the drain bolts. Once the axle fluid was all drained, I replaced the drain bolts...careful not to strip them. I used the hand pump to fill the front axle with hydraulic fluid. There is a trick to this - pump enough fluid until you see it at the top of the filler hole, then stop, walk away, eat a samich, come back, pump some more, walk away, wait, repeat until you are certain it is full. The filler cap has a dipstick for checking the level. Once I was certain it was full and had seeped all the way through the axle, I replaced the cap and gently tightened with the channel locks.
Next was draining the transmission case. There is 9-10 gallons of hydraulic fluid in the transmission case so be prepared to catch it all. I used the 3 3-gallon buckets and was prepared to transfer one bucket full of fluid to a 5-gallon bucket that is too large to go under the tractor.
This is the drain plug fo the transmission fluid. It is also a 7/8 inch bolt.

The transmission filler cap and dipstick are located on the back of the tractor. The filler cap looks like the oil filler cap, has yellow paint on it, and I gently used channel locks to unscrew it. I cleaned and inspected it, then lightly threaded it like I had done with the oil and front axle filler caps. I forgot to take a picture of the filler cap, but in this picture you can see the small yellow transmission fluid dipstick (lower left of photo) and the tube is being fed into the transmission filler hole.

The drain plug for the transmission fluid is in the center and toward the rear of the tractor. It also required a 24-inch breaker bar to get it loose. Once it is off, the fluid comes out fast so be prepared. While the fluid was draining, I cleaned and inspected the drain plug - it is magnetic and I did not see too many metal shavings on it. While the fluid was draining, after the plug was cleaned, I added Teflon tape to the threads of the drain plug as there was Teflon tape on the threads when I removed it. Once all the fluid was drained, I replaced the plug, using the breaker bar to get it snug.
Next, I removed both the HST and hydraulic filters. This process was MUCH easier than the oil filter removal. I used the strap wrench but found that if I kept the strap wrench and outside of the filters clean with some carb-cleaner, the strap wrench gripped much better. I lubed both rubber gaskets of the new filters with a little clean hydraulic fluid, then screwed them both back into place. The HST filter is white, located under the tractor, on the left hand side. The hydraulic filter is big and black, and on the right side of the tractor, just behind the step. I snugged them up, but didn't get crazy making them too tight.
This is the new HST filter, back in place.

I then used the pump to transfer 9.6 gallons of hydraulic fluid into the hydraulic filler hole (see above photo of the rear of the tractor). Once I had the fluid in, I replaced the filler cap, gently tightening with channel locks, started the tractor, ran the FEL up and down a few times, then rested the FEL on the ground to relieve the pressure, turned off the tractor, let it sit for a while, then used the hydraulic fluid dipstick to check the level - perfect.
The next time I use the tractor, I will make sure to check all fluid levels after about 30 minutes of use, and make sure there is no oil or hydraulic fluid leaking from the filters.
I hope this helps someone. I spent a lot of time trying to find a step-by-step tutorial on the 50-hr maintenance of the 2655 HST, but could not find anything. The "User Manual" is not worth lining a bird cage, and my local dealer was not very helpful either. I will talk to the service counter Monday about whether a service manual is worth the investment, and try and find a filter cap wrench to make it easier next time I need to change the oil.
