AllWaysBreakinSomething said:
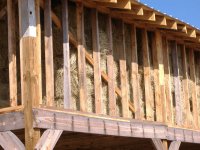
Hey Eddie, Purlins I think of wood that goes between studs,joices or trusses. But I think you mean slats nailed across the framing.
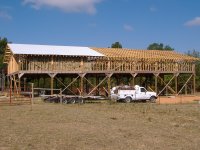
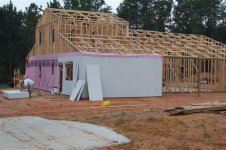
I've never heard of "slats" before, but from your discription, they sound like purlins. One of the advantages to metal siding and roofing is the lesser amount of lumber you need to frame it up. The method of framing is also totally different. What you did was conventional house framing. From what I can see in the pictures, you did a fantastic job of it too!!!
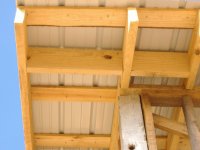
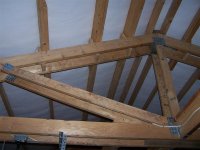
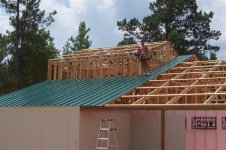
It's just interesting that you did it this way. Here are a few pics of my roof when I was building it. Notice the spacing of my trusses and the purlins to attach the metal to them.
I've heard that 1x material is too thin, and not code, for roofing and siding in some parts of the country. From what I've heard, it will not hold your screws over time and is prone to failure in high winds. I don't know this for a fact, but before I used it, I would ask around. Especially with your supplier.
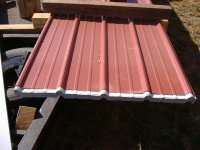
Be sure to use the best quality screws you can find. Not all metal to wood fasteners are the same. Failure usually starts with the rubber gaskets. Cheap ones break, crack and split on you really fast. Don't over tighten them. As soon as you see the rubber start to compress, stop.
There has been a few threads about where to put your screws. I always put them in the flats where you have solid contact with the wood. Some people said that they put them on the peaks to keep the water away from the screws. After some discussion, both versions were found to be recomeneded by different manufacturers. I prefer the metal to be as tight as possible, so I'll continue to fasten it to through the flats.
You'll also hear allot of stories about metal buildings that "sweat." This is really just condensation that forms on the bottom of metal roofing. Then it drops water to the floor as it builds up. This is caused by the lack of air flow in uninsulated buildings. You can never have too much venting!!!!
If you've never been on a metal roof, they are slipery. I wear white soled sneekers. Those seem to have the very best traction. Also be sure to keep them clean. Just a little bit of dirt on the bottoms of your shoes will make you slip and fall.
Good luck and be careful,
Eddie
 I guess slats are really common in NC. They are usually 1x4 or 1x6's over the truss 2' apart. I like the 16" on center for this thin board as it's really strong and easy to walk on. I'm using 26 guage imperial rib (