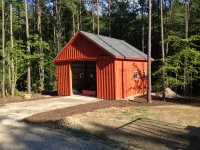
20x20 Pole Barn Project

   / 20x20 Pole Barn Project #31  
You know, I never even considered it. The barn could become my doghouse someday if my wife ever kicks me out, so that might not be a bad idea....

I saw 1/2" R-3 styrofoam sheet, which I could use without affecting the slab height too much, but would that make much difference? The thicker R-5 sheets wouldn't work without taking gravel out, and I'm not too keen to do that at this point.

That would work. Although I do prefer atleast a 1" thick rigid foam board for this. I know it would mean regrading but you can't wish it in later. I also prefer rigid foam to styrofoam. Once you work with both you will know why. And tape your joints.
 
   / 20x20 Pole Barn Project
  • Thread Starter
#33  
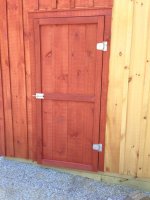
Door is up and swings real nice. Very rigid.

IMG_4449.jpg IMG_4450.jpg

(That's one coat of stain on the siding and two coats on the door in that second picture).

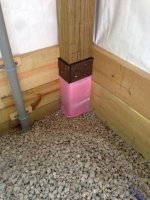
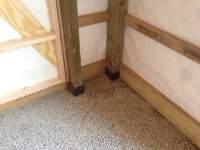
I put in expansion strip around posts, using standard felt/tar strip on top and a couple wraps of foam sill plate insulation below:

IMG_4453.jpg IMG_4454.jpg

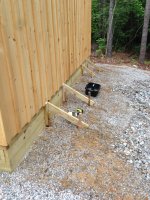
And put in bracing along the back and sides to keep the skirt boards from bowing when we pour the concrete:

IMG_4460.jpg

I am hoping to get 1-2 coats of stain down this weekend, as time/weather allows.
 
   / 20x20 Pole Barn Project #34  
There is a Foil Bubble Bubble Poly radiant barrier insulation that is not too bad in price and thin but reflects the heat back into or out of the shop.

TekFoil Reflective / Bubble Bubble / White Poly (R/BB/WP) - FarmTek

where I got mine and I added thinner styro under and over it (two 3/4" LAYERS ON EACH SIDE OF THE RADIANT FOIL BUBBLE BUBBLE POLY) I figured that way I protected the FBBP from being stomped flat & radon barriers as I had poly plastic layers in between and taped all the seams.


Pic shows soft layer down, FBBP and start of the 2nd layer of HD 3/4 styro. Plastic tape was used on all the seams as shown in other pics if ya click the photo and scroll thru.

Mark
 
   / 20x20 Pole Barn Project
  • Thread Starter
#35  
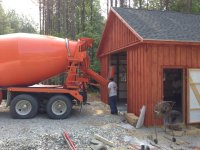
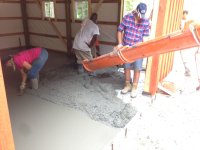
Concrete floor was poured last Wednesday. After going through a lot of trouble to line up a concrete guy, he bailed a couple days beforehand with a real weak excuse. Luckily, another contractor on my list had a cancellation and worked me in on short notice. They were a little pricier, but did real nice work.

IMG_4486.jpg IMG_4490.jpg IMG_4491.jpg IMG_4493.jpg

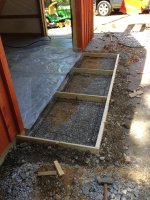
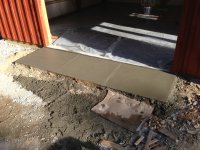
Yesterday, I did the apron outside the opening, to use up about 20 sacks of quick-crete leftover from setting the posts. Boy did it get old mixing that much concrete manually, but the finishing work went well.

IMG_4496.jpg IMG_4497.jpg

That last shot shows a broom finish on the first two sections on the left, while waiting for the last section on the right to setup after troweling. In the middle section of the apron, I embedded two short pieces of PEX pipe close to the center, which will accept sliding pins from the bottom of the barn doors to secure them

I'll pull the plastic off the floor tomorrow and resume work inside the barn. I'll give the apron another 4-5 days to setup before I start fitting the slider doors.
 
   / 20x20 Pole Barn Project
  • Thread Starter
#36  
Too much rain this weekend, which prevented me from painting or working on the slider doors. And the mud has been lousy from previous rain, sticking to tires and boots pretty bad (try climbing a ladder with goopy mud and gravel stuck to your soles). So I figured maybe I should jump ahead and finish grading. I picked up 2.5 tons of crusher run for the driveway into the barn and got that down and roughly graded yesterday. Today I picked up 3 yards of mulch and started spreading that along the front and sides. I need to do some box blade work behind the barn, but will eventually spread the mulch around back. Already, these improvements have really knocked down the mud so future work should be less affected by rains.

IMG_4554.jpg
 
   / 20x20 Pole Barn Project
  • Thread Starter
#37  
Some updates -- got the area behind the barn built up, graded, and topped with crusher run so I could park my 7x16 trailer back there.
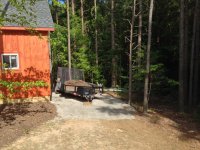
IMG_4575.jpg

Having this hidden parking area was one reason I went with a shorter barn, but I had been second-guessing that decision. Now seeing how much room I have inside the barn and how well the trailer tucks away in back, I am pleased with the arrangement.

I have the front slider doors finished, each 5'x10' in size. It was quite a project, but I took extra care to make sure the doors would be flat and secure. Having looked at a lot of barn doors over the last few months and seeing problems with warping, poor tolerances, and misalignment, and having issues buying straight wood that stays straight in long lengths, I decided to make the vertical sides of the door frame out of 1"x1.5" aluminum tube. It's strong, light, and will not warp or twist. Five fir 2x4 pieces form the laterals, and then various trim pieces cap off the bottom and sides. Here are a couple shots of the construction:
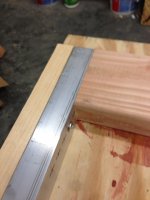
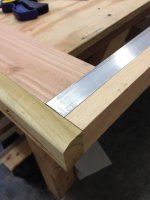
IMG_4570.jpg IMG_4572.jpg

That second shot shows the bottom with pressure-treated cap in the area where the door will sit against the floor slab.

Here are some shots of the test fit of the frames:
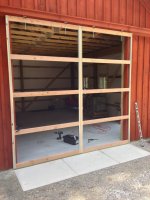
IMG_4577.jpg IMG_4579.jpg

At bottom, you can see how I secure the doors using pins that drop into pipes embedded into the concrete apron. Right now I am using timber nails, but will eventually use a piece of rod with a welded-on handle.

Here are the finished doors, hung and adjusted. To keep the weight manageable while putting the doors on the tracks, I attached the siding boards and trim after the frames were up and squared. Didn't want to have painted hex signs but wanted some ornamental rosettes, so I made them out of wood and gave them a little 3D effect. Cam locks on each door jamb complete the arrangement.
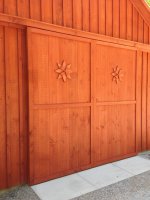
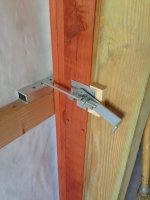
IMG_4618.jpg IMG_4615.jpg

With the center pins down low and cam locks midway up each jamb, these doors come together to be very flat, stiff, and secure when closed up. Combined with the aluminum framing, that ought to help the doors stay very straight over time.
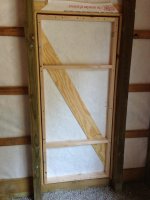
 
Last edited:
   / 20x20 Pole Barn Project #38  
Very nice job!
 
   / 20x20 Pole Barn Project #39  
S219 looking good. Did you insulate the floor?

Spiker. What kind of tape did you use? I am looking for some and out local lowes just says to use shipping tape.
 
   / 20x20 Pole Barn Project
  • Thread Starter
#40  
S219 looking good. Did you insulate the floor?

Yes, used some thin stuff on a roll that the concrete people recommended to create a thermal break.
 
 
Top