360* Rotating Back Blade Project

   / 360* Rotating Back Blade Project
  • Thread Starter
#181  
Here is a side view of the wedge showing a little more detail.
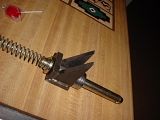


This is the theory of how it operates-

Lets say I want to rotate the blade - push a switch to activate the linear actuator, wedge lifts pin, rotate blade, push another switch, retract the wedge, if the pin in not exactly lined up, rotate blade a little then the pin will instantly index then lock into the hole by a spring.


Larry
 
   / 360* Rotating Back Blade Project
  • Thread Starter
#182  
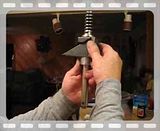
Here is a short video of the wedge. It takes 3.5" of horizontal linear motion to lift the pin about 1-3/4" vertically That is about 1/4" more than it needs to completely clear all the moving parts.


Larry
 
   / 360* Rotating Back Blade Project
  • Thread Starter
#183  
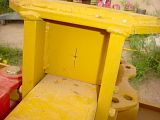
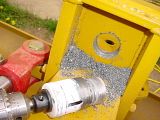
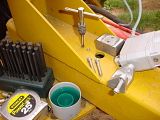
After receiving the linear actuator, it was time to install it. A 1.5" hole saw was used to cut through 3/4" thick steel for the actuator shaft. I found the center location:

Then drilleded a pilot hole, then followed that with the hole saw:


Of course the hole saw teeth grabbed and I did not have a good grip on the drill so it twisted off center and I bent the pilot drill and broke three teeth off the brand new hole saw :mad: , after replacing the pilot bit, I continued punching out the hole. I made it through though :)


Larry
 
   / 360* Rotating Back Blade Project
  • Thread Starter
#184  
After getting that 1-1/2" hole through the 3/4" thick plate, it was time to make the mount for the linear actuator. I drilled & tapped for 1/4-20 Socket head cap screws. The green stuff in the little cup is my cutting fluid. I use it for cutting threads, drilling & for the hole saw:


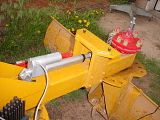
Then got the linear actuator mounted:


Then mounted the wedge to the end of the linear actuator shaft and dropped in the locking pin: Notice it's starting to rain - :rolleyes:


OMG - Lightning & Thunder all around me :eek: I'm starting to get it in gear now as I want to test this thing before it starts pouring.

Larry
 
   / 360* Rotating Back Blade Project
  • Thread Starter
#185  
I was able to test the actuator to see if it would lift the pin, and it does:


Well it started to rain real bad so I took everything apart and brought it and all my tools into the garage. I need the blade working now more that ever - you should see all the dozer tracks that need smoothing out around here.

Larry
 
   / 360* Rotating Back Blade Project
  • Thread Starter
#186  
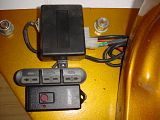
Next was to install the linear actuator switch control and electronics module underneath the ROPS canopy. This was done to protect it from the elements:


Those buttons labeled <- 1 -2- 3-> are what control the actuator, 1 lowers the pin, 2 stops, 3 raises the pin. They are programmable so that you can set the length of stroke. So all you have to do is push the button momentarily, and the actuator will travel the distance set by the program. It remembers it's program, even when power is removed. That little red button is the remote control for my gate.

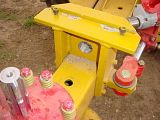
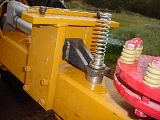
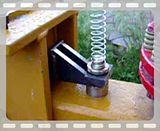
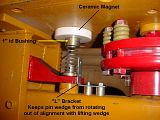
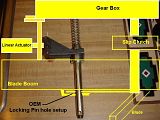
After getting everything painted I assembled all the pieces and parts, then re-installed the gear box. (I'm getting good at removing & re-installing that monster). I attached a ceramic magnet to the underside of the gear box with a short piece of bushing inside to keep the return spring centered. That Idea works great, as I did not have to do any machining on the gear box or use any gorilla glue. The magnet holds very tight. Here is a picture showing all the details of that setup:


Larry
 
Last edited:
   / 360* Rotating Back Blade Project
  • Thread Starter
#187  
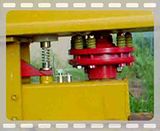
Here is a video of how it works under real life conditions. It's a little shaky but you will get the idea. I was operating the blade controls and my daughter Katie took the video. It was windy and was blowing her off balance. If you cannot make it out let me know and I will post a higher resolution one with sound. You can really hear the click of the pin when the spring returns it into position. With the slip clutch installed, it protects the gearbox, locking pin and shear bolt that holds everything together. If I forget to lift the pin, then try to rotate the blade, the slip clutch slips.


Now with that locking pin installed, I can cut, dig, smooth, push, pull, tug, tow with maximum horsepower and force on the edge of the blade to my hearts content without damaging any components or shearing any pins.

This wraps up what I was trying to accomplish with this project.

This was a "Monster Garage" project made possible by my wild idea and Rob's (3RRL) generous help and precision machining making me the gearbox. Again I thank Rob for making this all possible.

Larry
 
   / 360* Rotating Back Blade Project #188  
All I can say is WOW!!! It's just amazing what you and Rob come up with.

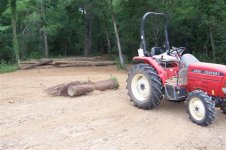
I especially like your reasoning for getting your blade working so you can smooth out your dozer tracks. :) :) :) All you need is a log and some chain to drag it with to make them disapear!!!!!!! :D :D :D

Eddie
 

Attachments

  • Log Drag with Tractor.jpg
    Log Drag with Tractor.jpg
    60.4 KB · Views: 313
   / 360* Rotating Back Blade Project
  • Thread Starter
#189  
Hi Eddie,

Thanks for the compliment and checking out the latest with the 360* rotating back blade.

EddieWalker said:
............
I especially like your reasoning for getting your blade working so you can smooth out your dozer tracks. :) :) :) All you need is a log and some chain to drag it with to make them disapear!!!!!!! :D :D :D

Eddie

Oh Man, All that work on this blade project and just to think, all I needed was a log on a chain to erase dozer tracks?

Well I guess I shouldn't feel too bad, I suppose I can still use it for snow plowing, road and ditch maintenance. Or do I only need some low cost simple setup for doing that as well? ;)

Larry
 
   / 360* Rotating Back Blade Project #190  
Should take a licking , and keep on ticking now...

Nice work
 
 
Top