4310 Rockshaft repair and filter replacement

   / 4310 Rockshaft repair and filter replacement
  • Thread Starter
#31  
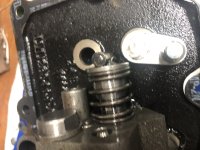
OK, I have a little more information now as I continue to investigate the problem. In examining the feedback rod, everything looked fine. This thread eluded to the fact that the pin (26 in the diagram) that holds the lever (11) on the shaft might be broken. In looking at it, it looked fine. However, after I loosened the feedback rod, I moved the rod back and forth, which it moved very easy. So easy, I wondered if the pin had sheared and was just protruding out of the lever. That is in fact what has happened. After removing the feedback rod from the bracket (20, the lever (11) slid completely off the shaft (10). The pin (11) had sheared into and was stuck in the lever.
I am going to try and put another pin back in and see what happens tonight. Hopefully this will fix the problem, but I am concerned that since it took a fair amount of force to break the pin, the shaft maybe locked up. That would be puzzling since the tractor never sits outside and is only 3 years old and 145 hours.
So, if another pin shears, it looks like the only resolution is to remove the manifold (5) and see if I can get to the shaft and fix??

I'm going to say it's probably rusty up in the shaft #10's bore.
 
Last edited:
   / 4310 Rockshaft repair and filter replacement #32  


You were spot on Kyle. After some deliberation decided to tear into this repair this weekend. I removed the rear tire and cover place. After marking all the hydraulic lines and taking some pictures, I removed all the lines that were connected to the rockshaft manifold. I then removed the linkage for the 3 point lever. Eight bolts are around the manifold and I removed all of them next. IMG-2072.jpg
The manifold fell away from the tractor without any prying and the gasket was intact. IMG-2073.jpg
The valve is on the other side of the manifold and so are the control levers. The bottom shaft is the one I was having trouble with, very stiff and almost impossible to rotate. IMG-2075.jpgIMG-2074.jpg
After removing the snap rings and the connecting rod, I was able to drive the shaft out of the manifold with minimal effort. IMG-2076.jpg
The shaft seemed to be in good shape but i removed the o-ring and polished the shaft on a grinder with a wheel brush. I then cleaned out the hole in the manifold with some 400 grit sand paper.
IMG-2079.jpg I greased the shaft really well and installed a new o-ring. I re-installed the shaft and tapped it back into place with a hammer. the shaft rotated with ease and worked like it was supposed to now. I put the linkage and snap rings back in place on the shafts and re-installed the manifold.
I re-installed all the hydraulic lines as well as the linkage for the 3 point hitch and the feedback rod. Before I put the wheel and shield back on, I fired up the tractor to check for leaks. Finding none, I tested the 3 point hitch, and all seemed to work as it should. After some slight adjustment on the feedback rod, I have the lower and upper limit set to within an acceptable tolerance.
Thanks to Kyle for posting his experience and notes. Start to finish, it took about 6 hours total time. At least two hours were spent diagnosing and trying to find the problem. I highly advise taking some pics of the hydraulic lines and labeling each of them, makes putting things back together much easier. I figure I saved at least $5-$600 on shop labor. Really didn't need any parts.
Anyway, if anyone ever has an issue with their 4066R cab's 3 point hitch not operating correctly, better check the feedback rod connection and pin. Its probably a broken spring pin, and that can be hard to diagnose.
 

Attachments

  • IMG-2078.jpg
    IMG-2078.jpg
    2.3 MB · Views: 250
   / 4310 Rockshaft repair and filter replacement
  • Thread Starter
#33  
Great job Jloven! You saved yourself a good deal of money and get a virtual high five for tackling it yourself, from me! I remember being so dismayed that deere didn't sell any parts to the rockshaft valve....just the whole thing over $500. At that point, I was bound and determined to repair it myself, even if I had to make a whole new body myself.....fortunately didn't have to.

Thanks for documenting your repair, now the 40XX cab guys have something to go by.

So to all, usually you can repair this by taking everything down, and driving out the lower shaft and getting it clean again.
 

Tractor & Equipment Auctions

2010 Toyota Camry (A50324)
2010 Toyota Camry...
vin:16VEX2023H3042174 (A50322)
vin:16VEX2023H30421...
Brent 776 Grain Cart (A50514)
Brent 776 Grain...
CATERPILLAR 308CR EXCAVATOR (A51242)
CATERPILLAR 308CR...
2023 Case IH 4412F 12 Row 30 In. Row Spacing Folding Corn Head (A50657)
2023 Case IH 4412F...
12 ft Chisel Plow with Rolling Baskets (A52128)
12 ft Chisel Plow...
 
Top