senecak19
Silver Member
I thought I'd follow suit and post my Underslung Plow Build.
Reading threads about this, I found several other builds that were extremely helpful in planning my build. So before I begin with my post, I think itç—´ prudent to give credit to those folks here:
GORDONGOULD
https://www.tractorbynet.com/forums/...snow-plow.html
CHIM
https://www.tractorbynet.com/forums/...snow-plow.html
TRACTORNH
https://www.tractorbynet.com/forums/build-yourself/401291-snow-plow-build-finished-underslung.html
A HUGE thank you to GordonGould and Chim (as their known on here) for helping me along the way and answering the dozens and dozens of questions I had.
Without further a due, here goes:
This was built around a Kubota L3200. I tried to be weight conscious because I picked up an older Fisher plow that weighed an absolute ton. As in, covered in snow and ice, three grown adults couldn稚 lift it into the back of a セ ton truck.
I intentionally shopped for a 7 or 7.5 plow figuring my L3200 would be pushed to its limits and an 8 would only make it worse. 7.5 seemed to be readily available and I was able to source this one with the cylinders, A-frame, push bar (albeit cut in half) and an almost new cutting edge for $100. I opted not to use the cylinders and purchased a new set of OEM Fisher cylinders locally out of fear of contaminating my tractor.
I took a risk and built this around a ï½¼ SSQA plate after reading one persons review that it would be sufficient. I did it because they were out of stock of the 5/16 plate that I wanted. I'm hoping with enough bracing, it'll be fine. More to come on that.
I really wanted to build GordonGouldç—´ design (vertical push members), but my little tractor had virtually no cylinder capacity remaining when in the vertical position. I contemplated this a long time and ultimately decided the weight savings would help me to go with one of the other persons designs and thus the forward leaning plate design it was.
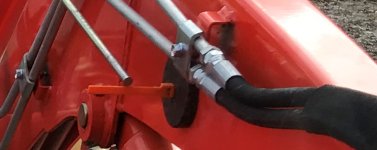
The restrictors and Crossover valves and Flow Restrictors are a carbon copy of Gordonç—´. The 3rd function valve is a Landpride OEM kit. For anyone looking to purchase this, pay attention. There is three sets of install instructions and there all different! They indicate different end configurations. The kit today comes with a male/female ISO 7241 Series A connectors for the end of your machine. One set of instructions indicates two males, which my kit did NOT come with.
The A-Frame Paint is Magic paint from TSC simply because I had purchased a gallon of it a long time ago and had some left. After reading some of the fading threads, I wasn't thrilled, but in the end realized fading isn't an issue for me, I'm more concerned with its durability chip wise as I don't want a rust bucket laying around. The new frame member is primered because we just received 12" of snow and I didn't have time to get it painted, so that will have to wait until the spring.
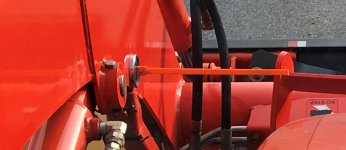
I re-used the original push bar since mine was in decent shape (unlike Gordonç—´). After measuring it a few times and trying to figure out how to use it with good strength, I realized 2.5 box steel fits inside the i-beam perfectly. I just needed to cut the two factory gussets out. For reference and in order to maintain as much as strength as I could, I flipped the push bar upside down and cut the bottom gussets out (not the top ones). For whatever reason the bottom gussets were backing one of the plow pin mounts. Hard to explain. The top gusset supported both of the plow pin mounts. So, I kept the latter and cut the bottom ones out. Plates welded on the side and rear section of the frame connect the entire structure together. Also note, the box steel that extends forward to connect to the SSQA plate stick out past the rear section of the frame so I could add a rear gusset. Again, trying to maintain as much strength as I can.
I welded this up with as many gusset plates as I deemed appropriate. Just how I did it. Looking at other builds and some really cobb'd together projects out there, I'm going to hope I got this a touch on the overkill side as I hope to never have to fix it!
Today was my first go at using it and my initial impression is it's definitely quicker than a bucket. Simply put, you don't have to dump the bucket every pass and the angling of the blade allows you to push snow for the most part without stopping! We got close to 12 and I plowed three different substrates this morning: grass, pavement, stone driveway. The grass being frozen did quite well. Plow pushed the 12 without having to stop. The paved driveway was on a slope and transitions directly to the road which just sucks with anything. Naturally, the plow scraped it clean. The worst of the three was my own driveway. ¾ stone and the plow picks them up everywhere. They don't really freeze over so the drive looks clean, but stone in every pile I have. I'm not one to fuss about it though. I'll take the speed over a little bit of stone. I have intention of laying down some recycled asphalt in the spring anyways. That should freeze over and make plowing next year even better.
As simple as these builds look, there's real money involved. I knew this going into this and moved forward because 1) I wanted third function hydraulics for other attachments and 2) I intend on keeping my plow forever. I started plowing for neighbors and needed something to make the process quicker and easier as I have an 18-month old that I'd rather spend my time with. .
Cost to Build:
Third function valve: $800
Fab Steel: $100 (Does not include the large angle iron or random gusset plates)
Paint: $0
Plow Hydraulics: Cushion Valve, Flow Restrictors, Hoses, etc..: $265
Gallon of UDT2: $25
Bottle of Loctite 545: $18
Two Replacement Pins: $10
Angle Cylinders: $235
Plow Skids: $75
SSQA Plate: $111
Chain: $20
TOTAL: $1659
I'm sure I missed some cost somewhere. Consumables such as argon mix got me. Just when that ran out, my weld wire ran out as well. Bwahh! I'm sure if I added it all up, I could get close to a dead even $2000 for this project.
Hope this helps some of you. Happy plowing!


Reading threads about this, I found several other builds that were extremely helpful in planning my build. So before I begin with my post, I think itç—´ prudent to give credit to those folks here:
GORDONGOULD
https://www.tractorbynet.com/forums/...snow-plow.html
CHIM
https://www.tractorbynet.com/forums/...snow-plow.html
TRACTORNH
https://www.tractorbynet.com/forums/build-yourself/401291-snow-plow-build-finished-underslung.html
A HUGE thank you to GordonGould and Chim (as their known on here) for helping me along the way and answering the dozens and dozens of questions I had.
Without further a due, here goes:
This was built around a Kubota L3200. I tried to be weight conscious because I picked up an older Fisher plow that weighed an absolute ton. As in, covered in snow and ice, three grown adults couldn稚 lift it into the back of a セ ton truck.
I intentionally shopped for a 7 or 7.5 plow figuring my L3200 would be pushed to its limits and an 8 would only make it worse. 7.5 seemed to be readily available and I was able to source this one with the cylinders, A-frame, push bar (albeit cut in half) and an almost new cutting edge for $100. I opted not to use the cylinders and purchased a new set of OEM Fisher cylinders locally out of fear of contaminating my tractor.
I took a risk and built this around a ï½¼ SSQA plate after reading one persons review that it would be sufficient. I did it because they were out of stock of the 5/16 plate that I wanted. I'm hoping with enough bracing, it'll be fine. More to come on that.
I really wanted to build GordonGouldç—´ design (vertical push members), but my little tractor had virtually no cylinder capacity remaining when in the vertical position. I contemplated this a long time and ultimately decided the weight savings would help me to go with one of the other persons designs and thus the forward leaning plate design it was.
The restrictors and Crossover valves and Flow Restrictors are a carbon copy of Gordonç—´. The 3rd function valve is a Landpride OEM kit. For anyone looking to purchase this, pay attention. There is three sets of install instructions and there all different! They indicate different end configurations. The kit today comes with a male/female ISO 7241 Series A connectors for the end of your machine. One set of instructions indicates two males, which my kit did NOT come with.
The A-Frame Paint is Magic paint from TSC simply because I had purchased a gallon of it a long time ago and had some left. After reading some of the fading threads, I wasn't thrilled, but in the end realized fading isn't an issue for me, I'm more concerned with its durability chip wise as I don't want a rust bucket laying around. The new frame member is primered because we just received 12" of snow and I didn't have time to get it painted, so that will have to wait until the spring.
I re-used the original push bar since mine was in decent shape (unlike Gordonç—´). After measuring it a few times and trying to figure out how to use it with good strength, I realized 2.5 box steel fits inside the i-beam perfectly. I just needed to cut the two factory gussets out. For reference and in order to maintain as much as strength as I could, I flipped the push bar upside down and cut the bottom gussets out (not the top ones). For whatever reason the bottom gussets were backing one of the plow pin mounts. Hard to explain. The top gusset supported both of the plow pin mounts. So, I kept the latter and cut the bottom ones out. Plates welded on the side and rear section of the frame connect the entire structure together. Also note, the box steel that extends forward to connect to the SSQA plate stick out past the rear section of the frame so I could add a rear gusset. Again, trying to maintain as much strength as I can.
I welded this up with as many gusset plates as I deemed appropriate. Just how I did it. Looking at other builds and some really cobb'd together projects out there, I'm going to hope I got this a touch on the overkill side as I hope to never have to fix it!
Today was my first go at using it and my initial impression is it's definitely quicker than a bucket. Simply put, you don't have to dump the bucket every pass and the angling of the blade allows you to push snow for the most part without stopping! We got close to 12 and I plowed three different substrates this morning: grass, pavement, stone driveway. The grass being frozen did quite well. Plow pushed the 12 without having to stop. The paved driveway was on a slope and transitions directly to the road which just sucks with anything. Naturally, the plow scraped it clean. The worst of the three was my own driveway. ¾ stone and the plow picks them up everywhere. They don't really freeze over so the drive looks clean, but stone in every pile I have. I'm not one to fuss about it though. I'll take the speed over a little bit of stone. I have intention of laying down some recycled asphalt in the spring anyways. That should freeze over and make plowing next year even better.
As simple as these builds look, there's real money involved. I knew this going into this and moved forward because 1) I wanted third function hydraulics for other attachments and 2) I intend on keeping my plow forever. I started plowing for neighbors and needed something to make the process quicker and easier as I have an 18-month old that I'd rather spend my time with. .
Cost to Build:
Third function valve: $800
Fab Steel: $100 (Does not include the large angle iron or random gusset plates)
Paint: $0
Plow Hydraulics: Cushion Valve, Flow Restrictors, Hoses, etc..: $265
Gallon of UDT2: $25
Bottle of Loctite 545: $18
Two Replacement Pins: $10
Angle Cylinders: $235
Plow Skids: $75
SSQA Plate: $111
Chain: $20
TOTAL: $1659
I'm sure I missed some cost somewhere. Consumables such as argon mix got me. Just when that ran out, my weld wire ran out as well. Bwahh! I'm sure if I added it all up, I could get close to a dead even $2000 for this project.
Hope this helps some of you. Happy plowing!
Last edited:


")