Fenceman doing what fencemen do these days

   / Fenceman doing what fencemen do these days #61  
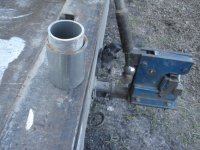
[I have to let the concrete stiffen up enough to hold the post for height and line]

Thats what I've been waiting to hear. I knew you notched your posts and then set them for line and height. I just didn't know how you managed to keep them from dropping. You must let them set quite a bit.

There's a lot of pipe fence around here. When I did my fence
Link I looked around at a bunch of others first. More often that not the top rail would roller coaster to the extent that it appeared there was not preparation or planning at all by the installer. Some post height would look like he measured off a dirt clod.

So I was bound and determinded not to have a top rail that looked bad. I set the posts and then cut them using one of the clamp on templeates and soap stone. I took my time using string and a lot of eye balling. I would try to look down the line to anticipate how to gradually follow the slight grade.

Also before I even dug a hole I worked the line with a grader blade.

In the end I have one of the better looking fences around in terms of the top rail. Me and three neighbors on each side all have the same fence. Unfortuntly theirs are real bad.

That being said it took me forever to do. I think I'd rather notch the posts first. Guess I need to practice.
 
   / Fenceman doing what fencemen do these days #62  
This is how I did my 2-rail pipe fence with 2" sch 40 pipe.

Using a transit, I sighted down the property line and put a stake in the ground every 100'. I ran a string along these stakes at ground level. I then walked the line and made a paint mark on the ground every 10' where a post would go.

The pipe came in 32 foot sticks, so I cut (4) 8' posts from each stick. I drilled my 2.5' - 3' deep post holes on the 10' centers along my string (I didn't see the need to go 8' and the 10' worked better for material and aesthetics).

I then filled each hole with approximately 1.5 to 2 (80#) bags of concrete (fills the hole about 1/2 to 2/3). The concrete was mixed on the stiff side. I then insert the pipe in the hole and concrete (making sure it touches the string so my fence is straight) and drive it into the ground (bottom of the hole) a few inches with a tee-post driver. The stiff concrete and the fact that the post has been driven in the ground a few inches allows it to stand upright without bracing. I check the pole in two directions with a 3 foot level and push it around as needed to get it plumb.

After all the posts have been set and the concrete has cured, I stretched a string at the elevation that the top rail will sit. You'll need to secure the string in a few places because it will droop. Stand back and look at the string, adjust as necessary. You might have to secure the string to a number of the poles to get the contour you want (rise and fall along the land contour). You're looking for aesthetics. You don't want the top rail to follow every little peak and dip of the terrain or the top rail will look too erratic (That's what happens when people use a storyboard eg. top rail set at a fixed distance at each pole). You need to gently follow the contours so the fence flows.

After the line is set to my liking, I mark where the string hit each post with chalk. I then clamped this jig to the pipe shur-kut jig , lined the top of it up with the chalk line and cut the saddle with a torch.

After all the saddles were cut, I dressed them up with an angle grinder if required. I then laid full 32' foot pipe lengths in the saddles and welded the top rail. I butt-welded each new pipe length to the preceeding one BEFORE I welded the last saddle for each respective top rail pipe. This is important, because when you weld the saddles it draws the top rail down. If you have an unsupported length after the post, it'll draw down too much and give your top rail a big bend.

After the top rail is welded out, I put in the mid-rail. For getting the mid-rail placed right, I cut a length of board to use as a spacer between the top rail and the midrail. The mid rails get a saddle on each end. You want to cut the mid rails (distance between the saddles) a little long (1/8 to 3/16") so they fit snuggly between the poles, I had to use a 5-pound mallet to move it up or down when I put the mid rail in place. This allows them to stay put while you weld them out and you won't need clamps or a helper.

IMO, I think it's easier to cut the saddles once all the posts are in place. That way you only have to worry about getting the posts plumb and not worry about elevation.

FYI, my fence was constructed of 2" sch 40, top rail set at 52" and mid rail set at 19" down from top rail.
 
   / Fenceman doing what fencemen do these days #63  
yeah thats pretty much what I did. The reason I'm kind interested in notching the pipe 1st is because you can use a notcher instead of a torch. That is a pain in the rear and if you've got several hundred feet then you'll be looking for better ideas. You might not find one but you'll look.

Besides the notcher, cuting the saddles has to be so dead on else you end up with gaps caddi corned if your saddle doesn't point exactly in line.

So there's pros and cons either way you go. As someone once said, Harv likes to entertain himself and it appears he's got pretty good at it.
 
   / Fenceman doing what fencemen do these days #64  
I was surprised to hear that Harv pre-cut the saddles. I guess he's better at thinking in 3 dimensions then us mere mortal folk. /forums/images/graemlins/wink.gif I have a hard enough time just getting the post straight, never mind adding the complexity of getting the elevation right /forums/images/graemlins/confused.gif. Harv sure builds a beautiful fence, so his technique works great for him. I'd just have a hard time getting the top rail figured right, if i didn't run the string and be able to step back and look it over a few (that would be a few hundred for me) times.

I did about 1600 feet of fence and I thought the shur-kut jig made things really simple. You place the torch tip on the edge of the jig, so you get very accurate saddles. Even if the saddle is miss-aimed by a few degrees, it's easily dressed with an angle grinder. A 1/8" welding rod can handle a fairly decent weld gap. If two people are doing it, it makes it real easy if one guy just handles the torch and the second guy just keeps clamping the jig and moving the torch bottles. You never have to kill and re-light the torch that way.
 
   / Fenceman doing what fencemen do these days
  • Thread Starter
#65  
Awright you guys!

1. We mix the concrete stiff to begin with but hauling back that far brings all the water to the top which sabotages some of the work of having it stiff. But letting it set up is usually no more than fifteen minutes. And us fence guys have ways or little tricks of expediting the setting up of the concrete.

If the ground is clay and a little wet we'll pull the post and stab it into the clay to plug the bottom of the post. It makes it harder to squeeze down but then it'll stay in place.

Another is to cover the top of the concrete with tailings or dirt around the hole. This sucks up the moisture rather quickly. But this is only done after the post is in place.

Shure-cuts. I have about six of them. I used to use the heck out of them and anytime I found an unusual one I'd buy it. Like I've got one that's cut for two and three eighths to two and three eighths on one end and two and three eighths to two and seven eighths on the other.

I've also made them for special applications. One of the common sizes fence companys use for gate posts is three and half inch schedule forty. The Lexus dealership on 121 in Grapevine has a guardrail made from this around their lot.

I had to make a ton of saddles. So I grabbed a piece of four inch schedule forty. I guesstimated a saddle cut for the three and a half inch. I slid the four inch over the three and a half and cut a saddle joint. I repeated this until the four inch was a perfect guide for the torch to make a saddle cut on the three and a half inch.

I cut the four inch length wise on one side. I then welded a standard butt hinge across the cut. I cut the opposite side. I now had a Shure-cut for the three and a half inch.

If I have a ton of two and seven eighths to saddle I'll use a Shure-cut and the plasma.

The hardest thing about setting posts by eye is figuring out the image you're wanting when you do it. Once you know what to look for then it's just practice and then practice some more.

Us fence guys like to make it look like magic so we can get girls. /forums/images/graemlins/grin.gif /forums/images/graemlins/blush.gif /forums/images/graemlins/grin.gif
 
   / Fenceman doing what fencemen do these days
  • Thread Starter
#66  
Tom we'll be working on this job today and tomorrow (rain forecasted for early next week). It's over by your house. We're on CR 642 just off of FM1778. Can't miss us, tall hansome man with red truck just getting after it down in the woods. /forums/images/graemlins/grin.gif
 
   / Fenceman doing what fencemen do these days #67  
Sorry I didn't make it by today. I finally started that balcony and I've got to get it done the weekend. I should be finished in time to goof off tommorow so maybe I can come by.
 
   / Fenceman doing what fencemen do these days
  • Thread Starter
#68  
I'm going to be out there. Gary B Davis has said he'll come by sometime if he can get his alligators separated from his crocidiles for ten minutes.

I can tell it's springtime. First the pear trees bloom. Then the poison ivy shoots up everywhere. I also noticed yesterday the fire ants are starting to become active again.

But I look at the fire ants, poison ivy, and tornados in the spring as the price of admission into paradise. /forums/images/graemlins/grin.gif
 
   / Fenceman doing what fencemen do these days
  • Thread Starter
#69  
It looks like I had a window of time between storms to get the welding done down in the lower part of the property. I've had pretty good luck with it.

So far I've got about a thousand feet of fence welded up. That's in about twenty two hours of one man working. On straight getting it down a line I can do about seventy to eighty feet an hour. That's cutting in and welding three hundred and sixty degrees each joint. That doesn't include cleaning or painting the completed joints.

Down in the wood there was a lot of stopping and starting plus cutting in braces etc so that slowed me down. Down there at times forty feet an hour was doing good.

As I was cleaning up tonight I thought I'd share with my TBN friends some of the details of my work.

I talk about two and three eighths and two and seven eighths pipe. Two inch pipe, not tubing, pipe, has an O.D. of two and three eighths inch. Pipe is measured I.D. Tubing is measured O.D. So two inch tubing is two inch O.D.

Two and a half inch pipe has an O.D. of two and seven eighths.

Here's a piece of two inch pipe inside a piece of two and a half inch pipe (2 3/8's inside 2 7/8's). Both pieces are schedule forty.
 

Attachments

  • 852085-DSC02517.JPG
    852085-DSC02517.JPG
    84.4 KB · Views: 534
   / Fenceman doing what fencemen do these days
  • Thread Starter
#70  
In the background of that picture was the Vogel pipe notcher. It has a die set for two inch (2 3/8") pipe. It cuts the pipe so that even Ray Charles could have sewed up the joint if he'd been so inclined.
 

Attachments

  • 852089-DSC02520.JPG
    852089-DSC02520.JPG
    77.4 KB · Views: 426

Tractor & Equipment Auctions

BOBCAT 260 WELDER/GENERATOR (A52472)
BOBCAT 260...
2015 KENWORTH T680 TANDEM AXLE SLEEPER (A52577)
2015 KENWORTH T680...
2017 Nitro Z 19ft Bass Boat with 26ft T/A Boat Trailer (A51694)
2017 Nitro Z 19ft...
2014 GALYEAN 180 BBL STEEL VACUUM TANK TRAILER (A52472)
2014 GALYEAN 180...
Redirective Crash Cushion Guardrail (A51692)
Redirective Crash...
2012 Infiniti G25 Sedan (A50324)
2012 Infiniti G25...
 
Top