OP
EddieWalker
Epic Contributor
Today we had a cold front come through. Temps have been dropping into the 30's and tomorrow night, should go down into the 20's.
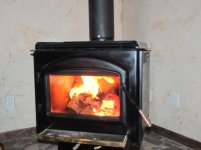
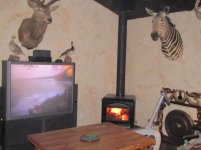
I started my first fire tonight in my stove. At first, it just smoked and smoked. It was crazy to see how the smoke washed over the glass. I read the comments here about it, but to see it for the first time was really something!!!
Then the flames took off and it got real pretty. Then it got warm in here. I was wearing a beanie, sweatshirt and my boots. I didn't check the temperature in the house when I started the fire, but after an hour, it's 76 degrees in here off of the first load of wood, and I'm not going to add any more. I'm in my tshirt, shorts and bare foot.
Outside it's 38 degrees and inside it's 76!!!!!
Thank you everyone for your advice.
Next is my wood shed.
Eddie