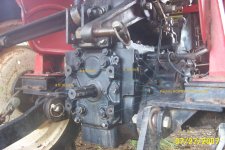
I agree that 3/8 or 1/2 would be stronger than 1/4, the question will be the actual bolts that come with the tractor that are used to secure rops on all YM240's. I think the fasteners will fail before anything else. I upgraded everything to grade 8 with large flat washers. The four rear bolts I replaced with full depth fasteners. The tubing has full length gussets at the base in front, as well as the sides and the axle plates are welded directly to the rear mounting plate. It's surprisingly stiff. As the YM240D only weights 1700 lbs, I think it will easily stop a roll. I agree though that more is probably better, as long as the weight of the ROPS doesn't roll it.
As far as the questions on the AC welding rod goes, I am a big believer in the 6011 rod for root passes, especially for out of position welds. It does tend to leave a rougher bead and first time users find it a bit frustrating to hold the short arc necessary for best results. It is a hot weld for root passes and you soon learn not to lift your helmet too soon when using it. You also can't hesitate too long with it, because it will dig right though if held in one place, but you can't rush either, or you get an ugly bead. Not all AC machines have a high enough striking voltage to handle the 6011. If not, it will almost always handle the 6013, a similar rod but easier to strike and maintain the arc. If your AC machine is not up to the 6011, you will probably find it can handle the 6013, another good general purpose rod.
The 7014 or 7024 rods leave a beautiful looking weld, but are not my choice for anything but a finish pass. That's not to say they are not a good rod, it's just they can fool a beginner with a beautiful looking bead that has virtually no penetration or holding power. And I support Sandman, never to be used on dirty metal. When used for a root pass on a fillet weld for example, it is not uncommon to suffer slag inclusion, even with clean metal. I have seen fillet welds having virtually no penetration except at the very edge, with slag underneath and on top. One trick to help avoid this is to tilt your work at 10 or 15 degrees, so you are welding 'uphill'. They also work well with stringer beads. You can assess your weld easily after cooling, because often the slag lifts by itself and sheds on a perfect bead. The 7014 or 24 needs a steady hand to avoid slag inclusion. I have used both for stringer beads and when cut and polished for inspection resulted in flawless fill. So they are good in the right application.
I really like the 7018. It is a great rod, versatile because it's low hydrogen, but not best for AC. Some machines do fine with it, but DC reverse supports the 7018 well. With the 7018 though, dry rod is critical. If you aren't getting good results with a 7018, suspect flux contamination. I use the 7018 on any suspect metal and it has all the characteristics of a nice looking weld with good strength and good penetration. Use it for welding growsers on cat tracks and that's a tough application.
To be honest, I think 90 percent of good welding is preparation. Before welding, I grind every surface that will take a bead. No dirt, oil, rust or oxidation allowed. I bevel every edge at about 30 degrees to ensure for good penetration and fill. When I run a bead, I don't worry about anything because I know I prepared it as well as possible. There are times when cleaning is out of the question and that's where 6011 shines. It may not be pretty, but the arc is brutal and blows through rust and paint.
Not sure about on line classes, but will offer the following recommendations for those interested:
Always make sure you are comfortable when welding, your bead will be smoother.
For flat welding, the general rule is your rod should tilt at the top about 20 degrees in the direction you are welding. A bad habit to pick up is welding at a 45 degree angle. For fillet welding, the rod should be at 45 degrees (splitting the 90) but again, the top tilting 20 degrees in the direction welding.
Try to keep the arc about 1/16 to 1/8 inch long. That isn't really very long. A bad habit to get into is holding a long arc (to provide more light) to see what's going on. Concentrate on keeping your arc short and lenses clean to observe it. Generally, if you are getting a lot of splatter, question your arc length. Some rod definately splatters more than others, but a long arc results in more splatter.
Don't rush the bead. A common mistake is moving to quickly, resulting in a thinner, weaker bead. Relax, watch the puddle, let the rod melt into it while maintaining your short arc and move ahead easily. Expect a finished bead to be about 3/4 the length of the rod when welding. This is a general rule, but works pretty well when assessing speed. 12 inch rod = 8 inch bead.
A good weld will appear slightly higher in the middle and taper nicely to the edges, about 1.5 times the width of the rod. If the edges are undercutting, amperage is too high, if the weld is round, amperage is too low. The ripples should be evenly tapered back, but not too long.
Make sure your rod is up to task. The first two (or three) digits represent the strength of the weld deposit. Third digit will usually be a 1 or 2. When 1, it means all position welding, flat, horizontal, vertical and overhead, when 2, it means only flat and horizontal. The last number has to do with specific properties of the rod and is generally not worried about. A 6011 rod is rated at 60,000 lbs per square inch holding power and an all position rod. A 7024 is 70,000 and should only be used on the flat or at horizontal.