Let there be light, lots and lots and lots of light!

   / Let there be light, lots and lots and lots of light! #41  
LED lamps make more lumens per watt than filament bulbs. Your tractor was most likely wired for filament bulbs. This means that you can use LED lamps and get much more light and NOT exceed the current that the filament bulbs used. I don't recall the ratio off the top of my head but it can be looked up. YOu can get at least 3 times (and probably 4 times) the light and not exceed the original design current. So if you don't "go crazy" adding lights you should be OK. Do some research and find out the wattage or current draw of the bulbs the wiring in question and associated fuses was designed to handle. Then find the current draw of the LED lamps and stay within the design current.

Here is a lot of light for the price and good rugged quality too.

12-24 VDC 1500 LUMEN LED FLOOD LIGHT SQUARE1492119

Patrick
 
   / Let there be light, lots and lots and lots of light! #42  
I have several John Deere model M tractors and the factory lighting is just not enough. Maybe it was state of the art in 1947, but, today it would seem that an LED solution could be found for the headlights and rear work lights. I will be looking for some single pin, bayonet base LED lamps in a white color spectrum (about 5000 degree Kelvin color temp) that will work with my 6 volt, positive ground system on these tractors. Anyone got a link, I would appreciate the information.

Thanks for the good posts on the tractor lighting thread.


Winford

Well, 6 volt replacement bulbs in LED with bayonet base are not so easily found.These bulbs are much more easily found in 12 volts. One approach is to upconvert your 6 volts to 12 volts. Essentially a 6 VDC powered power supply with 12 VDC as its output. You can save cost and complexity because you don't need a smooth ripple free well filtered output and frequency stability is also not a big issue. Another solution for the DIY guy (but not DIY enough for the previous suggestion) is to buy the CREE LED's intended for use at 6 volts (4 cell flashlight) and build your own light assembly. I suppose you could mount a few of those 6 volt CREE LEDs in a bayonet mount (like reloading a rifle cartridge.) You'd have to break out the glass and wire the CREE's . Be careful not to overheat the LED's if/when soldering. If it were me, I'd probably make my own CREE lamp holder for multiple LEDs and then make a power plug out of a bayonet base so I could plug my light assy into the bayonet socket. Boo Hoo Boo Hoo, it won't look stock... I'd have to take it off before driving in a parade.

Look here ==> http://www.superbrightleds.com/cat/ba9s-ba7s/ They have 6 vollt bayonet base lamps. This was extremely hard to find. I had to type in "bayonet base led light" into Google and hit enter!

Patrick
 
   / Let there be light, lots and lots and lots of light! #43  
Kiotiken,

Did you have any problem, as far as electrical, running that many lights?? Hope not, really like to have that many lights!!!
 
   / Let there be light, lots and lots and lots of light!
  • Thread Starter
#44  
Kiotiken,

Did you have any problem, as far as electrical, running that many lights?? Hope not, really like to have that many lights!!!

No, none at all. 8 of the LEDs draw less current than the 4 factory lights did so its not an issue.
 
   / Let there be light, lots and lots and lots of light! #46  
I am wanting to do the same thing on my DK55c. Do I need to remove the cab roof to do so, and if so, how is that done?
 
   / Let there be light, lots and lots and lots of light!
  • Thread Starter
#47  
I am wanting to do the same thing on my DK55c. Do I need to remove the cab roof to do so, and if so, how is that done?

The cab roof changed with the DK SE models as far as their design and how they are removed, I found that out when I started a thread about repairing the damage I did to my roof. You don't need to take the roof right off to add the lights though, at least not on the DK SE models, the Kioti comfort cab I had on my CK 30 or even the JDP aftermarket cab I had on my JD. It should be hinged at the back, all you have to do is remove the nuts (yours may have bolts) and tip the roof up like the hood of a car. Get a block of wood to jam it in place and you should be good to go. The SE cabs have 10 nuts to remove and the light bar at the front needs to be disconnected and completely removed. You're best to have an extra set of hands if you can get them, yours might be easier.
 
   / Let there be light, lots and lots and lots of light! #48  
Thank you, Sir.
 
   / Let there be light, lots and lots and lots of light! #49  
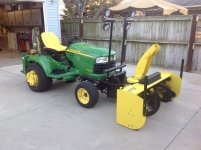
This is what I did to fix the low light problem image.jpg
 

Tractor & Equipment Auctions

2003 TRAILMOBILE 32FT DRY VAN (A43004)
2003 TRAILMOBILE...
2010 Gleaner 9250 Draper Head  30' with Crary Air Wind System (A46884)
2010 Gleaner 9250...
MIXER TANK (A47001)
MIXER TANK (A47001)
2010 Ford E-150 Cargo Van (A46683)
2010 Ford E-150...
2025 JMR 72in Grapple Tractor Attachment (A46683)
2025 JMR 72in...
Kubota 24in Quick Attach Compact Excavator Tooth Bucket (A46884)
Kubota 24in Quick...
 
Top