You are using an out of date browser. It may not display this or other websites correctly.
You should upgrade or use an alternative browser.
You should upgrade or use an alternative browser.
Long road to home.
- Thread starter ENG18LT
- Start date
- Views: 116009
More options
Who Replied?
/ Long road to home.
#321
tkappeler
Platinum Member
A great accomplishment, Lee! It looks beautiful. Enjoy the down time as long as you can.
ENG18LT
Platinum Member
A great accomplishment, Lee! It looks beautiful. Enjoy the down time as long as you can.
Thanks Tom,How is the new house?
tkappeler
Platinum Member
Thanks Tom,How is the new house?
Doing great Lee! Thanks for asking. I need to get the last of the boxes out of the garage and put away so I can have room to set up the wood shop and continue making the baseboards and door/window casings.
ENG18LT
Platinum Member
The boxes will never go away or be empty. There is always one that gets put in the basement and stays put until you move out.
:drink:
:drink:
tkappeler
Platinum Member
The boxes will never go away or be empty. There is always one that gets put in the basement and stays put until you move out.
:drink:
I wish it was only one.
ENG18LT
Platinum Member
So it has been a couple months since I have posted last. Nothing too big going on, taking it easy and just enjoying the time we get to spend out here on the property.
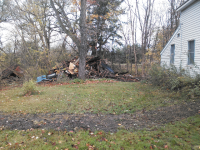
I did push over the old furniture shop right behind the house, it didn't take much. It was mostly collapsed on itself from years of neglect.
The second floor of the barn got some insulation in the spaces that aren't accessible once the sheathing goes on. I was hoping that two bundles of R-21 would be enough..., it wasn't. So I put up as much OSB sheathing as I had insulation for.
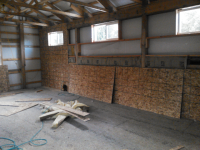
The spaces next to the windows are open at the top and will get blown in when time and money allow, so I didn't need to put any there now.

Managed to get all of the east wall insulated and sheathed. It was nice to be able to just plug away and not worry about any deadline or inspection schedule.
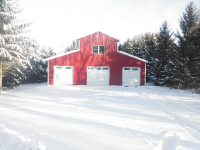
We came out for Thanksgiving with family and I took a picture of this years first snowfall. It's also the first snow on the barn. We wound up getting 10" of the white stuff.
Happy Thanksgiving to everyone!
I did push over the old furniture shop right behind the house, it didn't take much. It was mostly collapsed on itself from years of neglect.

The second floor of the barn got some insulation in the spaces that aren't accessible once the sheathing goes on. I was hoping that two bundles of R-21 would be enough..., it wasn't. So I put up as much OSB sheathing as I had insulation for.

The spaces next to the windows are open at the top and will get blown in when time and money allow, so I didn't need to put any there now.

Managed to get all of the east wall insulated and sheathed. It was nice to be able to just plug away and not worry about any deadline or inspection schedule.
We came out for Thanksgiving with family and I took a picture of this years first snowfall. It's also the first snow on the barn. We wound up getting 10" of the white stuff.
Happy Thanksgiving to everyone!
ENG18LT
Platinum Member
lostcreekranch
Super Member
- Joined
- Dec 14, 2012
- Messages
- 8,078
- Location
- Austin County, Texas
- Tractor
- NH TL-100A with Bush Hog 5045 FEL, WR Long 3rd function, LS XR4155HC w/FEL, WR Long 3rd Function.
Lee;
Great progress on your barn. Do you have heat in it yet?
Rick
Great progress on your barn. Do you have heat in it yet?
Rick
ENG18LT
Platinum Member
Lee;
Great progress on your barn. Do you have heat in it yet?
Rick
No heat yet, still don't have electricity back there.
EddieWalker
Epic Contributor
Thanks for the update. I really like OSB on your walls. It makes it so much easier to hang stuff, and if you hit it really hard, nothing happens like it does with sheetrock.
Eddie
Eddie
ENG18LT
Platinum Member
Thanks for the update. I really like OSB on your walls. It makes it so much easier to hang stuff, and if you hit it really hard, nothing happens like it does with sheetrock.
Eddie
I agree, it definitely holds up better then sheetrock. Especially with me around!
ENG18LT
Platinum Member
Been a while since posting. Took the winter off after spending the summer putting up the barn. We did get to spend Christmas at the property with the family on my wife's side. We are still clearing out items from grandma's estate. There was a huge amount of stuff in the house, but we can see the light at the end of the tunnel. I just hope it's not a train!
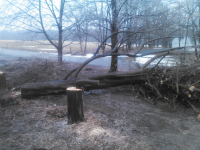
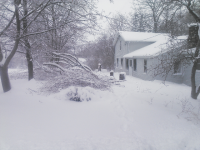
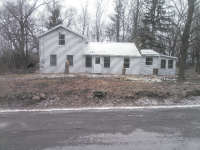
The winter has been a long one this year, doesn't seem to want to let go. Had another 8" of snow last weekend. Most is gone, just dealing with mud now. Last weekend we took down three trees that where way too close to the house. Then it snowed, so we came out this weekend to clean up the mess.
The app on my phone keeps crashing when I try to add pictures, will post them in a couple days when I am at home and have regular internet access.
Hope everyone had a good winter.
Attachments
ENG18LT
Platinum Member
dave1949
Super Star Member
Good to hear from you again, Lee.
Everyone is ready for this winter to be a distant memory.
Everyone is ready for this winter to be a distant memory.
rjwassink67
New member
- Joined
- Mar 9, 2014
- Messages
- 17
- Location
- Northwest PA
- Tractor
- 5 years from now, grew up on a: JD 2550 and White 105
Thanks for the update, really enjoying this thread!
ENG18LT
Platinum Member
Thanks. Should have more in two weeks!
ENG18LT
Platinum Member
Thanks. Should have more in two weeks!
