LS backhoe questions. please post pics of subframe mount.

   / LS backhoe questions. please post pics of subframe mount.
  • Thread Starter
#51  
Time to do a jig

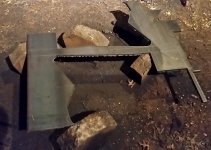
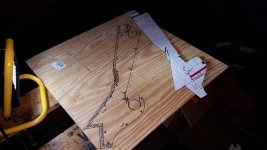
This chicken scratch is an attempt to make my template for the 4 point cradle. Scissor skills from kindergarden finally came in handy. Used a USPS priority box (thanks Uncle Sam) and some duct tape to work out a shape that would work.

Next I plan to cut out a plywood jig I can drag my plasma torch around for the main shape.

4point_jig.jpg

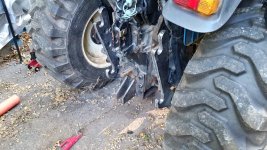
The right angle part (yea, looks kind of like Texas) will sit on the cross member between the ROPS mounts shown in previous pictures.

Rain coming so who knows how much I'll be able to get done this weekend.
 
   / LS backhoe questions. please post pics of subframe mount.
  • Thread Starter
#52  
After the rain stopped

Haven't been able to post an update in a while because it's kind of hard to use a plasma cutter in a boat! Well, we didn't get rain like SC did but I did miss over a week of getting anything done.

So after my hillbilly engineering in the previous post (who needs G Code? Well, I would like it!) I cut my template out with a jig saw and then used the plasma to cut four of these parts (picture in previous post) out. That went pretty well except I ended up running my compressor quite a bit (more than usual) and when it heats the lines then you get condensation. I had a small dryer just before the plasma and it got saturated while cutting the parts out and I got about 1/8" of water in my separator that I emptied about three times!

So I realized I needed to do something different so I bought the Harbor Freight dryer (69923). I read the reviews and saw where people complained about the little plastic service indicator (a orange thing that pops up when the filter gets too much of a restriction and needs changed/cleaned) but didn't think much of it. I got the thing for $40 so I thought that was pretty good compared to others I had seen and a lot of other stores don't even carry them anymore ... they show up on their web site but when you look real close it's not available in stores - available online only - ship to home.

I rigged up quick connect fittings because I have no place to mount it so I just want to fix it up for temporary use. I hook it up and go to try it and ... yup, the clear plastic service indicator thing is blowing air big time ... so the entire rest of the evening was spent screwing with that. :( To make a long story short, I needed to ditch that service indicator and plug it. I determined the threads were M16x1 which is an odd thread and none of the local suppliers had it. Sure, you could order a plug on the Internet but I need to get busy now!

I finally give up and just filled the cavity up with two part epoxy which turned out to work very well and not leak at all ... so now I'm in business:
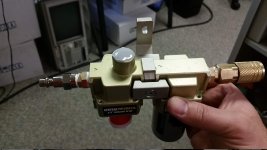
dryer.jpg

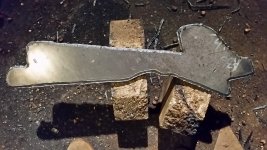
After cutting out the four 1/2" plate parts, I was going to use my grinder to make a 45 along the edges because I plan to stack two of these parts together to get the thickness to 1" and I wanted a nice 'V' grove in the middle to fill in with weld to get better penetration/strength. I was kind of dreading doing this because I knew it was going to suck and take forever ... that's when I had an epiphany! I thought to myself 'hey, I could use the plasma to put a 45 on the edge'. I tried it out on one of the parts and boy, that's why faster than using a grinder! I was rolling along having a good time then I hear POP and my torch lost air and shut off. See anything wrong with this picture?

dryer_popped.jpg

The two bodies are standalone units and they are held together with a ramp type clamp on each side that draws the bodies toward each other and compresses a rubber O-ring on each side of the mounting bracket in the middle. The screw backed out from the vibration of the compressor and the seal pooched out and blew all my pressure. It was easy to fix but looked pretty freaky.

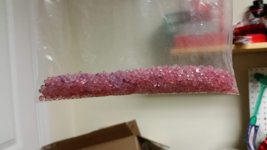
I made it through three parts putting the 45 on the edge and then my dryer started getting used up. I didn't get any moisture in the plasma separator so it was doing it's job but I decided to change out the desiccant (I have a gallon more on the way from Amazon):
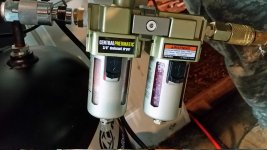
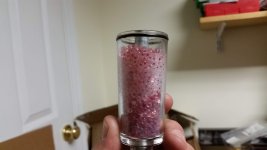
dryer_fogging.jpg dryer_spent.jpg

Hey buddy, want a dime bag of pink stuff?
pink_stuff.jpg

This job made me realize I need a BIG compressor and one of those fancy refrigerated air dryers but hey are $$$$!

Here is one of the parts after I put the 45 around the edge:
bevel_4point.jpg

Now I have to cut out the cradle area for the four pins to sit in and clean them up and weld them together. I plan to cut some holes on one side so I can plunge weld them too so they get some strength from the more than just the edge.
 
   / LS backhoe questions. please post pics of subframe mount.
  • Thread Starter
#53  
HF Bling!

Thought I'd show of my new HF bling:

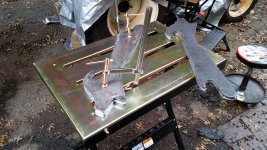
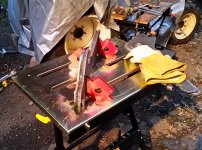
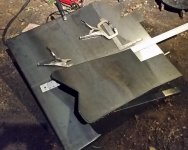
welding_table_tacking.jpg

I used it to tack my two parts together so I could then do a root weld without (hopefully) warping it. A friend put me onto this table when it first came out and told me how it was a knock off of a much more expensive table. I posted some details about it in the 'HF tools that don't suck thread' as I put it together http://www.tractorbynet.com/forums/...-tools-dont-suck-post4261730.html#post4261730

Here I'm filling in the grand canyon I made with the plasma so I could get some good welds/surface area. Once I fill that gash up this baby should be pretty stout!

filling_grand_canyon.jpg

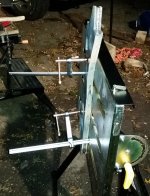
I like how I can tilt the table and cheat by not having to weld out of position:

table_tilt.jpg

My only regret is I didn't get one sooner. I got it for a pretty smoking price and liked it so much that I really did go back to the store and bought another one (the coupon has a limit of 7 ... so you can give them as Christmas gifts ... stocking stuffers!)
 
   / LS backhoe questions. please post pics of subframe mount. #54  
Re: HF Bling!

Thought I'd show of my new HF bling:

View attachment 443432

[snip]

I got it for a pretty smoking price and liked it so much that I really did go back to the store and bought another one (the coupon has a limit of 7 ... so you can give them as Christmas gifts ... stocking stuffers!)

Boy, is my wife going to be thrilled with hers! :)
 
   / LS backhoe questions. please post pics of subframe mount. #55  
Re: HF Bling!

Bought one of those for the woman this weekend. Great price with the coupon. She really loves a bargin
 
   / LS backhoe questions. please post pics of subframe mount.
  • Thread Starter
#56  
Re: HF Bling!

Bought one of those for the woman this weekend. Great price with the coupon. She really loves a bargin

I'm sure it will go great with her shoes! :)
 
   / LS backhoe questions. please post pics of subframe mount.
  • Thread Starter
#57  
4pt. Cradle tacked on

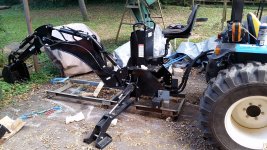
Today I fired up the backhoe and used the hydraulics to get it off the shipping crate/pallet:

backhoe_pallet.jpg

Next I got my 4 point cradle brackets tacked on:

4point_cradle_tacked.jpg

Next I'm going to cut out two big parts to go from the backhoe to the cradle pin holders and install the pins. After that it should be some bracing, final welding then paint!
 
   / LS backhoe questions. please post pics of subframe mount.
  • Thread Starter
#58  
Factory Backhoe height?

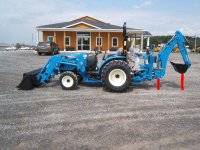
Could someone with the factory R3039 backhoe comment on the height off the ground at the two points I marked in red?

ls_factory_backhoe_height.jpg

These last parts I'm going to cut out tomorrow will determine the mounting height of the backhoe. I don't want to get it too high or too low.

Thanks!
 
   / LS backhoe questions. please post pics of subframe mount. #59  
Re: Factory Backhoe height?

Don't have an LS, but holdin' a thumb up and looking, it seems just fine. More clearance (departure angle), is more better for maneuvering, traversing gullies, and loading on a trailer - - while taking little away from max digging depth. As long as the stabilizers have adequate spread and remaining lift, it'd say good enough.

Wish I had that much clearance on my cab, where the hoe has an extension so there's room for an outside seat.
 
   / LS backhoe questions. please post pics of subframe mount.
  • Thread Starter
#60  
All major parts cut!

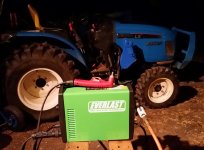
More plasma action tonight with my trusty PP50:
plasma.jpg

Cut out the side mounts for the backhoe. Next I have to locate the pins and weld them on. Here's one of the sides:
side_backhoe_mount.jpg

Pretty much used up all my plate I bought ... still a little skin on the bones so hopefully I have enough scrap left to make the final small parts:
skin_on_bones.jpg
 
 
Top