My Grapple Project (part 1)

   / My Grapple Project (part 1)
  • Thread Starter
#31  
WhiteRock,
Yes, that was my original plan. I must have looked at that photo a million times and just could not get the design to work. Here's my theory, there are alot of factors that come into play here. 1) The depth & height of your bucket. 2) the design of your arms in relationship to your bucket size. 3) The degree of rollback that Kubota's larger loaders have is either 40 or 45 degrees, that's alot of rollback. I feel the downfall of my "L" shaped arms was the fact that they extended too far out in front of my bucket therefore I had to mount the cylinder farther back to accommodate my opening that I wanted to achieve. It didn't work out or else I gave up to quickly /forums/images/graemlins/confused.gif.

Bill <font color="black"> </font>
 
   / My Grapple Project (part 1) #32  
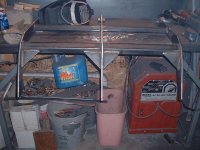
<font color="orange">I was so frustrated over the “L” shaped arm dilemma that I vented my frustrations by buying a Millermatic 251 mig welder . I feel a lot better now . Big Blue does a mighty fine job!!! (pic16)
</font>

I am glad you feel better I feel a little worse /forums/images/graemlins/frown.gif /forums/images/graemlins/smirk.gif
Looks great Bill, I do have a legit question though. PineRidge moved his center tooth on his bucket over to allow for tighter closing of his grapple, do you see this as a problem or are the new arms close to the plane of the bucket edge and not foreseen as a problem? Thanks Steven
 
   / My Grapple Project (part 1)
  • Thread Starter
#33  
Steven,
I adjusted the grapple via the clevis on the front of the cylinder. The adjustment allows me to keep my center arm
off the center tooth and saves me revamping the toothbar /forums/images/graemlins/wink.gif.

Bill
 
   / My Grapple Project (part 1) #34  
Bill looks to me like you are back on track again.

<font color="blue"> I adjusted the grapple via the clevis on the front of the cylinder. The adjustment allows me to keep my center arm
off the center tooth and saves me revamping the tooth-bar .
</font>

I thought about doing the same and I also thought about moving the lift arm off-center an inch or two but when I set in the saddle seeing the center lift arm off center would drive me batty. I opted for repositioning the center tooth on my tooth-bar as it only took about 45 minutes of additional time and all 3 lift arms close tight against the buckets edge.

Keep posting those pictures your project looks great!

I also have some left over New Holland blue paint I can send you for when the grapple is finished, you are getting close. /forums/images/graemlins/wink.gif
 
   / My Grapple Project (part 1)
  • Thread Starter
#35  
Part 4 - Moving right along

Good evening everyone. After attaching a few gussets to the bottom tube, it’s ready to be remounted. (pic 17)

Bill
 

Attachments

  • 628458-my grapple17.JPG
    628458-my grapple17.JPG
    56.9 KB · Views: 556
   / My Grapple Project (part 1)
  • Thread Starter
#36  
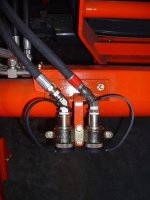
This is the mount I made for my front hydraulic outlets. I ran the hoses to my rear outlets for now and will no doubt buy a solenoid in the future and mount a button on my joystick like Pineridge & others have done. (Hydro pic )
 

Attachments

  • 628459-my grapple hydraulics1.JPG
    628459-my grapple hydraulics1.JPG
    32.1 KB · Views: 447
   / My Grapple Project (part 1)
  • Thread Starter
#37  
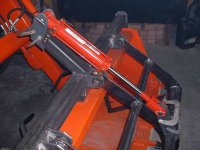
Time to finalize the cylinder mounts. Once in place, they were tacked, I mounted the 2 x 8 cylinder from TSC. (pic 18)
 

Attachments

  • 628460-my grapple18.JPG
    628460-my grapple18.JPG
    54.7 KB · Views: 509
   / My Grapple Project (part 1)
  • Thread Starter
#38  
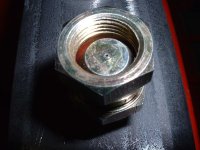
All remaining hydraulic plumbing was completed and a restrictor was added to slow down the cycle time. The restrictor has a 1/32” hole and was purchased at TSC. Just in case the hydraulic police are watching, these fittings are all high pressure compliant and are not the garden variety black pipe fittings. (pic restrictor)
 

Attachments

  • 628461-my grapple restrictor.JPG
    628461-my grapple restrictor.JPG
    52 KB · Views: 466
   / My Grapple Project (part 1)
  • Thread Starter
#39  
Part 4 - The moment of truth /forums/images/graemlins/shocked.gif /forums/images/graemlins/laugh.gif

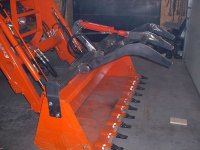
First test, grapple open, PASSED. It gave me an opening of 33” from the floor to the tip of the arm, more that enough to grab a log or pile of brush. If I can grab a log with that diameter, I probably won’t be able to lift it anyway. (pic grapple open)
 

Attachments

  • 628466-my grapple open.JPG
    628466-my grapple open.JPG
    52.5 KB · Views: 555
   / My Grapple Project (part 1)
  • Thread Starter
#40  
OK, it works. So I’ll check everything to make sure it’s welded, do alittle grinding and then it’s off to my paint room for a coat or two of NH blue. Yea right, it would make the ‘bota look like a high school mascot /forums/images/graemlins/wink.gif, blue & orange, no way /forums/images/graemlins/grin.gif.
I'll be posting the final photos on Saturday night. I must warn you, sunglasses will be needed to view them /forums/images/graemlins/grin.gif.

Bill
 

Tractor & Equipment Auctions

12 FLATBED W/ 300GAL WATER TANK (A50854)
12 FLATBED W/...
2025 Safety Basket Forklift Attachment (A50322)
2025 Safety Basket...
2012 GENIE S-60X MANLIFT (A50854)
2012 GENIE S-60X...
2016 GENIE GTH1056 TELESCOPIC FORKLIFT (A51242)
2016 GENIE GTH1056...
HONDA EB 5000X GENERATOR (A50854)
HONDA EB 5000X...
2020 KUBOTA RTV X1100C UTV (A51406)
2020 KUBOTA RTV...
 
Top