Mrs3RRL
Bronze Member
- Joined
- Apr 19, 2006
- Messages
- 63
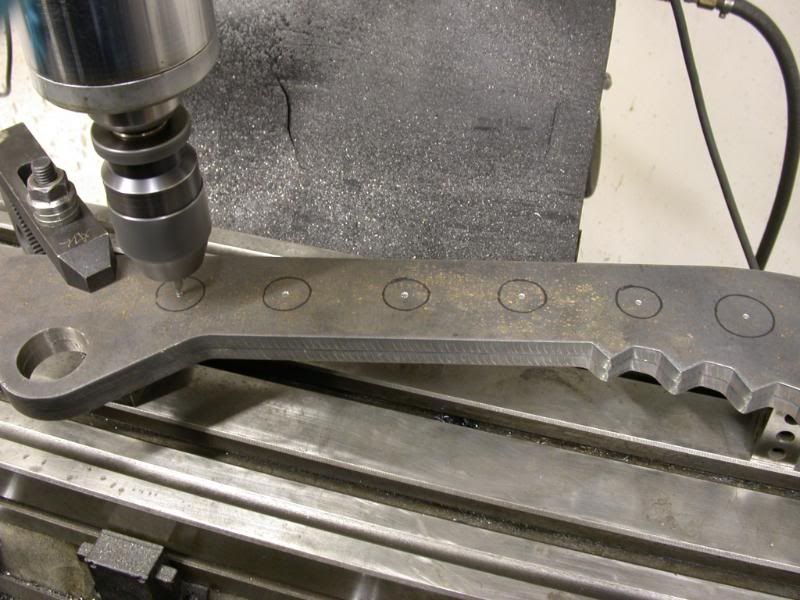
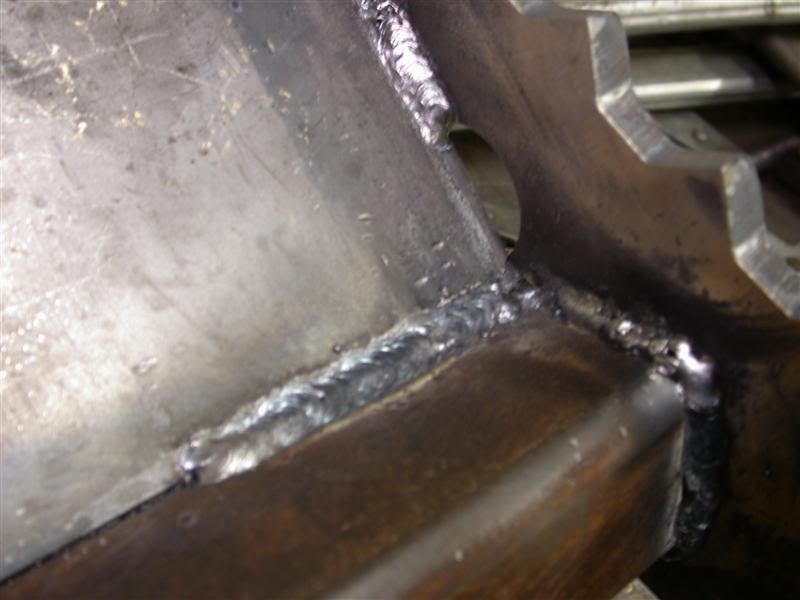
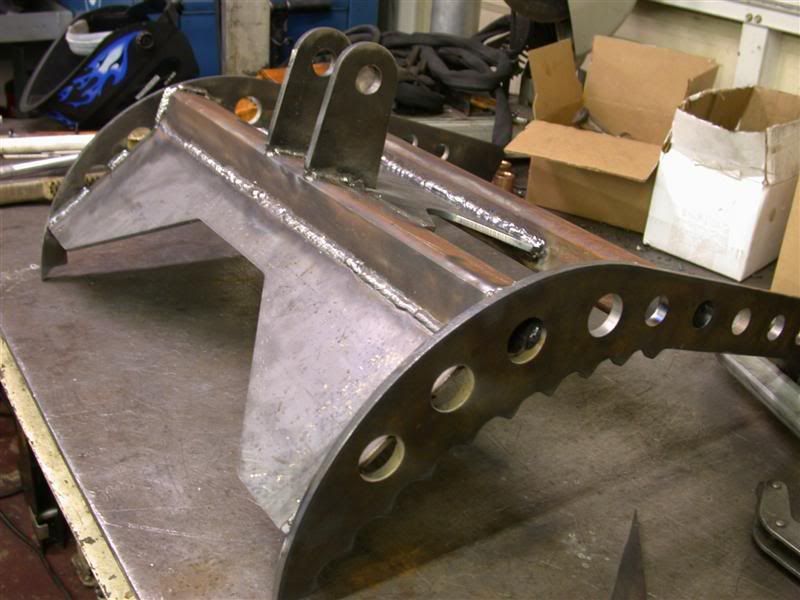
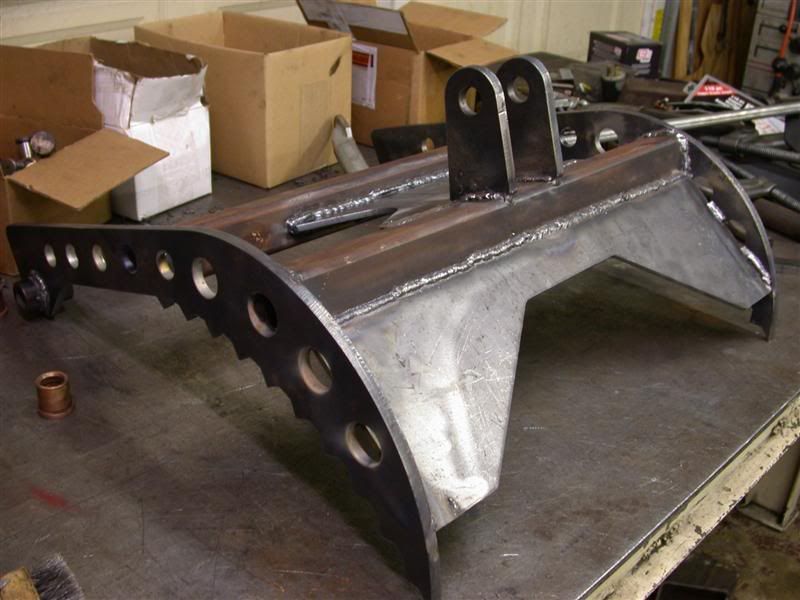
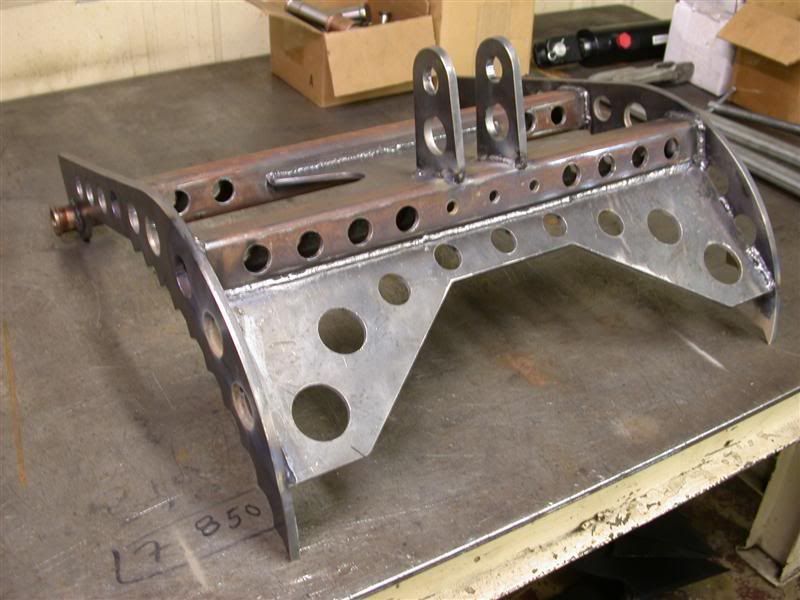
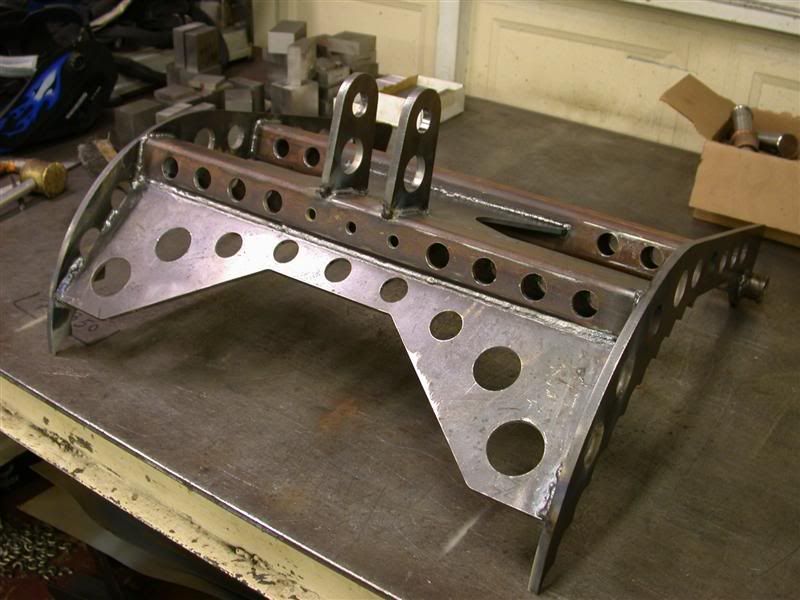
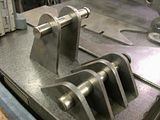
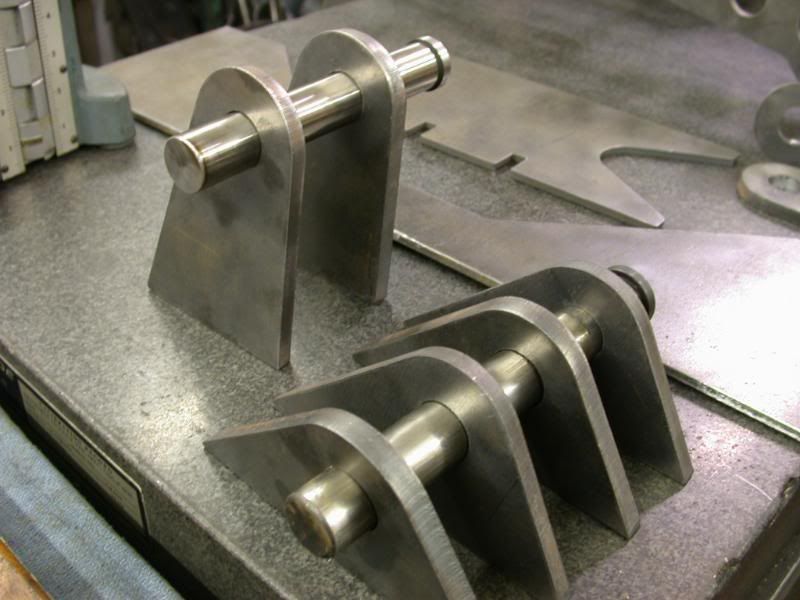
You may remember back in December last year when I started to build my very own grapples for Honey Bee. Rob had designed a very cool looking set of grapples for Larry and Ken and I wanted a set too. So Larry got them Plasma cut for me and sent them out. I was so excited to get them.
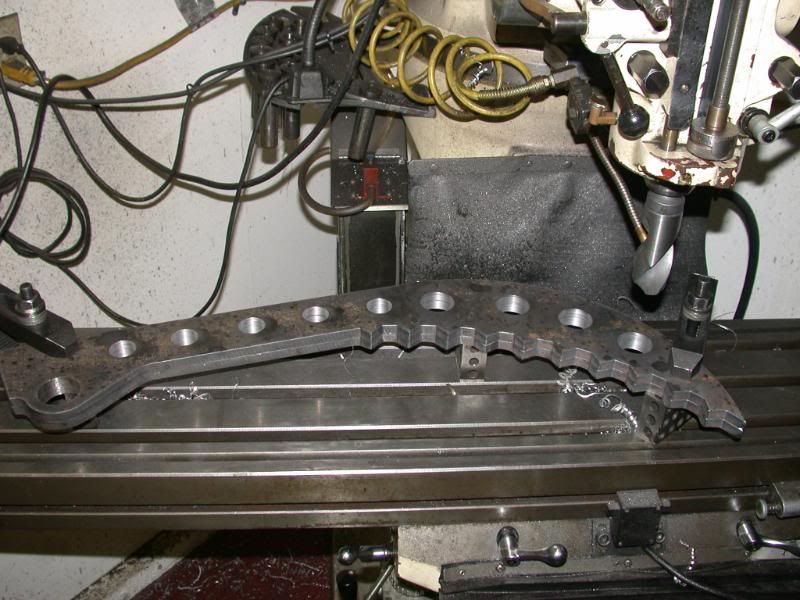
Look what he sent me. Aren't they beautiful?


I'll try to describe what I had to do to make them.
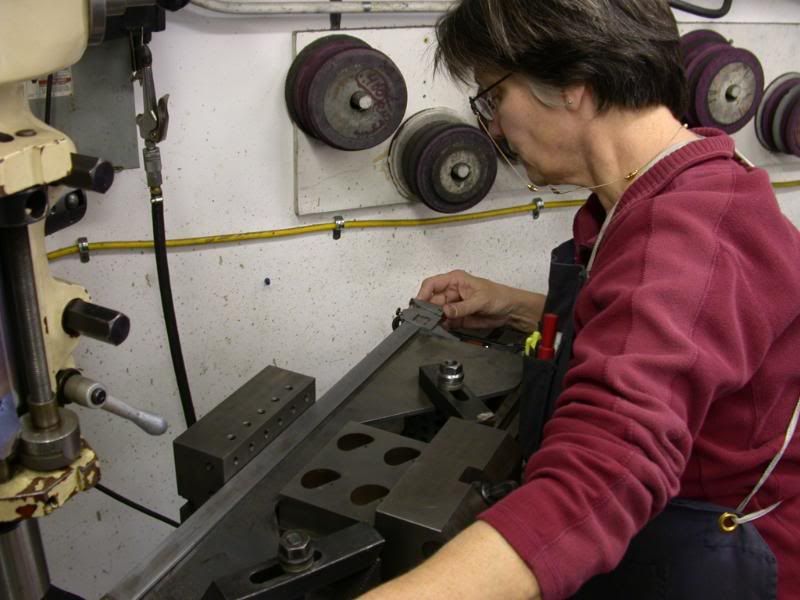
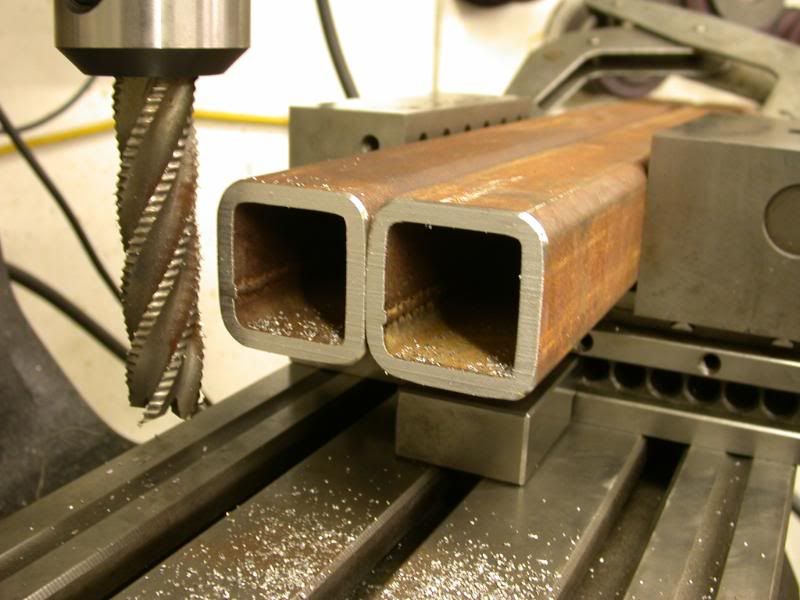
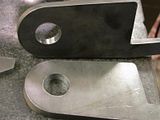
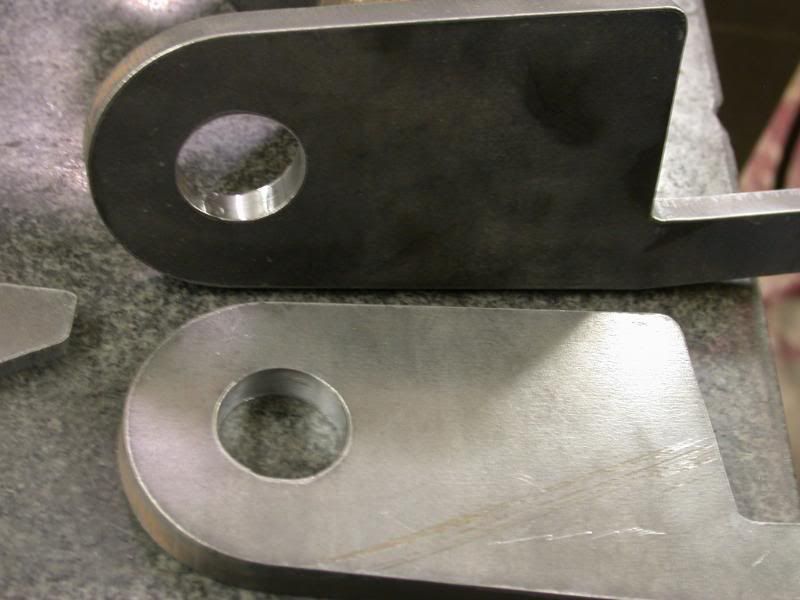
First, I had to open up the holes that were plasma cut, so they'd be 'perfect' (don't forget who I'm married to") ) Boy, now I know what Rob means when he says it takes longer to set up than it does to do the actual cutting.
) Boy, now I know what Rob means when he says it takes longer to set up than it does to do the actual cutting.
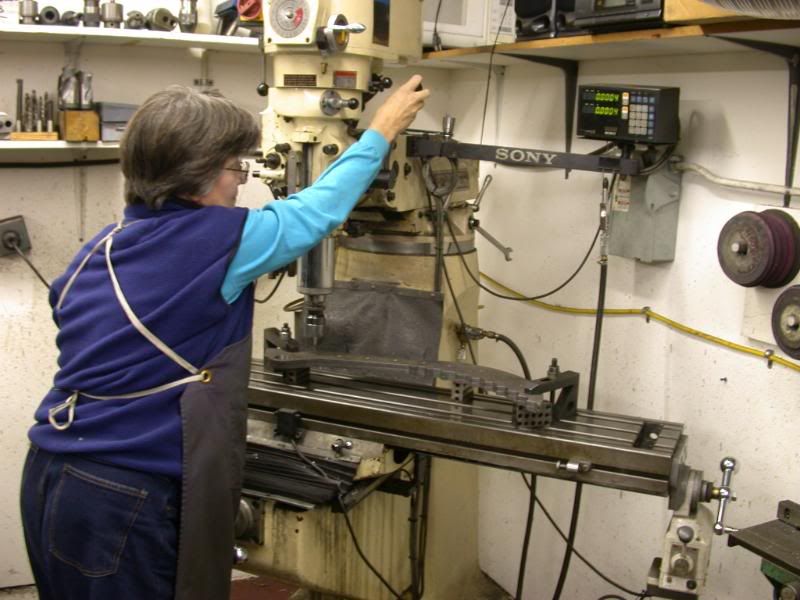
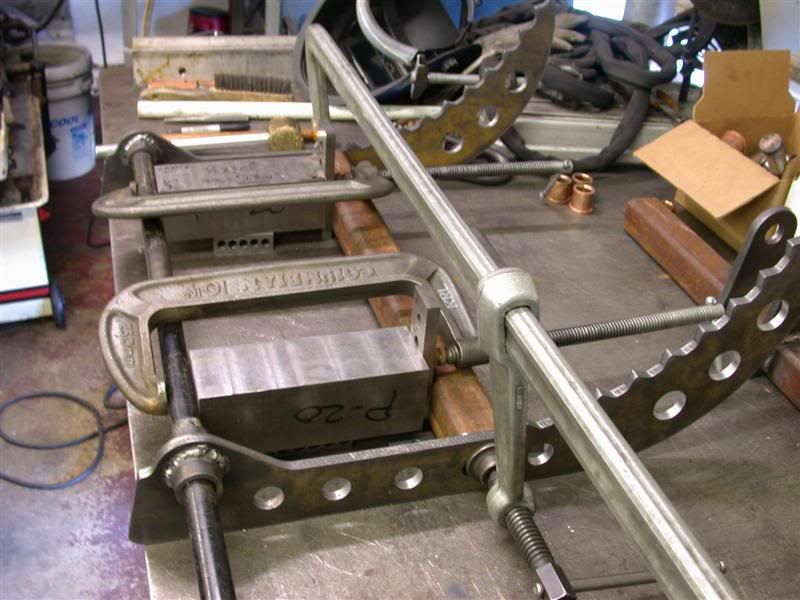
The first step was clamping the work down. I used 1-2-3 blocks to set the work up high enough that I wouldn't bore a hole through the table.
Since there were multiple pieces, I also had to make sure that the part that was going to be seated was perfectly even. I used a 'perfectly' squared up piece of steel for that.
Then I clamped it to the table, being careful to keep the clamps and the 1-2-3 blocks out of the way of the holes.
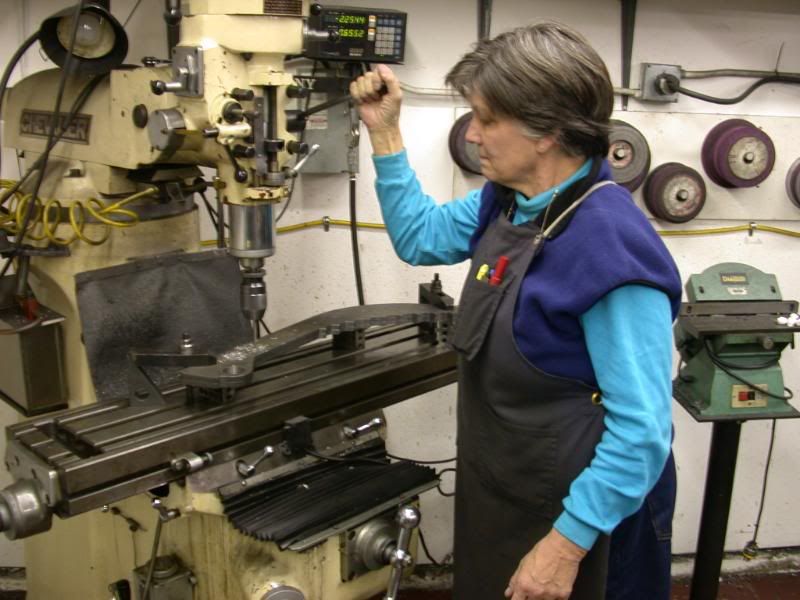
Then I had to indicate the work in. I clamped the indicator onto the spindle, and Rob showed me how to make sure the hole was perfectly centered (notice the continued use of the word 'perfect'... remember who I'm married to).
Boy, there sure are a lot of levers and dials to remember! I'd get one side on zero (or close to it), then spin it around to the other side, and move the table so the work was half-way between zero and whatever the dial said. Then, go back to the first side, and to it again. Once it was centered side-to-side, then do the same thing front-to-back.
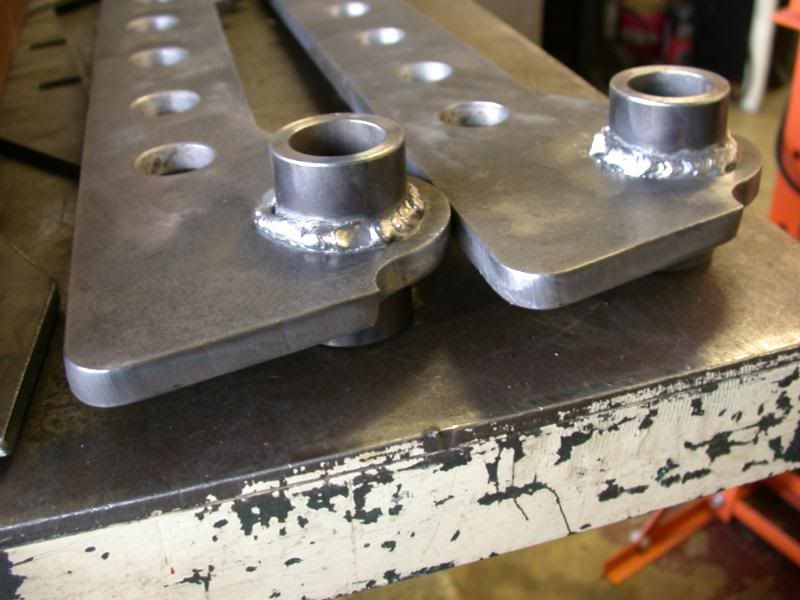
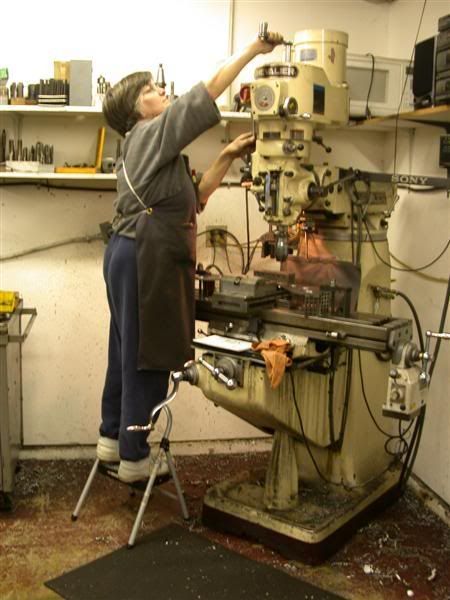
Since the holes had been plasma cut, they had a taper on the inside of the holes, and some gouges, so it was hard to indicate it in. But finally it was centered. Rob put the boring bit in, because I wasn't tall enough to reach the top of the mill.
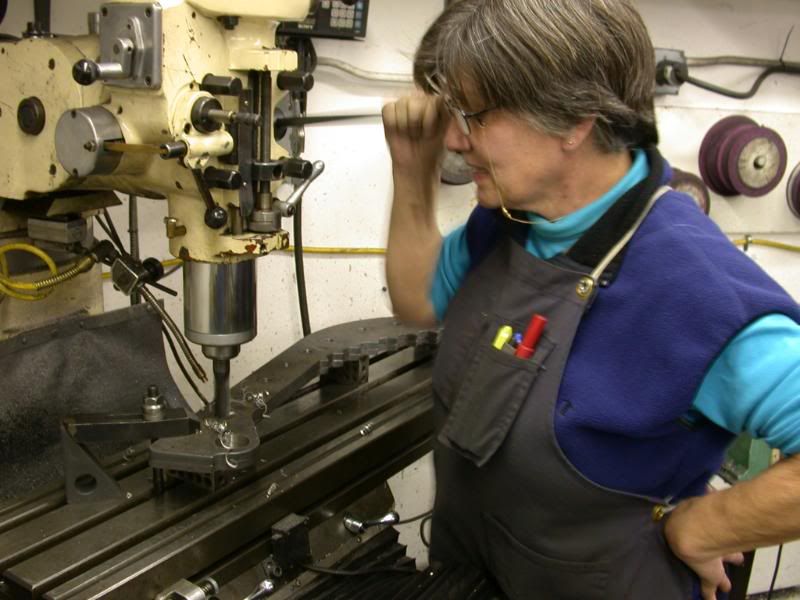
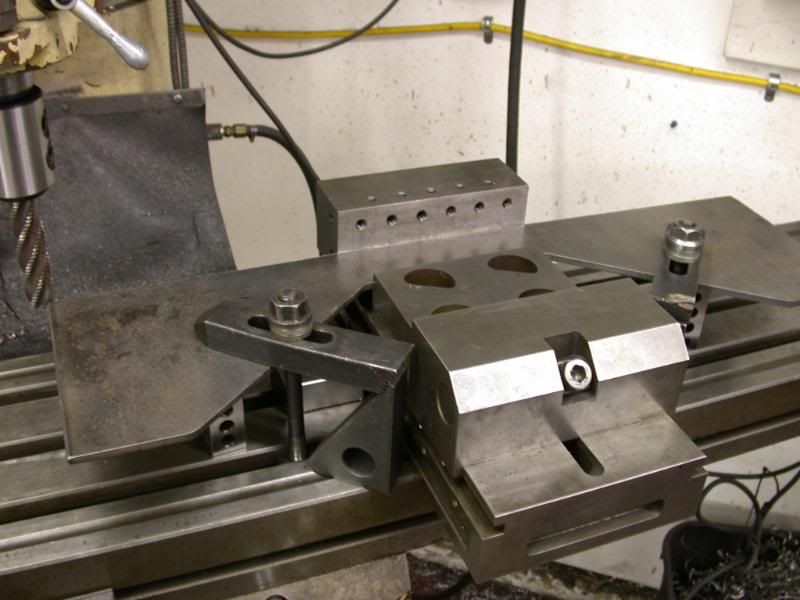
Then we had to make sure the bit was set to the right diameter. Rob did that part, and Rob showed me which direction to turn the 'on' switch. That was pretty weird, because you turn it a different direction, depending on whether it's on high or low. I still don't understand that part.
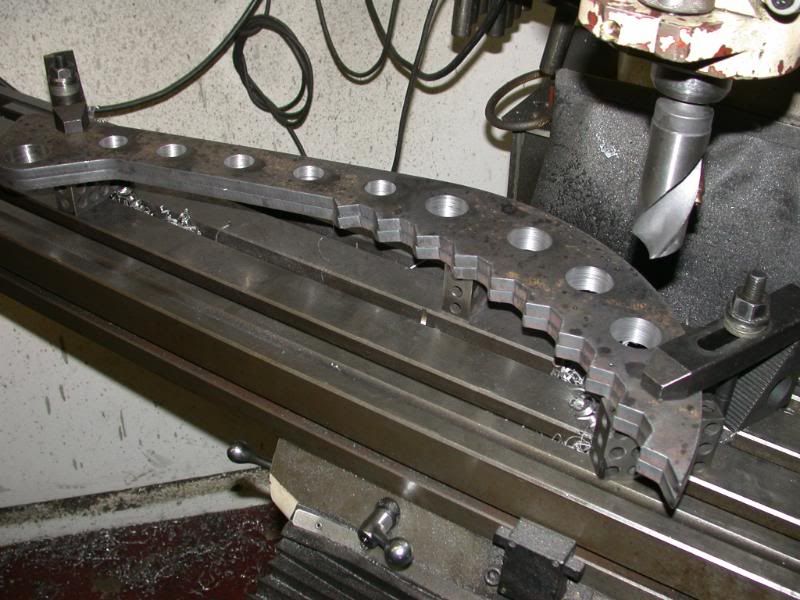
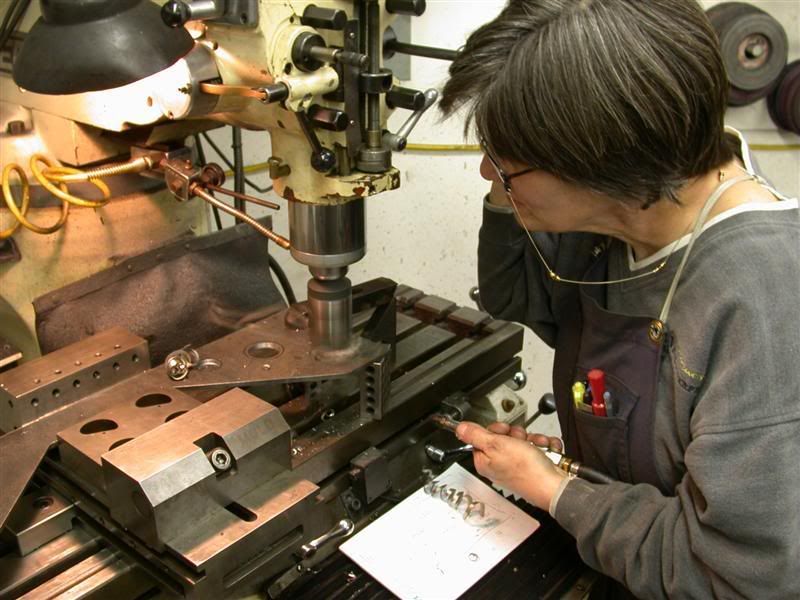
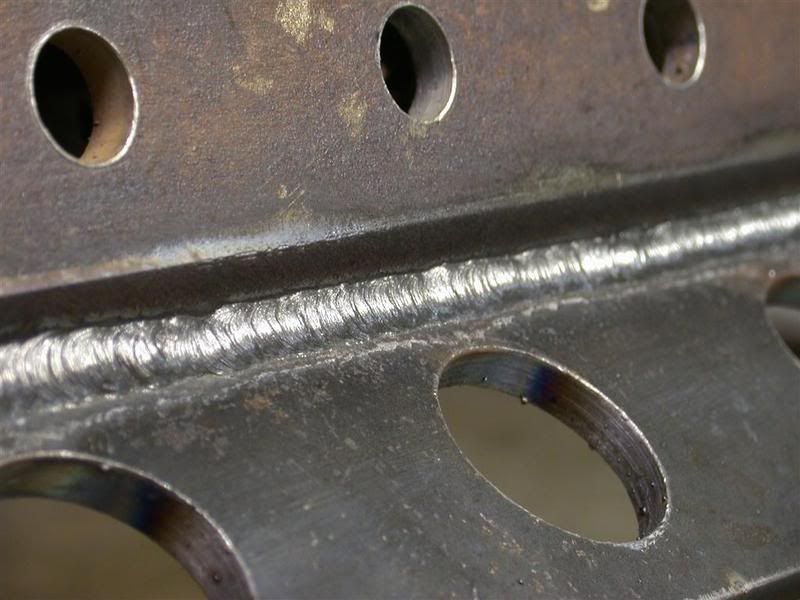
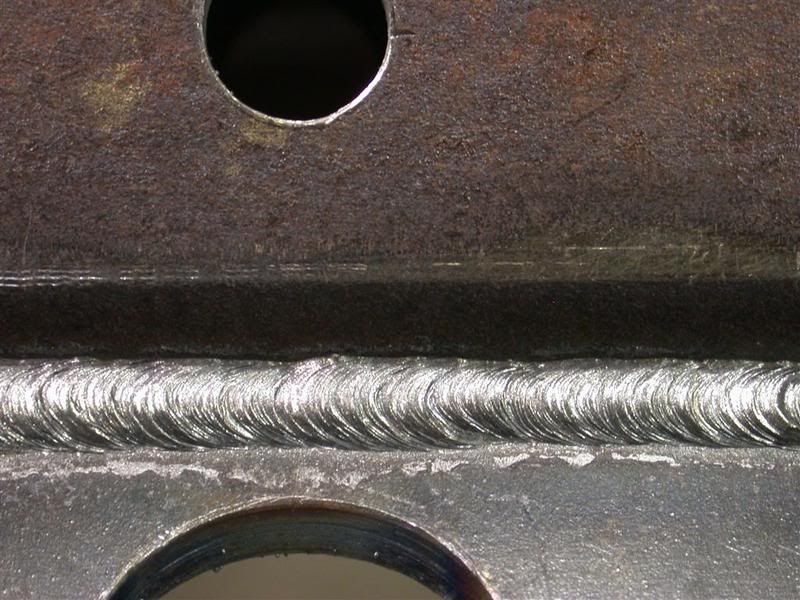
Then I lowered the bit almost down to the work, turned the machine on, and engaged the part that automatically lowers the boring bit (I forgot what that's called). Wow! That made it really shiny! It's not completely shiny all the way around, because the holes weren't really round in the first place..... but they sure look pretty!

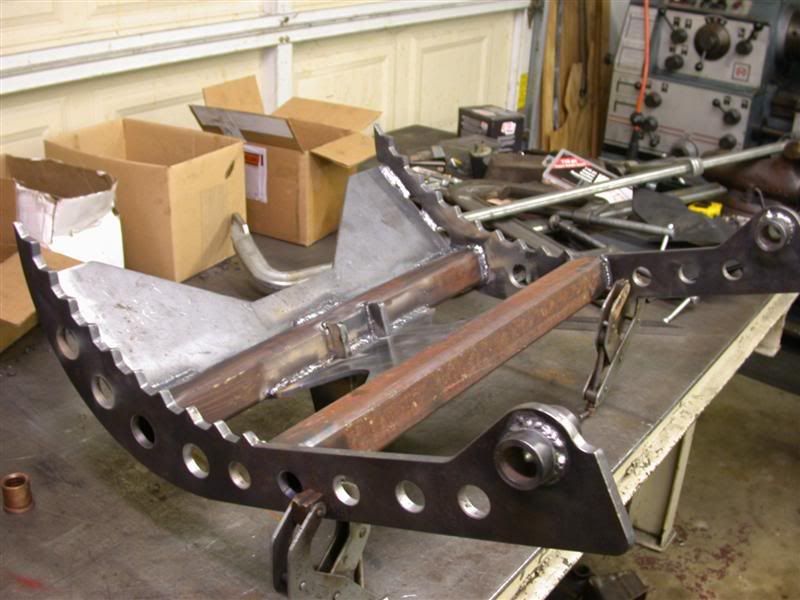
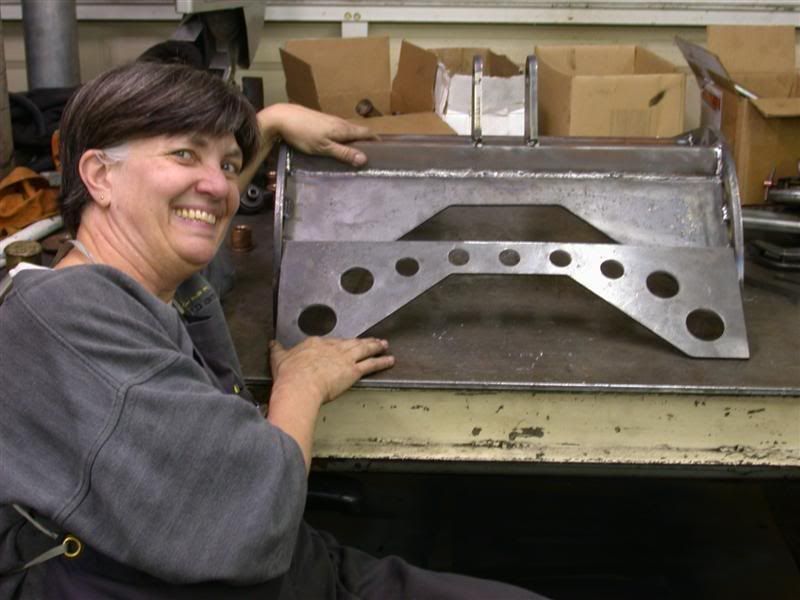
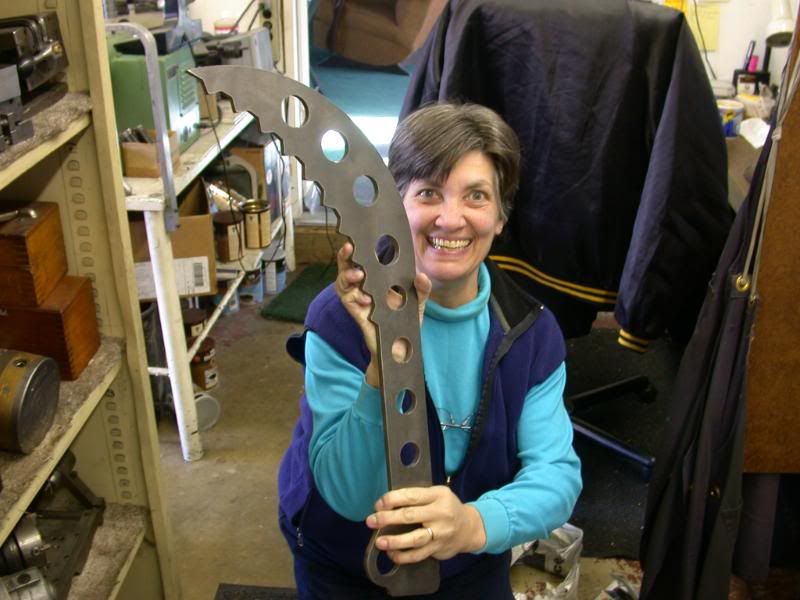
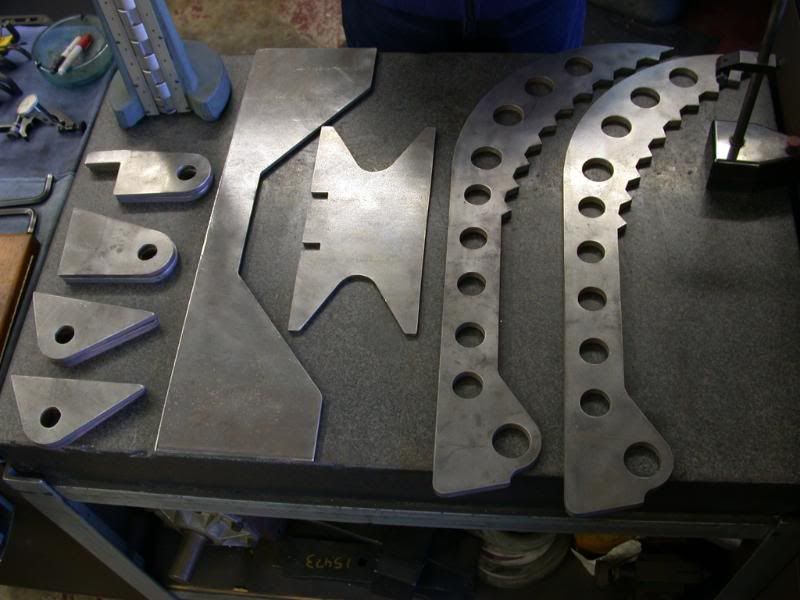
And I did most of it myself! I did the rest of the parts, too, and Rob took some pictures.
Look what he sent me. Aren't they beautiful?

I'll try to describe what I had to do to make them.
First, I had to open up the holes that were plasma cut, so they'd be 'perfect' (don't forget who I'm married to
) Boy, now I know what Rob means when he says it takes longer to set up than it does to do the actual cutting.The first step was clamping the work down. I used 1-2-3 blocks to set the work up high enough that I wouldn't bore a hole through the table.
Since there were multiple pieces, I also had to make sure that the part that was going to be seated was perfectly even. I used a 'perfectly' squared up piece of steel for that.
Then I clamped it to the table, being careful to keep the clamps and the 1-2-3 blocks out of the way of the holes.
Then I had to indicate the work in. I clamped the indicator onto the spindle, and Rob showed me how to make sure the hole was perfectly centered (notice the continued use of the word 'perfect'... remember who I'm married to).
Boy, there sure are a lot of levers and dials to remember! I'd get one side on zero (or close to it), then spin it around to the other side, and move the table so the work was half-way between zero and whatever the dial said. Then, go back to the first side, and to it again. Once it was centered side-to-side, then do the same thing front-to-back.
Since the holes had been plasma cut, they had a taper on the inside of the holes, and some gouges, so it was hard to indicate it in. But finally it was centered. Rob put the boring bit in, because I wasn't tall enough to reach the top of the mill.
Then we had to make sure the bit was set to the right diameter. Rob did that part, and Rob showed me which direction to turn the 'on' switch. That was pretty weird, because you turn it a different direction, depending on whether it's on high or low. I still don't understand that part.
Then I lowered the bit almost down to the work, turned the machine on, and engaged the part that automatically lowers the boring bit (I forgot what that's called). Wow! That made it really shiny! It's not completely shiny all the way around, because the holes weren't really round in the first place..... but they sure look pretty!

And I did most of it myself! I did the rest of the parts, too, and Rob took some pictures.