My very own grapples!

   / My very own grapples! #11  
Rob could always get his own dishwasher in the shop. Heck, he's already got a microwave behind the mill...
 
   / My very own grapples! #12  
Oh ok,
LOL ... I see it's "trash Rob Day" now. :D
Loretta, those are not "training wheels" dear, they are gauge wheels.:mad: :confused::( Very serious stuff. Shees.
Now I see why you guys don't let your wives post.
 
   / My very own grapples! #13  
Mrs3RRL said:
(hmm.. maybe THAT's why my dishwasher has suddenly quit working):eek:

Does this mean we can look forward to a new thread about 'the new and improved hydraulically controlled dishwasher'. :D Knowing Rob's 'Incredible Talent' (there, I redeemed myself :eek: ), I forsee a minature set of grapple arms loading the new and improved dishwasher. :)

Don
 
   / My very own grapples! #14  
Loretta,

Your workmanship is exceptional!!! Do you guys realize there is a huge market out there for grapples that's barely being tapped? Come up with a solid design with easy to follow instructions, and 3RRL Grapples should be the next great impliment company.

What did you use for the bushings? I looks like a thick walled pipe. Could it be a heavy duty DOM tubing?

Thanks,
Eddie
 
   / My very own grapples! #15  
Well Tom, Defective and Don, :) :D :)
I know you guys are having fun with me. hahaha ... a thread on how to cook a turkey dinner... behind the mill in a microwave or a hydraulic dishwasher. Jeez.

Hi Eddie,
I thought she did pretty good too! You see the guys get a kick out of it. I think they're waiting for her to check MY work now.:confused:
The first set of grapples you saw (made for Ken) have DOM tubing, but Loretta's (the last photos) have hardened shoulder bushings in them. I have several boxes with old leader pins and bushings from plastic injection molds. When I do a P&M (prevention and maintenance) on the molds, I replace them but keep the old ones for projects like this.

Here is a photo of some spares. Also a shot of Loretta's grapples with the bushings welded in.


New they are very close tolerance (.001" clearance max) and some I replace are still very good. They align the two halves of the mold so the mating surfaces can match up. They have a very thin coating of Lamina, a bronze alloy for wear and lubricity. Some of the older ones can get worn down to where there is over .001" clearance ... maybe two or three thousands or more. Those make great pins and bushings for our home made projects since they are hardened and work fine for non critical pivots like these grapple pivots.
 
   / My very own grapples! #16  
While on the subject, do you want to see some boring details what is involved in making the pins so they can be greased? I thought so.:)

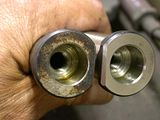
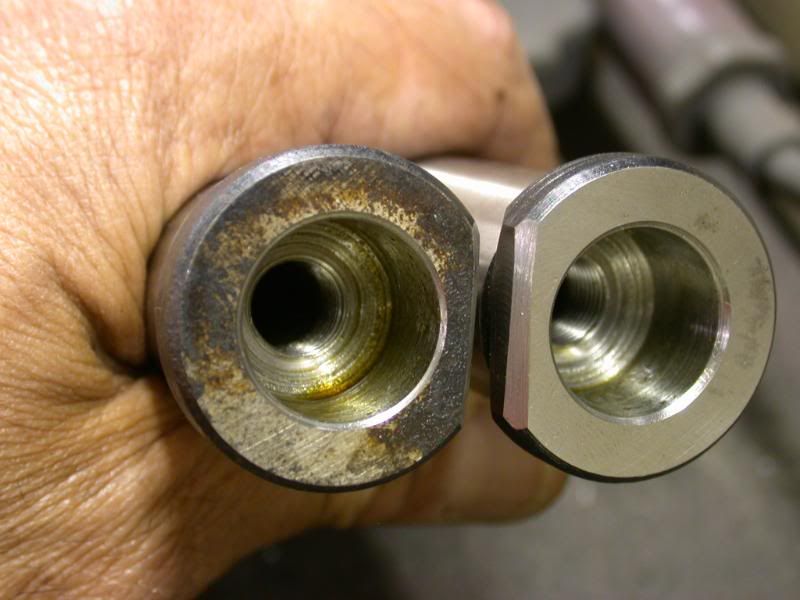
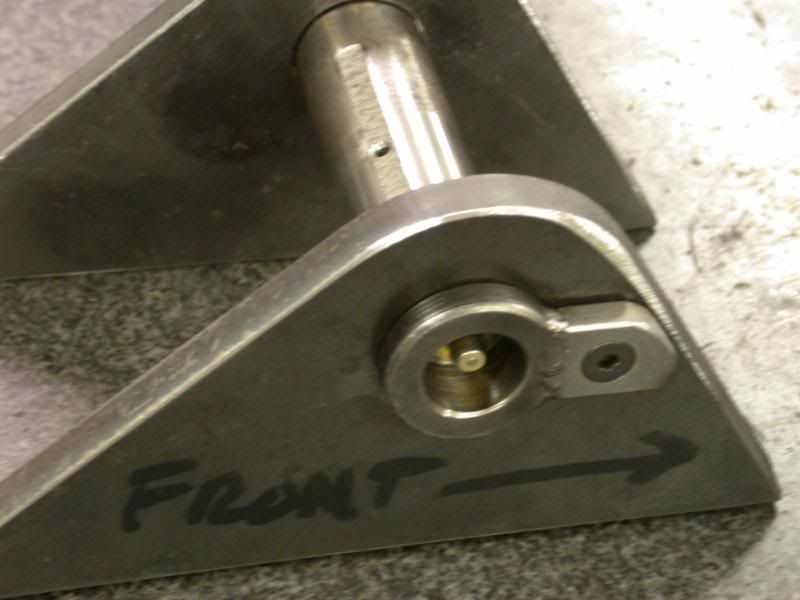
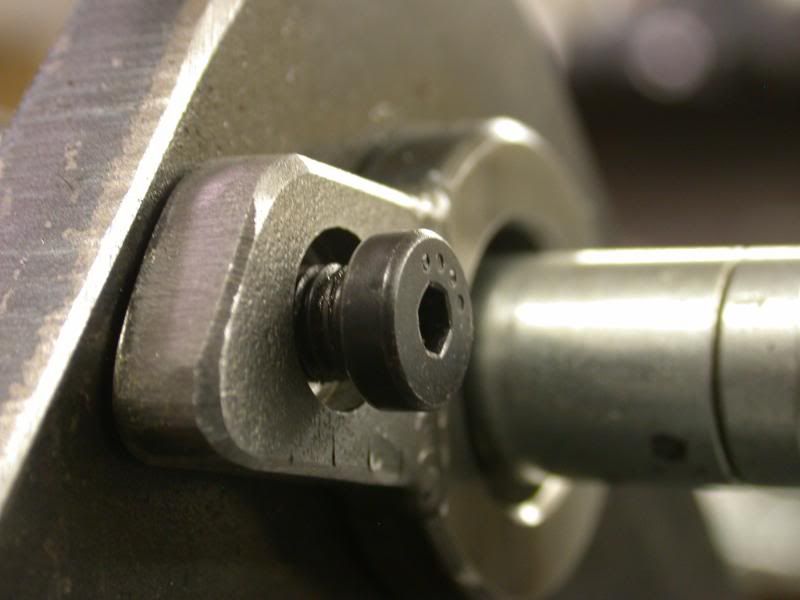
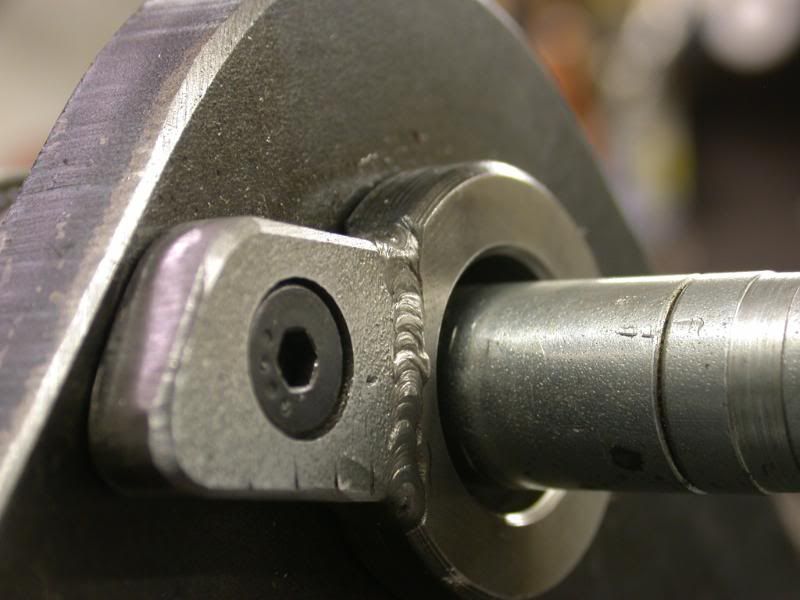
It takes a little work, but the way I make them allows the Zerk fitting to sit below the surface in a protective pocket to reduce the chance of it getting snapped off. It also gets the grease right between the pin and the bushing. Overkill? Well, whatever floats your boat, right?:)

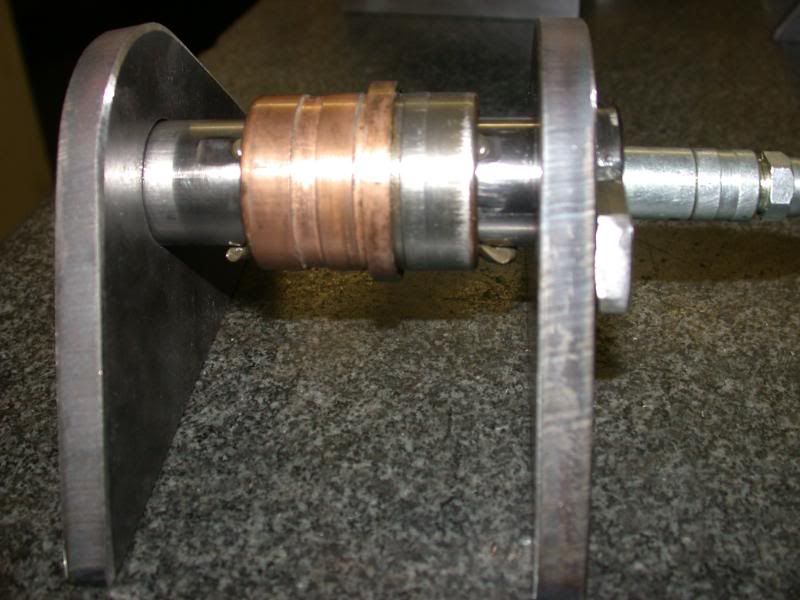
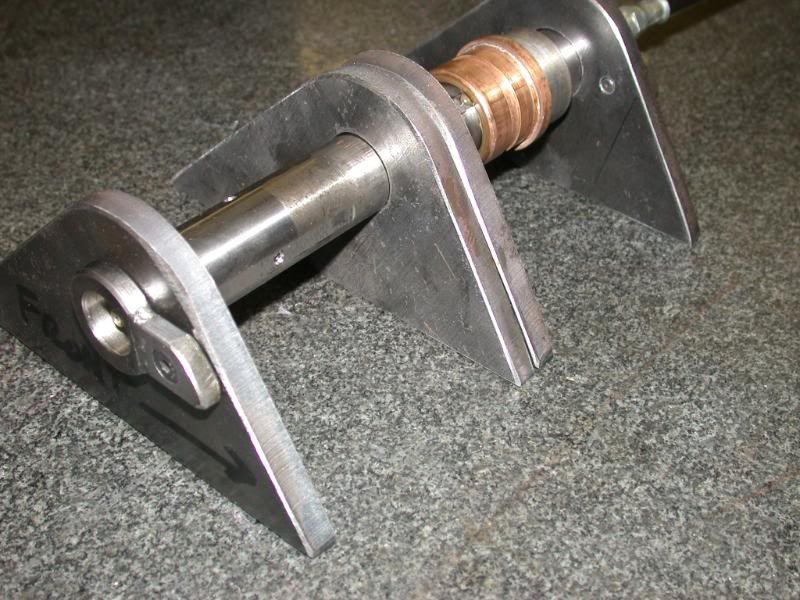
Here is the process in detail.
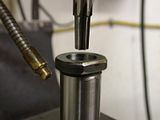
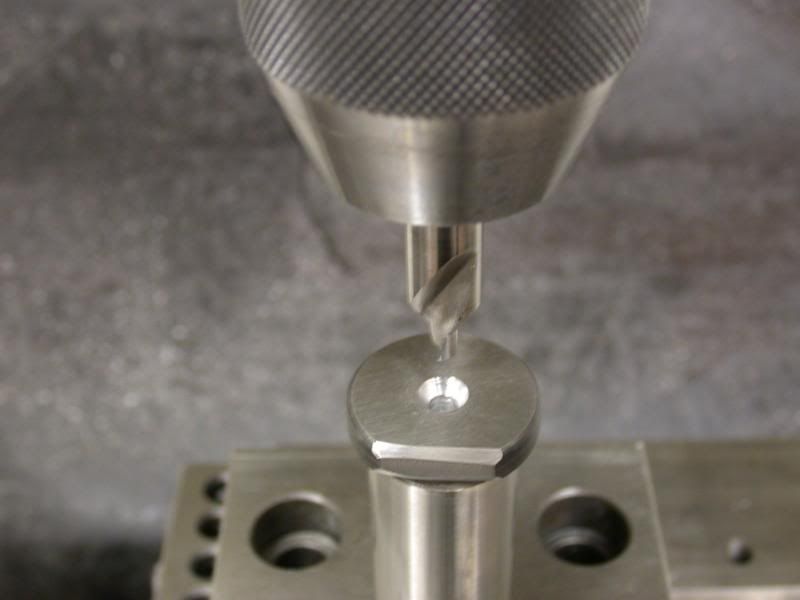
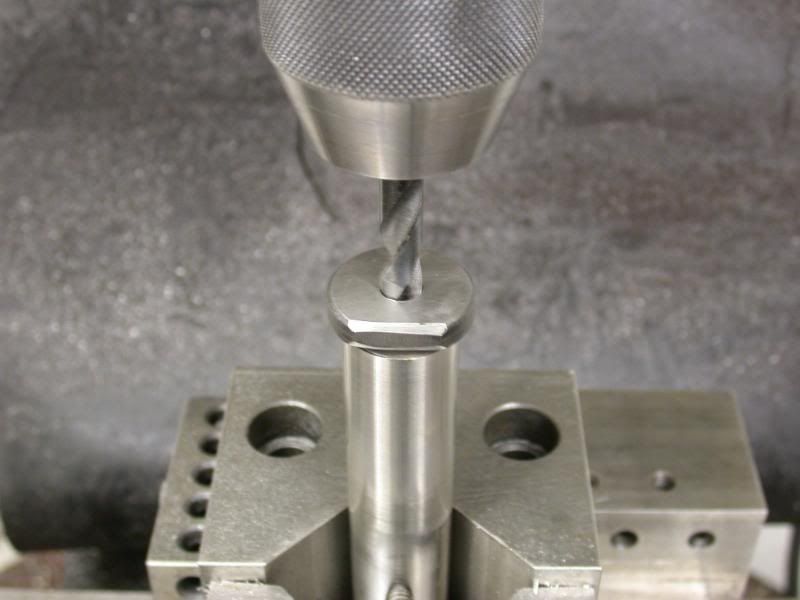
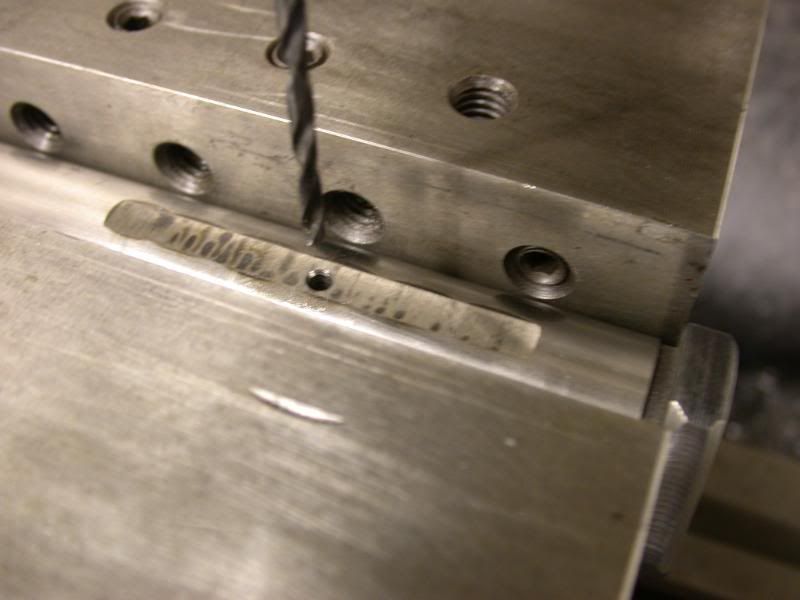
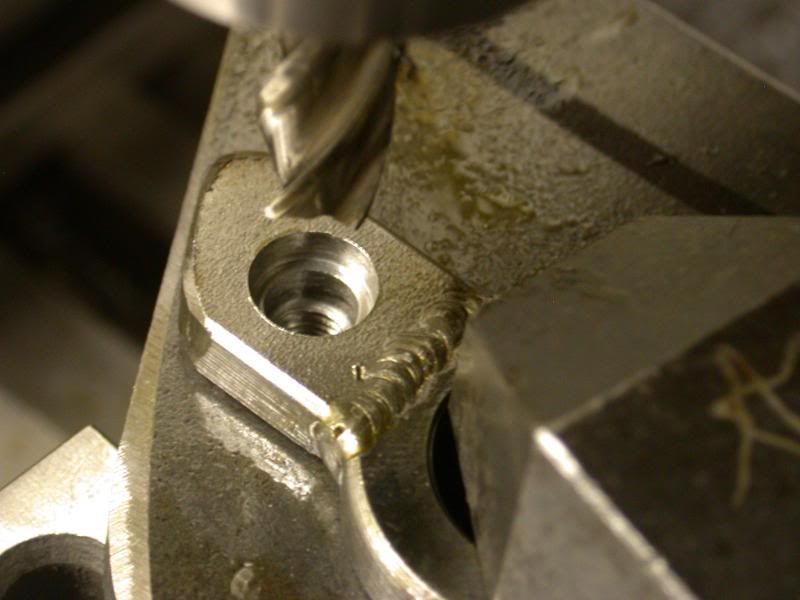
I set up the pin in a "V" block in the mill and centerdrill, drill and counterbore. The drill is the tap drill for a 1/8NPT-27 thread, which is what the Zerk fitting thread is.


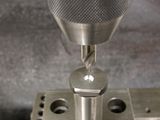
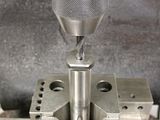
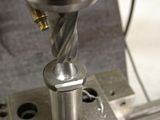
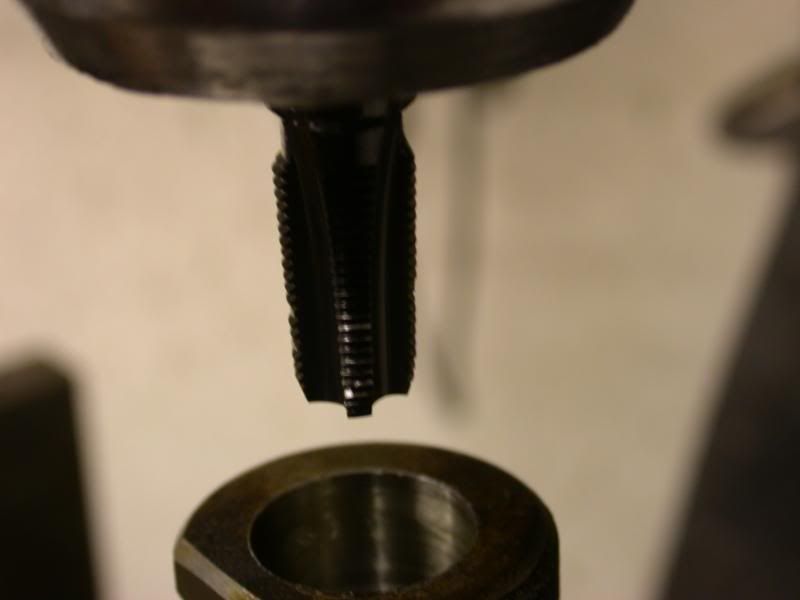
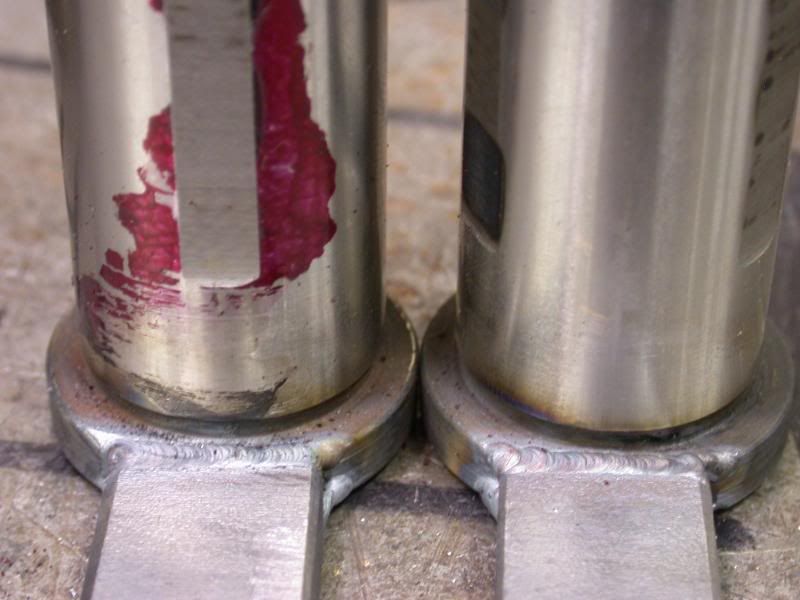
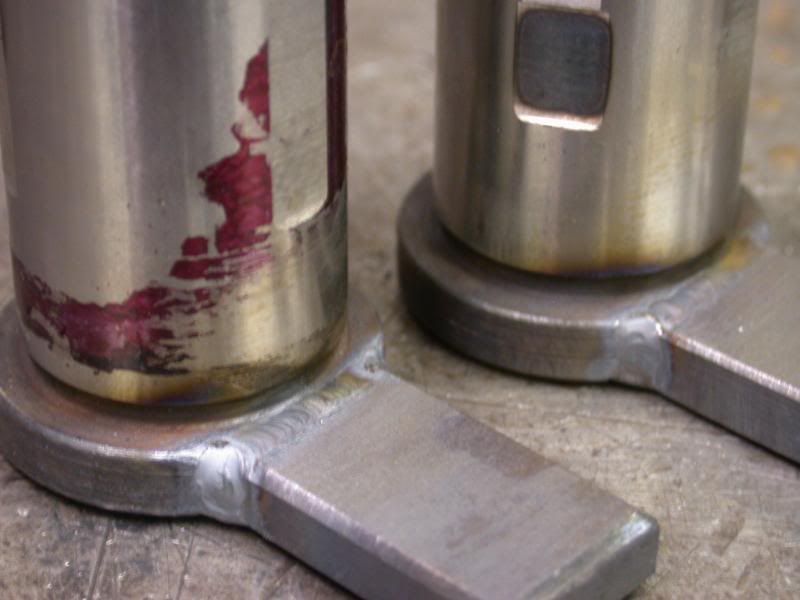
Those pins are case hardened, so once you get through the hardened surface, the center is soft enough (about 36RC) to cut and drill with high speed. But be careful when tapping with tapered threads. In order to reduce the chance of breaking a pipe tap, I use a pipe reamer first, then tap for about 7-8 threads engagement. So that's what the end looks like. Ready for the Zerk fitting.
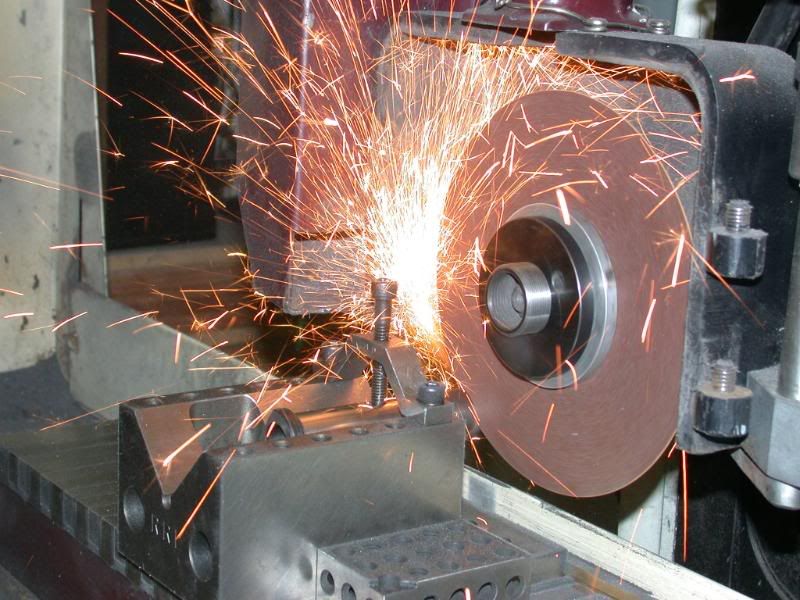
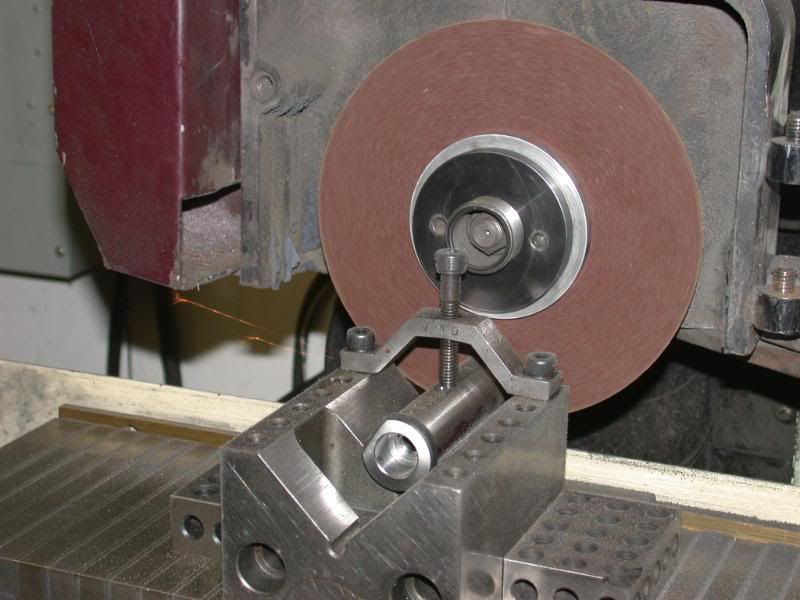
A chamfer makes for nice finished touch.

 
   / My very own grapples! #17  
After getting the ends complete, I grind 3 flats lengthways on the diameter of the pin, equally spaced 120 degrees apart. They are the length ... about 1/4" shorter than the length of the bushing in Loretta's grapples. Then I drill holes connecting into the center hole. This will allow the grease to flow from the middle of the pin through the 3 holes and onto the flats ... thus lubricating the inside of the bushing perfectly.


After that, I cut the pins to length in the surface grinder using an abrasive cut-off wheel that is only 1/32" thick. It slices the 1" diameter pins like butter.

 
   / My very own grapples! #18  
You saw the flat on the shoulder of pin.
That is so I can weld a tab to it. The tab will be used to secure the pin to the pivot brackets, so the pins don't spin. This forces the bushing only to rotate or pivot over the pin. It's a common way to fasten pins. You can also see the grease flats on the pin.


Then I set the pins into the mill again and drill, tap and counterbore for a low head socket screw. The screw will be protected also, sitting completely inside it's counterbore. Here is what the pin looks like fastened to the bracket. You can see the Zerk fitting installed and also protected. Then some close ups of the low head socket screw and the grease nozzle on the Zerk nipple.
Everything fits pretty good.

 
   / My very own grapples! #19  
So if you are still awake, here's the final result.
I put a test bushing over the pin and greased it. I chose a bushing shorter than the ones in Loretta's grapple so you could see the grease coming out of the 3 flats. Her bushings are longer and will overlap the ends of those flats by 1/8" per side. That way it kind of traps the grease inside the bushing with not too much squirting out the ends. It also forces the grease to work it's way all around the diameter.


That last photo also shows the inside of the bracket. Notice that the screw does not go past the inside surface.
I will take all that stuff to camp and weld those brackets to a plate, or sections of a 1/2" plate which will be the platform for her grapple pivots. The plate will then be attached to her top bucket lip. I'll take some photos up there of how to fit the grapple jaws to the bucket properly for final mounting.
 
   / My very own grapples! #20  
Rob,
It is always fascinating to watch how put such precision into everything that you do. The result is a clean elegance. for example, I noticed that the retaining tabs are angled on the end to match the angle of the bracket. I would have eye-balled the angle and cut it with a 4.5 inch grinder and cut off wheel and rounded the edges with a flap disk. You probably measured the angle, set it up in your surface grinder to take the slice off and then milled the round corners. Mine would be functional (maybe), but yours is a work of art!


That grapple has so many lightening holes that if you paint it yellow like the tractor it is going to look like Swiss cheese!!:cool:

Mike
 

Tractor & Equipment Auctions

2025 AllMetal K3325 UNUSED Double Garage Metal She (A47484)
2025 AllMetal...
2022 Chevrolet Tahoe FL SUV (A44572)
2022 Chevrolet...
2025 Wolverine TCR-12-48H Trencher Attachment (A47484)
2025 Wolverine...
Mini Excavator Auger Attachment with 2 Bits (A45336)
Mini Excavator...
Water Buffalo Roller (A47484)
Water Buffalo...
Heavy-Duty 4-Wheel Rolling Warehouse Cart  74in x 32in (A44789)
Heavy-Duty 4-Wheel...
 
Top