Lo and behold the tractor finally arrived today. I will try to get some more pics later but these are what I took when she was being offloaded. I spent all afternoon in the seat using both the loader and backhoe. The dealer threw in a set of rubber feet for the backhoe which seem to be a little more stout than the standard feet which they gave to me in a box. The backhoe was a beast having no problem with these Florida roots. The loader will take some learning to get the bucket full each time. The only problem I had today was I didn't put on sunscreen so my neck is red.....no pun intended:laughing: Probably won't use the mower till this weekend so will have to wait for that experience.
View attachment 318039View attachment 318040View attachment 318041View attachment 318042
A couple of first impressions. I like the roominess of the seating area. I also really like the placement of the joystick for the loader. The HST is the bomb as I had driven a gear shift of my friends and it was no fun when using the loader. The placement of the reverse peddle caused me to hit something else which I am really not sure what it was yet (loader joystick lock?). I was also looking for a 4th gear as high just seemed slower than expected.
The sales rep showed me how to take off the backhoe. He also said i needed to mount at least 1 of the 3pt arms to raise and lower the MMM which i wasn't quite sure why. Anyone know if this must be done? Also, getting on the 3pt arm was a bit of a challenge as we had to remove a locking bolt. Then we used a crowbar to get the rod that the 3 pt arm mounts to, to move to one side. Is this typical and is there anything I can do to loosen this rod up? I will post more experiences along with pics later.
Paul
I also have the rubber BH stabilizers for pavement, I like them and use them even in the dirt as they have a wider footprint. I also made the dealer give me the steel stabilizers as I paid for them so I wanted them. I also made them give me the standard seat base as again I paid for it I want it, the BH packages comes with a 2nd swivel seat base. Don't worry about the reverse pedal, I was pretty annoyed with it at first but now I don't even think about it and it seems quite natural, give it a few hours operation. I have yet to even try high, I'm in medium for most things but for getting a good full FEL bucket of dirt try low I find that's better. I also have a tooth bar for my FEL bucket and it helped a lot with FEL digging and brush bashing.
YES you must use the left 3 pt arm to raise/lower the mid mount mower deck. Go to the back of the tractor, look just above the left side of the 3 pt hitch shaft you had to pry with a crow bar, see that 'J' shaped orange hunk of steel, that's part of the mid mount mower deck assembly, the left 3 pt arm arm fits under that and as the arm raises and lowers it raises and lowers the mower deck. Do not try to turn the mower deck height adjustment knob unless you have the left 3 pt arm installed and the deck raised up. Here's why. The mower deck height adjustment knob is connected to a vertical shaft, if you crawl under the left side of the tractor you will see a cogged cylinder attached to the bottom of that deck height adjustment knob shaft. The deck rests on that so if you don't lift the deck to take the load off that the knob will be very difficult to impossible to turn, you are apt to break the plastic knob. First raise the mower deck to take the load off that cogged cylinder, then you can easily turn the deck height adjustment knob to the desired mower deck height then you lower the mower deck back down onto that cogged cylinder.
You CAN leave the mower deck attached and still use the backhoe. What you do is raise the deck all the way up, turn the mower deck height knob to the highest setting, then lower down. You can now remove the left 3 pt arm and the deck will stay locked in the up position. You can then re-install the BH if you want. I have found for FEL and BH work its easier to remove the mower deck to be honest as you get a lot more ground clearance that way.
Speaking of the mower deck, trying to follow the instructions for removing wow it is WAY more complicated in the instructions than it needs to be. You can tell an engineer wrote the instructions. Just adjust the mower deck anti-scalp wheels to a high setting so the deck is no more than 3" off the ground. Lower the deck all the way down, unlock the deck at the front, remove the two pins at the rear, release the PTO drive line and that's it. If you use the little ramps to drive off/on I recommend putting a piece of carpet under the ramps as they will dig/scrape/damage a concrete driveway.
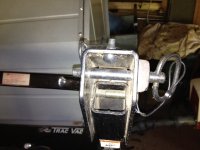
Yes prying that 3 pt shaft left then right to get the arms on/off is a pain. For some reason if it doesn't have a zirk fitting the dealers don't grease it that's part of the problem. I recommend greasing that 3 pt shaft, the 3 pt arms heck every pin and everything a pin inserts into as this makes installing/removing implements a lot easier. Also when you have the implement off, for example when the BH is off test the pins in the holes they should fit fairly loose. Some have reported goops of paint that makes getting the BH on/off a real pain so test the fit of the pins and if it seems tight under no load scrape out the excess paint and grease until the pins insert easily.
Keep an eye on the retaining pin for the BH thumb pin, working in brush that pin has been pulled out by the brush 3 times now, the brush is catching on that wire cable that's supposed to keep you from losing the retaining pin. I'm about to take my wire cutters to that. They have the same safety wire cable on the retaining pins for the ROPS I'm about to cut the cable off those also as its annoying.
The stabilizer controls on the BH vibrate and make a lot of noise. So do the ROPS pins. Without a load so do the retaining bolts in the FEL just fair warning if you get hearing something buzzing and rattling.
To safely get on/off the BH leave the pin with the long handle in so the BH can't swing left/right and crush you. That's why it has a long handle so you can pull the pin once you are seated. Use the foot pad on the left side of the BH to climb up on there, grab the ROPS with your left hand and the main BH cylinder with your right hand. I have found I have to push the right BH control (right when seated on the BH facing rear) forward out of my way to climb up in there, this will move the bucket out a few inches no big deal. Lower the RPM to around 1800 this will slow down the BH so its not jerking around while you get used to it. I have found it to be fine and just leave it at 1800, saves fuel and the BH is just as strong at 1800 as it is at 3000 rpm just not as fast and you may not be able to make combination moves at 1800 but I'm finding it works fine and saves quite a bit of fuel.
Okay there's a brain dump.