New Garage/Barn, hole to roof

   / New Garage/Barn, hole to roof #61  
It looks likethat is an 11 ft opening, looks as though the roof rafters are 2 ft on center and there is 5 and a half spaces between posts. The rule of thumb here is 1 inch of header for every ft of span triple beam with plywood like eddie said. Now i live in maine so we have snow loads to deal with but that was just for comparison sake. also never joints in between posts lots of work but i owuld have them pull the beam and replace. just my 2 cents worth
 
   / New Garage/Barn, hole to roof
  • Thread Starter
#62  
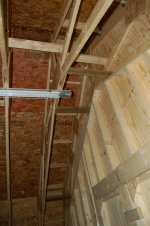
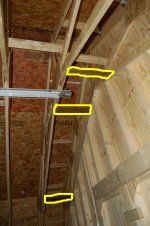
Well, they agreed about the beam and brought the material to fix it. Haven't done it yet though. They're going to replace that part of the beam, and move the joints onto the tops of the posts. Went out last night and did some more work and nitpicking that's sure to thrill the contractor. I added some blocking between the end wall rafters and the next rafter. Since the end rafter face is even with the back of the siding, the wall studs go up to the bottom of the rafter. Since the studs don't go all the way to the roof sheathing, it acts somewhat like a hinge along the bottom of the truss, allowing too much wall flexibility for my taste. Adding the bracing tightened it up quite a bit, but I'm going to add more just because. I drove back out every nail that was supposed to be holding the t-111 up that either missed the board it was supposed to go into or wasn't anywhere near anything. Now the outside looks like a pincushion. I also marked each place that a t-111 seam is unsupported, so they can make support boards. They came out and put another layer of t-111 on the dormer sides, covering the flashing and put up the majority of the trim. It weathered our last couple of rain/ice/snow storms with no leakage, so I'm happy. Due to the shed roof being on the north side of the structure, it gets little sunlight and snow/ice builds up pretty badly; after one of our big storms (big for out here, not new york big) the snow had built up to the bottoms of the rear facing dormer window's glass. I may end up having to put some heating tapes on the back roof to avoid that kind of buildup.
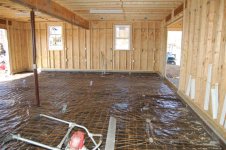
Last weekend I got the floor ready for concrete, ended up having to take probably 2-3 yards of gravel out to get the concrete thickness to an even 4". We laid down 6mil plastic on that, and 6x6 remesh, in addition to 3' rebar drilled into the footings every 2 or 3 feet to tie everything together. My uncle's a master stonemason, so he's helping and supervising the pour and preparations. Concrete goes in this friday. The electrician is making great headway on his end. I'll take pics this afternoon, but the long and short of it is that I'm not going to be hurting for power or light anywhere. Also good or bad depending on your point of view, the electrician is doing the work in exchange for my dirtbike, so no great cash outlay. He's covering everything but lights and permits. That said, my current plan has the downstairs having 20 4' double tube T8 fixtures; 8 per side for area lighting, and 4 over the workbench. 3 150w halogen fixtures tucked in the eaves above the doors on the front, two flood fixtures per end wall in the mid peaks, and one flood fixture on motion sensor in the peak of each end. The shed roof will have one 65w flourescent (300w comparative) streetlight style light over the rear door as a work light, and a couple of barn lights along the length for general area lighting. Upstairs will have a single strip of T12 flourescents running down the length, since that's what I had laying around. Eventually when the money fairy visits again I'll add some more of the T8 fixtures up there. Everything is being run on 12-2 unless it specifically calls for larger. There will be a 50a plug by each shop door (the 9' doors) for the big welders, and a 20a 110v circuit with a single duplex outlet on the lolly column for my little welder. The bench wall will have two 20a circuits with two rows of outlets every 6' or so, one at 2' and one at 4'. This should put one row above and one below my workbench tops. Used to only have them above the workbench, but that leads to lots of spilled beer and such when the cords get dragged across the bench top. There will be 2 outside outlets per end wall, and three running along the shed wall @4' high, which will be just above a shelf I plan to install there to rest battery chargers and whatnot on. Under the stairs will be a 12-3 or 10-3 wire that will be wired up for 110 for now, with the third leg taped off. This will be dedicated on it's own breaker for my air compressor. If I ever get a bigger one or a 220v model, it'll be ready for it. My current compressor is a single stage oilless model, which is another way of saying louder than the hounds of ****. Short of putting it outside, under the stairs is as far away as I can get it and still have it be protected so I'll build it a small enclosure and just run the air line back to where I'm using it. Outlets upstairs will be much less shop-oriented, as that is still just going to be storage.
 
   / New Garage/Barn, hole to roof
  • Thread Starter
#63  
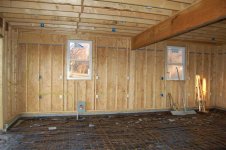
First pic shows the bench wall and it's rows of outlets. The panel will be installed at the left end.
Second pic shows the back door and the floor prep.
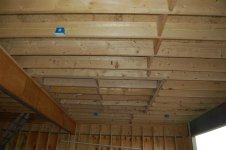
Third pic shows the boxes installed in the downstairs ceiling for the shop lights. The box in the middle is for the eventual garage door opener.
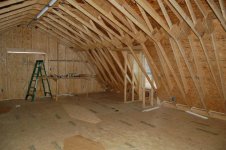
Fourth pic is the upstairs light strip and the boxes for outlets there.
Fifth pic shows the blocking I installed to firm up the end walls, sixth shows the blocking I put in hilited.
 

Attachments

  • benchwall.jpg
    benchwall.jpg
    79.7 KB · Views: 281
  • backdoorfloor.jpg
    backdoorfloor.jpg
    85.7 KB · Views: 257
  • downstairslightplugs.jpg
    downstairslightplugs.jpg
    55.2 KB · Views: 240
  • upstairslightsandboxes.jpg
    upstairslightsandboxes.jpg
    78.1 KB · Views: 248
  • blockingunhilited.jpg
    blockingunhilited.jpg
    71.4 KB · Views: 246
  • blocking.JPG
    blocking.JPG
    74.3 KB · Views: 257
   / New Garage/Barn, hole to roof
  • Thread Starter
#64  
Concrete is in. It was a fiasco, but went as well as you could hope for given the circumstances. To recap, my uncle is a stonemason, and a **** good one at that. He was the supervisor and brains fo the operation, I and two of my teenage mentor kids were laborers. The contractor ordered the concrete and set up the delivery time. We previously leveled, graded, compacted, and prepared the site. Went with 3500psi mix with fibermesh, rebar into the frost wall every 3-4 feet, and 6" remesh, with a 6mil plastic liner underneath.
First fiasco, concrete truck didn't come till 1045. Next, he came with 7 yards?!?!? He said he could fit 8 in that truck, but the contractor only ordered 14 yards so they're sending two 7 yard trucks. I'm sorry, did you say 14 yards? That ain't gonna cut it. Call to the contractor, he said yup, 14 yards should do it. I said no it ain't. He said if I run short, call him and he'll send another truck. Yay. Anyhow, we start wheelbarrowing it to the back. My uncle works on the edges and directs me and one of the kids on where to dump the crete. The other teen is pulling and leveling the crete, and lifting the mesh as needed. The garage is 28' deep, the chute on the truck is 12' long so we have to wheelbarrow the back half in. We specced 1% accelerant in the first load, and 2% in the second truck so hopefully it'd all cure at roughly the same time. We got half the garage done with the first truck, and went to the second. Repeat of the same, and lo! we are a yard short. FWIW, my uncle, who does this for a living, said he would absolutely never have tried this with 14 yards. He'd have gone for 15 minimum and probably 16. Well, rather than deal with the contractor, the driver calls for another truck with one yard. We heave and pitch to get a nice line in the setting concrete and leave the big apron for the last truck. It arrives, and it's almost entirely rock. Just what you want to try to finish the last bit with. We (we meaning my uncle) get it smoothed and looking nice anyhow. He brought with him a power screed with a 10' bar, which is absolutely a must have for something like this. He used it to set grade lines (we put rebar pegs at height across the floor, and had 1/2"x4" expansion joint at finished height around the perimeter) and then put me on the screed. I just had to keep the edges level with his marks, and he moved the concrete back and forth behind me so the screed only had to move a little material. Once that was all done, he put a rougher finish on the aprons and let it set for a while. This was about 10pm. Then he got his 4' power trowel and commenced to smoothing and leveling, and did the entire floor about once an hour till 1:30am when we called it a day. Most of the floor had set enough by that point that it took a nice finish, but the first section that we wheeled in hadn't so it's just going to have to have a rougher finish. He was hesitant to use any water on the surface to make it prettier, as it also makes it weaker and he knows how I'm going to abuse the floor. This morning, we took a saw with a diamond blade and cut 1" deep slits across the apron breaks, and across the center of the floor to divide it into 4 equal sections. After much cleanup, he hopped back in his truck for the 5 hour drive home so he can get to work again on sunday. Holy crap, what a guy! I did some more cleanup, then started to apply the sealant we bought. First I used a roller, which was somewhat like trying to paint a car with a brush. It looked like crap no matter what I did. So then I went to get my garden sprayer, only to find that it was half full of frozen 2-4-d. I thawed that out and decided which part of the yard doesn't need plants and dumped it out, then filled the sprayer with the sealant. Pumped it up, pulled the trigger, nothing. Ended up having to entirely disassemble the spray wand and clean/lubricate/adjust the whole dang thing to make it work, then I got to fight the cheap plastic nozzle that is apparently designed to put the product anywhere but directly where the wand is pointing, and certainly in any manner other than that of an even, steady application. It was kind of like a power washer with a flex hose on the end instead of a solid wand. I ended up just drilling the thing out and keeping the drill in my pocket for tuneups as I went. As it sits (literally) the sealant is drying and I'm taking a break, then a nap. I have pics of the whole shebang, but won't be able to put them up till I get back to work monday at the latest.
 
   / New Garage/Barn, hole to roof
  • Thread Starter
#66  
But wait! There's more! I just went out to look at it, and there were a couple of low spots in the floor that the sealant congealed in. Ended up going back in there with a broom and a hose and scrubbing/sweeping/washing the stuff off. Now I have to wait till tomorrow to find out whether or not I'm going to have to pressure wash the crap up. I don't know if the sealant had gone bad, didn't like the temperature, or what but it had a much higher solids content than I expected (yes I mixed the stuff as well as I could) and the puddles had a definite skin going on. yay.
 
   / New Garage/Barn, hole to roof #67  
Don't know much about the qualities of sealants, but I remember when I sealed my shop floor I had the option of applying it to the "green" cement or waiting 30 days. I don't remember the specifics of why, but I did wait 30 days before sealing. I rolled mine on and I do recall it was like rolling on water it was so thin. The shop is 24x40 and I used a 5 gallon container of the stuff and was able to get 2 coats out of it. That was 13 years ago and the floor still looks good.
 
   / New Garage/Barn, hole to roof
  • Thread Starter
#68  
The stuff I used is specifically supposed to be put on the concrete while it's still fresh, not so much to seal the outside stuff out but to seal the water in that it needs to cure. It is supposed to cover 200 square feet per gallon, I used 5 gallons. Supposed to go on milky white then dry clear. I'm guessing the stuff I got was old, as it said on the bottle it had a shelf life of 8 months and I can't believe this is the popular time to be curing cement.
 
   / New Garage/Barn, hole to roof
  • Thread Starter
#69  
First pic shows the prep for the concrete. You can also see the plethora (Latin for 'seventeen') of outlets on the shop wall.
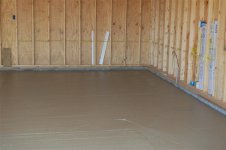
Second pic shows the other half of the floor prepped, and also shows the power screed.
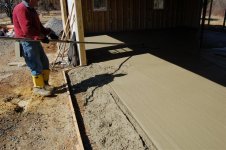
Third pic shows us wheeling the concrete for the back half (fourth, really)
Fourth shows the finish left after one pass with the power screed. Whatever they cost, it's a deal.
Fifth shows where we were once the second truck left, empty. This is when the waiting game for the last yard started.
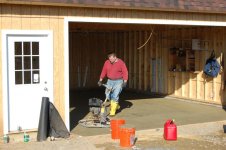
Last pic shows my uncle running the power trowel.

The electrician came today and ran some more lines, told me he's in for over $1K in materials so far. I also installed all the lights for the downstairs area, and we jimmied a cord on the wires that feed the area lights so I could light them up and see what it looks like. If it's not enough light, I can see an easy place to add 6 more without breaking the pattern I have going. For what it's worth, it's a tick over 1000 watts of flourescent lighting, not including the lights over the workbench.
 

Attachments

  • floorprepped.jpg
    floorprepped.jpg
    96.7 KB · Views: 244
  • powerscreed.jpg
    powerscreed.jpg
    105.3 KB · Views: 212
  • wheelingbackhalf.jpg
    wheelingbackhalf.jpg
    98 KB · Views: 218
  • afterscreeding.jpg
    afterscreeding.jpg
    51.3 KB · Views: 217
  • 14yards.jpg
    14yards.jpg
    90.7 KB · Views: 242
  • powertrowel.jpg
    powertrowel.jpg
    71.9 KB · Views: 245
   / New Garage/Barn, hole to roof
  • Thread Starter
#70  
Well, the doors are in and they look nice. Unfortunately, where we ran out of crete the floor slumped, and the big door doesn't seal well so I'm going to have to add some self-leveling concrete to bring the level up there. I also redid the lights, going from 16 to 23; 3 rows of 6 and one row of 5 (the stairs are in the way of that last one) Much better now, and while they're all switched they each also have pull chains so I can shut some off if the light gets too intense.
 

Tractor & Equipment Auctions

2000 Isuzu NPR-HD Landscape Truck, VIN # 4KLC4B1R9YJ802689 (A51572)
2000 Isuzu NPR-HD...
2010 Ford Edge SE SUV (A51694)
2010 Ford Edge SE...
2018 WACKER NEUSON RTSC3 ROLLER (A52576)
2018 WACKER NEUSON...
378491 (A51572)
378491 (A51572)
TMA (A49461)
TMA (A49461)
2015 Jeep Compass SUV (A50324)
2015 Jeep Compass...
 
Top