New ym240d owner

   / New ym240d owner
  • Thread Starter
#31  
You guys are on the same track I am.
Currently it appears they welded 1/2” plate on the bottom
Of the stock draw bar bracket. That location seems to have some solid structure and I like that there is a ton of structure to support fore and aft movement.
I would like to utilize that bracket. Then build up another section that lands the pins near the stock location, although further outboard of the differential from stock.
Utilizing the pto cover area is a good idea as that will slow for good vertical bracing.
I feel like this contraption might be a little overbuilt once it’s all done, but it will utilize the entire back side and under side of the differential for support rather than just one case base.


On another note, I found some fenders and a foot throttle. Shipping from Wisconsin. :D
Also, ordered all shift forks and gaskets for the shift tower so I can get that issue resolved.

Yesterday I ran the machine for a solid hours or so and found it’s got a decent amount of blow by once it’s hot. Also has a slight oil leak out of the oil pressure sensor. No big deal.
I also think I am going to mount 3 buzzers under the dash. One for each of the warning lights.
I found it very difficult to see the lights in direct sunlight. I’d be more comfortable with an audible alert as well. And it shouldn’t take away from the nearly factory function of the machine as it sits.

I appreciate all the input from the forum on this machine.


Good idea.

Here's a picture of something similar that might give some ideas. Its the bolted-on 3-point mount that is original on (smaller) YM186D. This particular one has been welded to the drawbar mount as well as bolted to the transmission housing. For the more powerful YM240, additional bracing from the ends of that rod back to the transmission housing might be needed. The main point here is that everything hinges in the same plane.


158327d1268421940-gear-chain-driven-p1530518rym186d-pto-jpg

It looks like it would be simpler to start from scratch on the design to get the lower arm pins in the right spot.
You might consider bolting it to the rear housing using bolts around the PTO housing and shield area. While redesigning this you might also do something in the way of a drawbar. The greater support you can provide should reduce the potential for housing damage by spreading the force over greater surface.
Good luck with your redesign.
 
   / New ym240d owner
  • Thread Starter
#32  
Good idea.

Here's a picture of something similar that might give some ideas. Its the bolted-on 3-point mount that is original on (smaller) YM186D. This particular one has been welded to the drawbar mount as well as bolted to the transmission housing. For the more powerful YM240, additional bracing from the ends of that rod back to the transmission housing might be needed. The main point here is that everything hinges in the same plane.
I like how they incorporated the sway linkage in the same bracket for the bottom bars! Even with them pulled inward, they still provide the same function :)
I Might steal that idea :)

158327d1268421940-gear-chain-driven-p1530518rym186d-pto-jpg


I like how they incorporated the sway linkage on the same pin. Even moved inward, they still serve the same function.
I might have to steal that idea :)
 
   / New ym240d owner #33  
I think that is the legendary OEM long pin!

Does it look original, or shop-made? Where did you find it - or was it already on there?

The busted out part on mine (shown in that post I linked) is on the front side, indicating the original damage was done crashing into something going in reverse. When I bought the YM240 the right side pin was one of many sloppy loose threaded connectors, and it already was missing a piece out of the casting. The nut on that side was missing, somebody did that to let it thread in deeper. I applied red (permanent) Loctite and threaded it back in until it bottomed, which again, didn't leave any threads for a nut. That lasted ~12 years until it needed a similar repair again but this repair came loose after a couple of seasons.

I couldn't find a long pin like you have. I had to replace the right axle assembly complete.
They were on the tractor when I got it but they do look original. The tractor was really abused before I got it. No fault of the owner, she hired a local kid that she thought knew what he was doing. I took them off once to replace the lift arms that had been bent when he tried to push a scraper blade in reverse and hit something? After she almost flipped driving it into a ditch and got it to the point of almost not being able to start it after using starter fluid a couple times she parked it. I asked about it after 4-5 years of sitting and she told me I could have it. I got it started on a hot day and drove it home!
 
   / New ym240d owner #34  
I like how they incorporated the sway linkage on the same pin. Even moved inward, they still serve the same function.
I might have to steal that idea :)

Lots of brands of SCUT’s do the inboard sway links. The inly issue with it is if you have non quick hitch implements, you really need a release system in the sway links. This is because each lower arms outward swing is restricted instead of the inner swing being limited. Ince the implement is attached or the quick hitch it does the same job.
 
   / New ym240d owner
  • Thread Starter
#35  
View attachment 649710
Here is a pic of one of the pins installed on my 240D. They are really tough to find however and if the casing is broken may not work anyway. This pic was taken before I filled the gap on the right with a link for a limiting chain.


You said you’ve e removed this for a lift bar repair?
The parts manual make it seem like it’s just a pin. That the hole in the rear end isnt threaded, but smooth, is that accurate?
If that’s the case, I could spin this out very easily on the lathe. I could go as far as to fill the hole with........weld (probably far too much heat for that) or jb weld, then drill out to a nominal size. Turn up a couple pins and attach it exactly how this is done.
Now my wheels are surely turning.
I could even extend the current bracket I have to have the pin slide through the bracket before entering the rear end to better support it. I would end up at exactly the factory location at that point, and would be a whole lot easier than fabricating a giant assembly.
 
   / New ym240d owner
  • Thread Starter
#36  
Lots of brands of SCUT’s do the inboard sway links. The inly issue with it is if you have non quick hitch implements, you really need a release system in the sway links. This is because each lower arms outward swing is restricted instead of the inner swing being limited. Ince the implement is attached or the quick hitch it does the same job.

I think I would be modifying any attachments I get to accept the quick hitch. I don’t plan on having a ton of attachments, but I’m sure that’ll change once I realize how useful the tractor is

I was thinking of getting a draw bar and modifying it so the sway links were mounted on that, at the same height as the new location of the lower bars pivot point.
But now that I’ve seen the diagram of the factory long pin, I think I like that idea better. (See my previous post).
 
Last edited:
   / New ym240d owner #37  
Lots of brands of SCUT do the inboard sway links. [like in the photo above] The only issue with it is if you have non quick hitch implements, you really need a release system in the sway links. This is because each lower arms outward swing is restricted instead of the inner swing being limited.
True that. It's a PIA to disconnect a sway chain to hook up a back blade that won't fit on my Qhitch.

Jmlcolorado whatever you build, if the sway chains can connect to the outer face of the 3-point arms like you have now, then you avoid that nuisance.
 
   / New ym240d owner
  • Thread Starter
#38  
True that. It's a PIA to disconnect a sway chain to hook up a back blade that won't fit on my Qhitch.

Jmlcolorado whatever you build, if the sway chains can connect to the outer face of the 3-point arms like you have now, then you avoid that nuisance.

I’m really leaning towards fabricating the long pin setup. Only thing that has my head scratching is there is no way to keep
The lower bars from sliding the length of the long pin.
I mean, does that even really matter?
Except it would prevent the sway links from tightening properly.
I suppose I could drill a hole and insert a cotter pin.
 
   / New ym240d owner #39  
It matters. There's a lot of force there. A cotter pin won't be enough. You need that long pin to become larger diameter as soon as it is outboard of the 3-point arm. Or at least a 'cotter' through the pin that is minimum 1/8" diameter.
 
   / New ym240d owner
  • Thread Starter
#40  
It matters. There's a lot of force there. A cotter pin won't be enough. You need that long pin to become larger diameter as soon as it is outboard of the 3-point arm. Or at least a 'cotter' through the pin that is minimum 1/8" diameter.

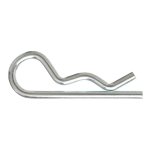
Perhaps cotter pin was the wrong term. I was thinking more like this style.
At least 3/16”
I figure 3/16” would be sufficient to keep the arm inward. Maybe a flat washer between the pin and lift arm ball. A765EC27-9ABD-476E-AC0B-FC105B798BC9.jpeg
 

Tractor & Equipment Auctions

2010 Ford Edge SE SUV (A51694)
2010 Ford Edge SE...
(4) Texas Built 25' Stand Alone Panels (A50515)
(4) Texas Built...
Xtreme XR1045 (A50120)
Parker 500 Grain Cart (A50774)
Parker 500 Grain...
2017 GENIE GS-2646 (A52472)
2017 GENIE GS-2646...
Rears 1000 Gallon Orchard Sprayer (A50120)
Rears 1000 Gallon...
 
Top