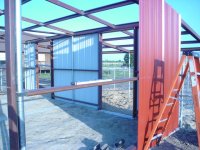
I suggest three horizontal rails. The top one will be right at the top of the posts. The bottom one I recommend six inches off the grade or up from the bottom. And I like the middle one to be forty eight inches up from the floor to the center of the purlin.
Here's why.
The top one will have a purlin attached to it perpendicular between the rafters because the rafters will be sitting on the top purlin. (Think of the top purlin as the top plate in stick or standard wood framing construction.
Earlier I felt I needed a bracket to attach the rafter to the post. I've since modified that to using the purlin to purlin brackets to attach the rafters to the vertical purlin which is attached to the top plate purlin. This way gives us a stronger top plate and allows us to better locate the rafters.
Some methods of metal building construction use a piece of angle iron on the floor. I know of one company out of Oklahoma that inserts a piece of inch and a half square tubing into the concrete when they're pouring the slab.
I like the bottom rail to be about six inches off the concrete. It's much less likely to corrode up there if there is a moisture problem. There's enough room to install foam for sealing out insects etc where the corrugation siding meets the ledge on the slab.
The middle rail location is decided by the type of interior materials used for the finish out. If you're going with plywood then the I'd measure the plywood to make sure it's actually forty eight inches wide. Then you lay out your center purlin line so that you sheet of plywood splits the purlin. That way you can attach the bottom and top sheets of plywood to the purlin.
One of the problems I have with building things is I always start at the completed project and work back in my mind. I try to decide what the end result will be and then work towards building an infrastructure that will provide that.
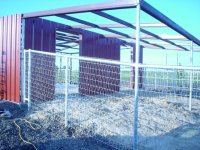
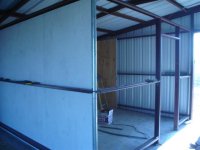
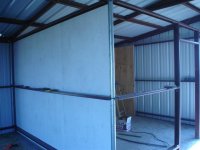
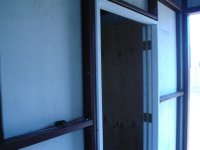
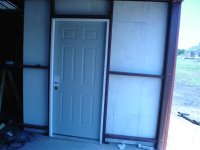
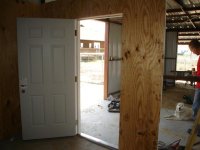
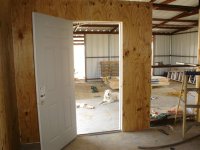
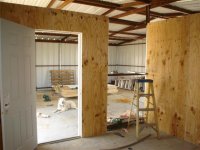
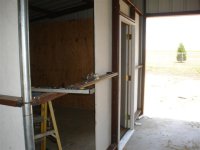
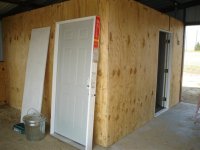
In this horse barn that I'm using for an example we have a tack room. The first thing we did was frame up the tack room where it would only have one walk in door. This is very comparable to your storage room at the end of the carport.
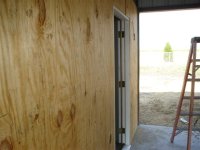
We used three quarter inch decking for the inside and outside walls. We sealed the sides of the plywood that were going to be facing the framing with Kilz. The inside of the tack room will be stained. The outside wall facing the horse stall will not be painted or stained.
We placed the sheets of plywood vertically around the tack room. The electrical was ran vertically down from the ceiling area for the switches and outlets.
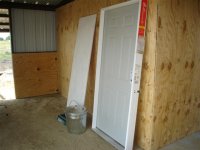
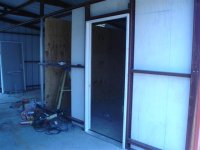
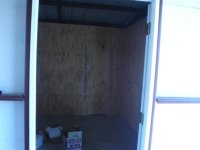
The door we used is a standard HD exterior metal clad prehung door that runs for about a hundred dollars. Normally with stick construction you leave two inches of play both directions in a door opening to enable plumbing up the prehung door. I cut that to one inch and made sure my purlin framing was as close to being perfect as I could. I got real lucky and the door was a tight fit so no shims were required.
I'm posting a bunch of these pictures hoping that they will help answer any questions you might have.
One of the advantages of using steel framing is you have to use self tapping screws. This comes in handy when you have something like the customer wanting to have saddle racks attached to the wall. What I'll do is find out where the saddle racks will be located. I will unscrew that or those sheets of plywood. Behind where the saddle racks attach I'll put in some two by sixes. They'll be there to give more material for attaching and holding the saddle racks and I won't have to frame up a whole wall and then have the framing decide where to hang the saddle racks.
In the stalls we're installing the three quarter inch plywood in the lower section. And we'll install three eighths above it. This is all about keeping the horses from exposed hardware and having more protection where they're most likely to kick.
If this room was to insulated then regular fiberglas pink would be used because we have a four inch gap between the exterior and interior walls.
We use self tapping screws designed to go through wood into steel. They have little wings that enlarge the hole as it goes passes through the wood and then the wings fall off when they encounter the steel. I'm also using steel finishing washers designed for countersunk screws.
We're using three quarter inch plywood because of the animal factor. Horses exert a lot of pressure by just being close. LOL
But one could use three eighths or half inch plywood or T-11 siding with no problems I believe.
Let's say one wants to use sheet rock. One could either use the standard twenty two gauge or whatever it is metal studs between the purlins. It wouldn't be anything to trim a tab on the stud that could be folded out and attached via self tapping screws to the purlin framework.
If one wanted to do additional framing with lumber all one has to do is pre-drill the purlin and then attach a piece of two by four. Conventional stick practices would be followed after that.
Some years ago I worked with a contractor building a fancy entertainment area by a pool. It was a cantilevered roof and wall with cedar siding to match the board on board fence. I framed it all up with steel. Then we attached wood framing to the steel. The finish out was all done conventionally with nailguns. Unless you knew what I'd done you'd never have guessed there was a steel backbone.
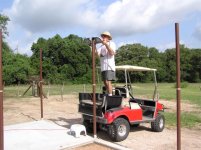
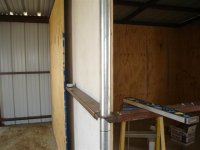
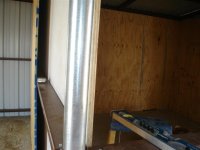
I had planned to start framing today but then I realized now would be a good time to cut all the top of the poles level. Well... I got to the marking of them all with the manual 6' level, a 20' purlin and a vise-grip jig I made (see attachment) and then I re-checked the mark with a laser level and then I measured up from my mid mark, then I eyeballed them and I am pretty sure that I will be able to cut then all within an eighth of a inch..... ....in the morning with the .......portaband saw.?..
Harvey I think I will be able to frame the walls. All purlins will have the open side down. First purlin is 6" from the floor, the mid purlin is centered 48" from the floor and the top purlin is level with the top of the pole. The connectors on the poles by the doorways might have to be cut about 2". The top purlin stands on edge with the open side facing in (might add a few welds).
Using the portable band saw to cut the tops was very easy and took about 20 seconds each. I used 'Lil Lucy' as a portable platform. See first attachment.
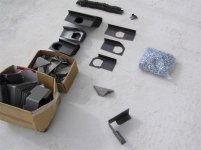
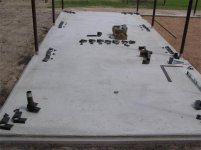
The second and third attachments show the different connectors and on which pole they will be attached to.


") ....in the morning with the .......portaband saw.?..
....in the morning with the .......portaband saw.?..