You are using an out of date browser. It may not display this or other websites correctly.
You should upgrade or use an alternative browser.
You should upgrade or use an alternative browser.
Patio/Outdoor Kitchen Project
- Thread starter polo1665
- Start date
- Views: 26651
/ Patio/Outdoor Kitchen Project
#21


OP
polo1665
Veteran Member
OP
polo1665
Veteran Member
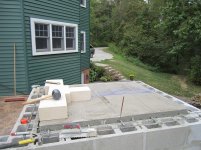
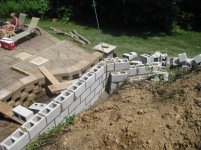
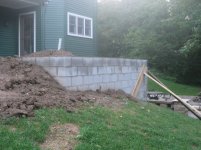
In the prior post you'll notice all of the concrete blocks piled on the corner of the patio. These blocks are for the cornerstone of our outdoor kitchen.
A while back Prokop (czechsonofagun) had a thread about a wood fried baking oven in the rural living forum. This oven interested me and after doing quite a bit of research I decided that I would include a wood fired oven in my outdoor kitchen.
The oven I decided on is an Alan Scott designed barrel vault oven and the next part of this thread will outline the complete build of this oven. This oven will be quite a bit larger than the oven Prokop built. The interior dimensions are 32.5" X 38".
Stay tuned...........
OP
polo1665
Veteran Member
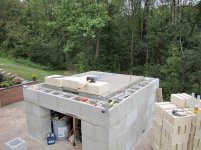
I started this wood fired oven project by buying plans from "OvenCrafters". This is a company started by a guy named Alan Scott. Alan roamed around the country baking bread and building ovens.
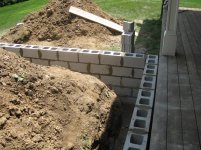
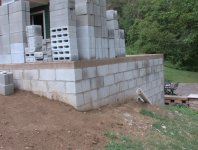
The oven I built called for a cement block base that was 64" wide by 72" deep. Four courses tall in all. I know, not that many blocks right. Before this I had never laid a cement block in my life. I could go another 45 years without laying another one and it wouldn't bother me.:laughing:
The oven I built called for a cement block base that was 64" wide by 72" deep. Four courses tall in all. I know, not that many blocks right. Before this I had never laid a cement block in my life. I could go another 45 years without laying another one and it wouldn't bother me.:laughing:
Attachments

OP
polo1665
Veteran Member
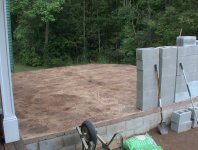
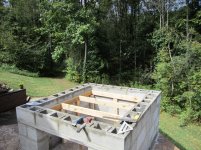
After the block base was built I began to prepare for the hearth slab by building framework inside the base. The framework was covered with plywood to support the first or insulating layer that consisted of a 6:1 mixture of vermiculite to portland cement.
Framework built
Framework built
Attachments
OP
polo1665
Veteran Member
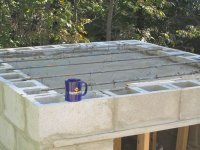
The vermiculite/concrete mixture was reinforced with wire allowing the wire to protrude out of the top of the mixture. This protruding wire will be hooked to the rebar reinforcement of the concrete hearth slab. This will allow for the future removal of the framework under the hearth slab.
This mixture is 2" thick.
This mixture is 2" thick.
Attachments

OP
polo1665
Veteran Member
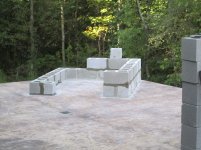
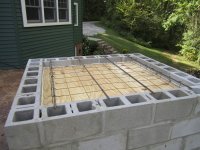
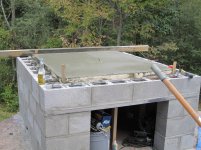
Once the vermicrete mixture had set up. Rebar was run north and south across the block base. 1X4's were then fitted around the perimeter of the hearth slab form. The hearth slab is kept separate from the block base this way. This is called a floating hearth and it is meant to keep the heat from transferring to the base.
Attachments
OP
polo1665
Veteran Member
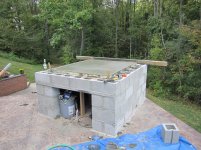
The hearth slab is 3" thick and required close to 750 lbs of concrete. After this concrete cured sufficiently I was able to start laying the hard fire brick for the hearth or floor of the oven. I purchased the 275 firebrick from a local supplier for $1.16/brick. The hearth portion of the oven required 108 bricks.
These bricks were laid on a 1/4" thick mixture of fire clay and sand. The mixture was 1:1 with just enough water to make it a paste consistency.
This mixture does not have any bonding qualities and is used in case a brick needs to be replaced at a later date.
These bricks were laid on a 1/4" thick mixture of fire clay and sand. The mixture was 1:1 with just enough water to make it a paste consistency.
This mixture does not have any bonding qualities and is used in case a brick needs to be replaced at a later date.