You are using an out of date browser. It may not display this or other websites correctly.
You should upgrade or use an alternative browser.
You should upgrade or use an alternative browser.
Patio/Outdoor Kitchen Project
- Thread starter polo1665
- Start date
- Views: 26658
/ Patio/Outdoor Kitchen Project
#31

OP
polo1665
Veteran Member
To jump the gun here -- what is the 'vent' space for?
And, no rebar in the block walls? Is that due to the cap (floor)?
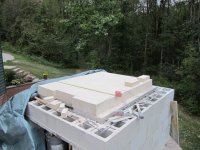
The vent space is an ash drop, I should have pointed that out.
No, there is no rebar in the block. Each corner and the center of each side and the back is filled with concrete from top to bottom, that process comes a bit later. Many of the pompeii style ovens are built on dry stacked block walls with some of the tubes filled with concrete.
OP
polo1665
Veteran Member

OP
polo1665
Veteran Member
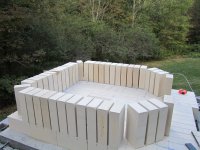
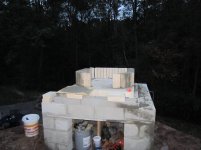
Once happy with the spacing and lay out of the bricks I began the process of grouting them in place. The grout is made of a 10:3:1.5 mixture of sand, portland cement, and fire clay. The fire bricks must be dunked in water or they absorb all the water out of the grout making it very difficult to set the bricks.
AS this project goes on further I have a new respect for masons.
AS this project goes on further I have a new respect for masons.
Attachments
OP
polo1665
Veteran Member
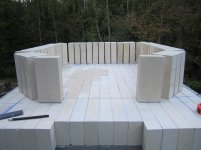
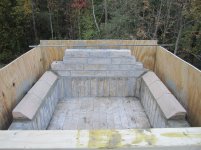
Some more pics of wall building.
It is fairly important to keep the joints as thin as possible. I ended up with some joints that I thought were a little over what I was comfortable with, but so far everything is holding together well.
It is fairly important to keep the joints as thin as possible. I ended up with some joints that I thought were a little over what I was comfortable with, but so far everything is holding together well.
Attachments

OP
polo1665
Veteran Member

OP
polo1665
Veteran Member
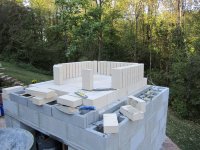
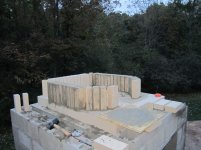
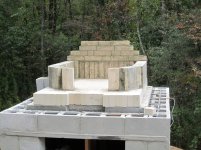
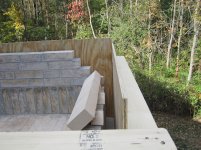
The next stage of the construction involved the bracing and support of the walls of the oven in preparation for the arched roof. First I started to construct the the first bricks that would make up the entry way of the oven. The placement of these bricks is important because they are also the start of the oven's chimney.
Attachments
OP
polo1665
Veteran Member
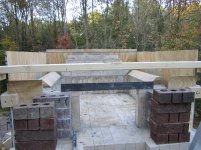
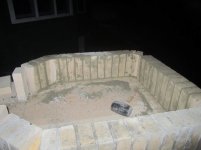
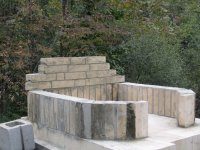
As the shoring up process continued, an angle iron lintel was mortared across the opening of the oven. This angle is at a precise height (63% of the interior arch height). This proportion is important to insure proper airflow into the oven as well as allowing for the smoke to escape out and up the chimney.
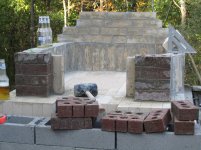
After the angle was in place a wooden frame was completed around the oven to allow me to pour a section of the oven's cladding. This section of the cladding will hold the side walls of the oven up against the thrust of the arches.
The bricks you see propped up on the side walls are there to mock up the angle of starting arch brick. In the third pic you see that I've cut the bricks to the angel needed to begin the arches.
Attachments
OP
polo1665
Veteran Member
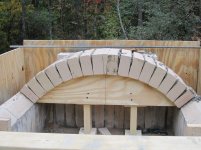
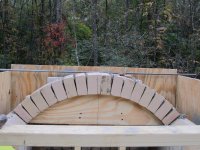
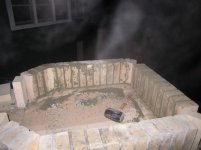
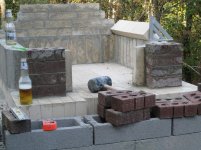
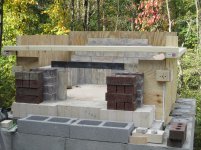
Support concrete poured, the first arch was constructed. I had laid the arch out previously and mad a form that could be removed after the arch was in place. It went very smoothly and the arches went up without a hitch.