Patio Project

   / Patio Project #1  

RobS

Super Member
Joined
Jun 26, 2000
Messages
7,189
Location
Goshen, IN
Tractor
None!
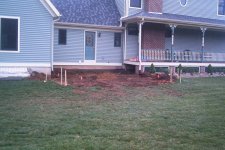
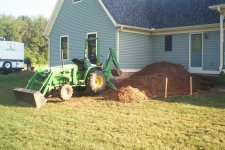
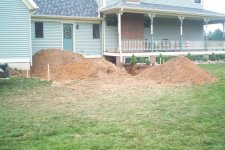
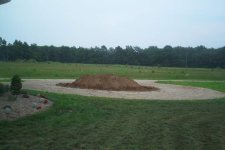
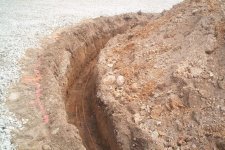
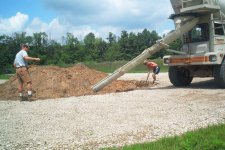
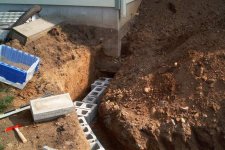
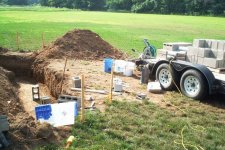
I've begun my final, major project for the summer. It will be a brick patio, raised with brick wall around. At the same time I'm building a brick circle wall in the center of our circle drive.

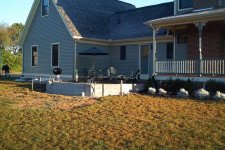
This first picture is a quickie patio I did a couple of weekends ago, mostly for the kids. It's been immensly popular with all of us /forums/images/graemlins/smile.gif
 

Attachments

  • 460434-IM000654.jpg
    460434-IM000654.jpg
    65.4 KB · Views: 1,412
   / Patio Project
  • Thread Starter
#2  
Here is the site of the real patio. It will be raised to the level of the cream trim on the house. Step up to the mud room door or the porch. Here it's marked out and ready to dig /forums/images/graemlins/smile.gif
 

Attachments

  • 460437-IM000655.jpg
    460437-IM000655.jpg
    77.7 KB · Views: 1,132
   / Patio Project
  • Thread Starter
#3  
Top soil (if you can call it that /forums/images/graemlins/tongue.gif ) removed. My only collateral damage was expected, hit the downspout drain line that I had put in a couple years ago. Here, I temporarily put it back in place in case of overnight rain /forums/images/graemlins/smile.gif
 

Attachments

  • 460439-IM000658.jpg
    460439-IM000658.jpg
    87.3 KB · Views: 952
   / Patio Project
  • Thread Starter
#4  
This picture is about the same as the last one. I remarked and took out a section of porch lattice. It's now ready to dig /forums/images/graemlins/smile.gif
 

Attachments

  • 460440-IM000667.jpg
    460440-IM000667.jpg
    75.9 KB · Views: 739
   / Patio Project
  • Thread Starter
#5  
Digging the footers. I went four feet down, per local codes. I kept the trench "clean" enough to eliminate formwork. I'll just pour into the trench directly /forums/images/graemlins/smile.gif
 

Attachments

  • 460442-IM000670.jpg
    460442-IM000670.jpg
    85.9 KB · Views: 868
   / Patio Project
  • Thread Starter
#6  
This one's for the NH guys. I guess my tractor thinks it's a Boomer. Hey, saved me some serious sunburn (I only got mild sunburn /forums/images/graemlins/blush.gif ). And no, I didn't drill my ROPS, just used zip-ties. Worked like a champ though it probably wouldn't hold up to field mowing /forums/images/graemlins/smile.gif
 

Attachments

  • 460444-IM000673.jpg
    460444-IM000673.jpg
    46.6 KB · Views: 922
   / Patio Project
  • Thread Starter
#7  
Here's the patio area nearly ready for footer pour. All I have to do is set the rebar this morning /forums/images/graemlins/smile.gif
 

Attachments

  • 460445-IM000674.jpg
    460445-IM000674.jpg
    79.8 KB · Views: 783
   / Patio Project
  • Thread Starter
#8  
And finally for now, the circle wall ready for rebar. Concrete mixer is due at 1:00 so I better get to it. More pictures this evening if all goes well.

Don't look for a finished product picture anytime soon. I suspect this project will take me well into the fall and a lot of it won't even be tractor work /forums/images/graemlins/smile.gif
 

Attachments

  • 460446-IM000675.jpg
    460446-IM000675.jpg
    38.6 KB · Views: 871
   / Patio Project #9  
Rob:

You've got a great start...looks good, bet your loving that backhoe huh? money well spent.

Hey, we won't need finish pic's till your done...just as long as you keep us posted along the way!!!!
 
   / Patio Project
  • Thread Starter
#10  
A couple more pictures from yesterday (I was too tired last night to post). This is a shot of my trench with rebar for the circular landscape wall in front of the house. One thing I learned here was that it takes a lot of tractor movement to make a circle with a backhoe /forums/images/graemlins/blush.gif My new challenge will be to layout the circle on the footer as my center stake is now surrounded by dirt piles. Thoughts anyone /forums/images/graemlins/confused.gif
 

Attachments

  • 461512-IM000677.jpg
    461512-IM000677.jpg
    97.2 KB · Views: 810
   / Patio Project
  • Thread Starter
#11  
And one final picture for now. This is the moment of truth, the concrete truck arrives. That's Mrs. S and myself doing the grunt work. Put down 7 1/2 yards between the circle and the patio footers. Very hot, humid day so we all had a dip in the kids pool afterwards /forums/images/graemlins/grin.gif

Progress will now slow considerably. I'm going to start laying block this weekend up to grade, then brick above grade. This is the part I've never done before so I may not be too quick to post all my "experiences". Tips & hints encouraged /forums/images/graemlins/smile.gif
 

Attachments

  • 461516-IM000689.jpg
    461516-IM000689.jpg
    81 KB · Views: 824
   / Patio Project #12  
</font><font color="blue" class="small">( That's Mrs. S and myself doing the grunt work. )</font>

Who took the picture?? /forums/images/graemlins/confused.gif /forums/images/graemlins/confused.gif

The cement truck driver? Hope he didn't charge you for working outside of his union! /forums/images/graemlins/shocked.gif /forums/images/graemlins/grin.gif
 
   / Patio Project
  • Thread Starter
#13  
<font color="blue">Who took the picture </font>

#1 son was assigned the digital camera and #2 had a disposable. Gotta give them something or they'd have been waist deep in concrete. They both had the assignment of taking a cold "PowerAde" out to the driver while he was washing out (with instructions to stay out of his way).

The driver was most helpful. He hopped out at one point and manned a shovel along with us /forums/images/graemlins/smile.gif
 
   / Patio Project #14  
The picture of the pool is scary, ours looks just like it. My octogon pad is a little smaller diameter though.

I'm a surveyor and I can't think of a good way to layout a full circle without having the radius point or some pretty high grade survey equipment. There might be some ways to do it if its just a portion of a circle and you had the distance between the end points. You could build a batter board over the stake that would be over the dirt piles and use a plumb bob to mark the center on that. You could then tie a string on the nail & use a plumb bob to mark points on the footers, but make sure to pull your string fairly level.
 
   / Patio Project
  • Thread Starter
#15  
It's been a while but work on the patio has progressed. Several things I've learned along the way including the notion that I do not enjoy masonry work as much as most other home improvement work I get into. That also explains the lack of photos along the way. It just hasn't been that fun for me.

This picture is laying the first course of block on the footer, down in the trench. It's not difficult work but it does wear you out. Hoping the brick work is a bit easier on the person /forums/images/graemlins/smile.gif
 

Attachments

  • 506523-IM000696.jpg
    506523-IM000696.jpg
    82.9 KB · Views: 600
   / Patio Project
  • Thread Starter
#16  
This is your basic work area shot. For some reason my mortar tub is missing. I used all premix mortar and mixed it one bag at a time in a tub. Between the mixing and lugging the blocks I wasn't very fast /forums/images/graemlins/smile.gif
 

Attachments

  • 506526-IM000697.jpg
    506526-IM000697.jpg
    94.8 KB · Views: 558
   / Patio Project
  • Thread Starter
#17  
Now fast forward a couple of months and about five skids of block. The patio sub-structure is complete. I filled it with about 10 yards of recycled concrete all tamped in. We've been using it but still need to get a concrete cap poured this season yet. Just today we decided to go with tile instead of brick for the paving material so I need to add a couple more inches of fill.

There will be a brick pilaster at each intersection with wrought iron railing in between. Stairs coming down toward the yard you can see in the picture.

I've decided to hire out the concrete flat work and put off the face brick until next spring /forums/images/graemlins/smile.gif
 

Attachments

  • 506531-IM000704.jpg
    506531-IM000704.jpg
    91 KB · Views: 631
   / Patio Project
  • Thread Starter
#18  
This project has really been a two-for-one. At the same time I've been working on a raised circle in the front drive. This picture shows the block work done, again waiting for face brick. Yesterday I rented a trencher and ran electic from the house to the circle so we can run a fountain pump and/or lights if we choose /forums/images/graemlins/smile.gif
 

Attachments

  • 506536-IM000701.jpg
    506536-IM000701.jpg
    90.2 KB · Views: 606
   / Patio Project #19  
I like it.

I like it enough to understand that you should feel guilty about having so much fun so close to home.

Seriously, ninety percent of the fun is getting there. But in your case I'd guess it's more like ninety five because it's obvious you're savoring each step of the way.

I really like that.
 
   / Patio Project #20  
</font><font color="blue" class="small">( It's not difficult work but it does wear you out. )</font>

It may not be "difficult" to learn how to do it, but it's sure hard work. /forums/images/graemlins/frown.gif It's looking good, though.
 

Tractor & Equipment Auctions

2002 Ford F-550 Crew Cab Landscape Dump Truck (A56858)
2002 Ford F-550...
30 INCH TOOTHLESS BUCKET FOR MINI EXCAVATOR (A58214)
30 INCH TOOTHLESS...
UNUSED FUTURE SB45 HYD SILENT BREAKER (A52706)
UNUSED FUTURE SB45...
2012 BIG TEX PIPE TRAILER (A58214)
2012 BIG TEX PIPE...
PENDING SELLER CONFIRMATION  READ BEFORE BIDDING (A56438)
PENDING SELLER...
2021 MULTIQUIP 25 WHISPERWATT AC GENERATOR (A59823)
2021 MULTIQUIP 25...
 
Top