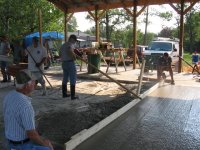
On my first pour I learned two things. 1. The next pour I was going to need more help. 2. A 2x4 was not going to cut it as screed board for a 17' wide pour. I got lucky and picked up two more volunteers. I also added 14" to each end of a 2x6x16 and a helper handle in the center. The first pic is of the guys who gave up their Friday to lend me a hand. You can also see the modified 2x6. The second shot you can see the screed board better.
You are using an out of date browser. It may not display this or other websites correctly.
You should upgrade or use an alternative browser.
You should upgrade or use an alternative browser.
POLE BARNS RECYCLED
- Thread starter mudcat
- Start date
- Views: 25970
More options
Who Replied?
/ POLE BARNS RECYCLED
#81

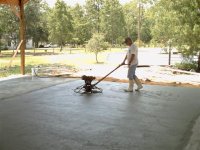
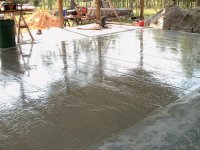
My dad had been trying to get an old power trowel working. It wasn't ready for the first pour. The third thing I learned was I did not like finishing conrete by hand. Thank goodness the power trowel was ready for this pour. And WOW!!, what a difference it makes. The third pic is the slab after bull floating. The first two is the old power trowel in action.
Attachments

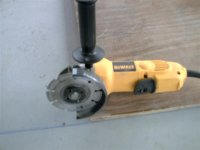
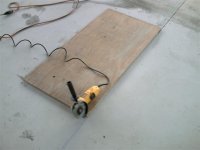
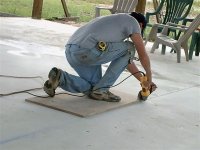
Today I cut a control joint across the middle of the slab. The first step was to chalk a line where I wanted the control joint. Next, I laid down a scrap peice of plywood to use as a straight edge. Then I used a 4-1/2" angle grinder with a diamond wheel to cut the joint.
Pic-1. The tool
Pic-2. The guide
Pic-3. Using the tool
Pic-1. The tool
Pic-2. The guide
Pic-3. Using the tool
Attachments
bones1
Platinum Member
- Joined
- May 31, 2006
- Messages
- 793
- Tractor
- Farmtrac 300 dtc
Great thread. More, more,more.
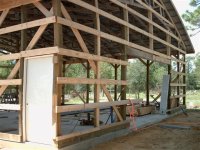
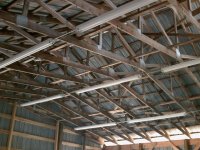
Just thought I would catch things up to where I am at. I've been working on it every chance I get. So far I have built the front and back walls, cleaned up grade, installed the man door, nailed up all the purlins, cut the 24' sheets of metal in half for the east and west walls, and skinned the east wall. Still alot more left to do but, the list is getting shorter.")
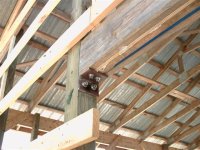
1. Back wall
2. Header
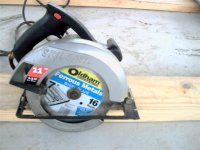
3. Purlins
4. Metal blade
5. First sheet of metal
6. East side almost finished
1. Back wall
2. Header
3. Purlins
4. Metal blade
5. First sheet of metal
6. East side almost finished
Attachments
-
 20060909_000001_3 (Small).JPG72.3 KB · Views: 448
 -
 20060909_000001_2 (Small).JPG62.5 KB · Views: 372
 -
 20060909_000001_1 (Small).JPG67.6 KB · Views: 370
 -
 20060909_000001_6 (Small).JPG44.1 KB · Views: 379
 -
 20060909_000001_4 (Small).JPG75.2 KB · Views: 375
 -
 20060909_000001_7 (Small).JPG58.1 KB · Views: 440

EddieWalker
Epic Contributor
That's great news. It's nice to see your updates and progress.
Thanks,
Eddie
Thanks,
Eddie
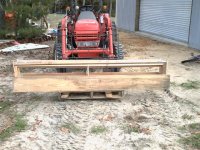
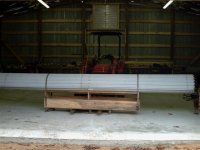
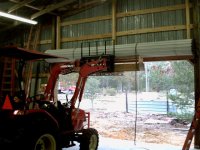
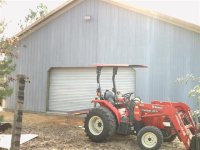
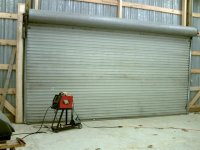
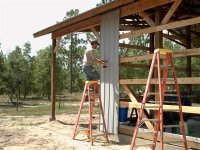
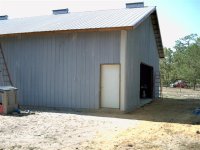
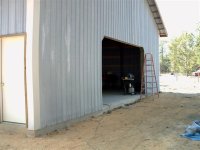
Finally got around to installing the roll up door! Only problem that I had was my loader wouln't reach high enough to mount the door. That was easily solved by building a cradle attached to a pallet. The prep work was the most time consuming part. Hanging the door took less than an hour.
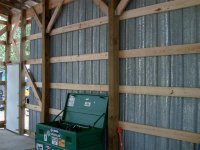
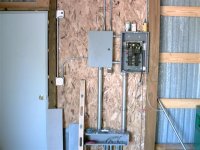
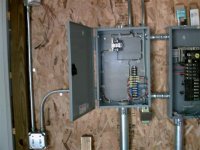
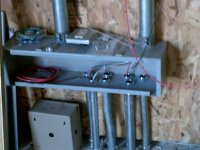
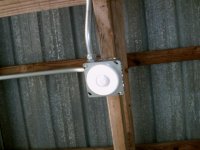
This week I plan on hanging some OSB on the interior walls and doing a little bit of plumbing.
Attached are a few shots of the door.
Happy '07 to all fellow TBNers
This week I plan on hanging some OSB on the interior walls and doing a little bit of plumbing.
Attached are a few shots of the door.
Happy '07 to all fellow TBNers