Snowblower Conversion - Pics

   / Snowblower Conversion - Pics
  • Thread Starter
#21  
I need to reverse direction on a shaft running forward to an 8 ft front mounted blower and had thought about doing it as you did, with a gear on the rear pto and another on the shaft, but was a little worried about running them in the open. I looked for a field chopper reverser without success and had about decided on the 3 sprocket and chain or a small car differential with the pinion shaft locked down. The gearing directly on the pto would be a whole lot neater and less complicated. Are you running them in the open with grease or did you enclose them in a gearbox with oil? Do you have enough use on it yet to see any problems?
Thanks,
Smiley

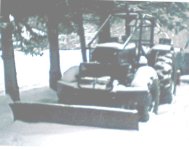
My gears are open and I intend to manually grease about every ten hrs +/- when I grease the bearings and PTO. The gears are protected by sheet metal covers as a safety precaution and also to contain the grease that will be slung out. Being a winter snow machine I don't anticipate dust and dirt contamination to be an issue.

I have not used the blower at all except for a full speed test with no load. Still waiting for winter to arrive. I know a lot of the country is getting severe conditions but not here yet.

For gear selection check out the engineering tool at rushgears.com. Using the tool I was able to match the strength of my gears to the tractor's PTO HP. Rush Gears just makes custom one-off gears so buying there is out of the question. I bought my gears from McMaster Carr. They have a decent selection but the 20 degree pitch angle gears I would have preferred (a bit stronger) were not available and I had to settle for 14 1/2 PA gears.

Eyeball engineering said my small gear should not be less than 3" dia ($87+/-). My 1:2 ration dictated the large gear then at 6" ($140). The gears come without keyways or setscrew bores so you'll need to provide them yourself.

Good luck with your project, I had fun with mine. Post you results, others will be interested.
 
   / Snowblower Conversion - Pics #22  
Red Dirt,
Thanks for the info. When I get at it next summer, I've got a a transmission/transfer case laying in the garage I may tear it apart and try to adapt gears from there to keep cost down. I have lathe etc to machine whatever necessary. However I wind up doing it, I will post it when done as it should be quite a beast. !00 HP 4WD
 

Attachments

  • MAX FRONT TILTED.jpg
    MAX FRONT TILTED.jpg
    25 KB · Views: 331
   / Snowblower Conversion - Pics #23  
red dirt- what I meant was for the cost to get a already built rear 3pt blower might be the same as modifying a front for the rear. If you used the same materails and just work on modifying it to fit for your tractor on front mount, comparing cost of buying one to building one, you come out ahead.
 
   / Snowblower Conversion - Pics #24  
Would I do it again? Probably not. As you say rear blowers are available for around what I've spent on this one (although relatively scarce around here for some reason or another). At my initial estimate of $450 to $550 complete I was hoping for a very reasonable "new" blower. At the $750 price tag I wish I'd have been more patient and waited until I could have found a used one in decent shape that did not require all the work.

Like many DIY projects, especially" make-overs", once committed, the project itself often dictates the budget and not preconceived plans and estimates.

RedDirt -- first of all; nice work.

I do have to agree with your final analysis here. I looked into doing a similar conversion, but ended up finding a nearly-unused pre-owned 48" 3PH blower for $700. I subsequently sold that one for $1200, and purchased well-used, Woods SB60 (60") for $800, now that I have a larger tractor. The woods has lots of life left in it. Now; neither has a power chute rotator, but it will be fairly easy to add to the woods; I'm already watching for the right deal on CL or eBay on a small hydraulic motor (I already have rear remotes).
 
   / Snowblower Conversion - Pics
  • Thread Starter
#25  
red dirt- what I meant was for the cost to get a already built rear 3pt blower might be the same as modifying a front for the rear. If you used the same materails and just work on modifying it to fit for your tractor on front mount, comparing cost of buying one to building one, you come out ahead.

Now I agree.

On the phone the seller "thought" it turned in the correct direction for me. I should have studied the for-sale photo better and figured it out for myself and declined due to what I knew would be added expense to reverse rotation. After driving four hours to look-see and realizing it turned the wrong way I still considered declining but on-the-spot figured I could reverse rotation cheaper than my final bottom line.

At home researching alternate drive methods it turned out gears were the most efficient method so I just bit the bullet and proceeded. One of those "Oh well" moments.

On the plus side for my project I ended up with a brand new, unused rear blower for $750, a fun project, and a chance to do some machine work with my buddy.

Do it again? Probably not but I am satisfied with the outcome none the less. If it ever snows here this year...and it works well... the added couple hundred above estimate will be soon forgotten.
 
   / Snowblower Conversion - Pics
  • Thread Starter
#27  
Massey driver did something similar but with a slight twist.

Front mount belt driven snowblowers - TractorByNet.com

Yes, I've seen that one and spoke w/massey about it on a different post. I actually found one of those gearboxes, normally $600, on sale locally for $400. It is made by Hub City. Too expensive for my project and Hub City tech thought it would be too lightweight for my application (because of my speed increase). He didn't think the gear box would handle the torque. I think Massey was reducing speed and the gearbox was up to that task for him.
 
   / Snowblower Conversion - Pics
  • Thread Starter
#28  
I realize I never posted any finished pictures of the converted blower so here are a few. It was finished several weeks ago and I've been waiting for snow to test it out.

FinLtfQtr.JPG FinRtSide.JPG FinCloseUp.JPG

We finally got a little snow; a measly 3". With the blower set two inches above gravel I had to blow the stuff that had slid off the roof in order to get a bit of volume in the blower.

1stRun.JPG 1stRun#2.JPG

Over all I was satisfied. I'm getting about 12ft-15ft throw with VERY heavy wet show. This is a bit less distance I was looking for so when I tear down in the spring to paint I might add the impeller rebuild rubbers that have been discussed elsewhere on TBN. Currently my impeller to housing clearance is about 1/4 -5/16 inch. The add-on rubbers will close this gap to almost zero and my throw should be increased.
 
   / Snowblower Conversion - Pics #29  
Nice job RedDirt! When you paint it, it'll look like you bought it. I like your chute rotator.

Jay
 
   / Snowblower Conversion - Pics #30  
We finally got a little snow; a measly 3". With the blower set two inches above gravel I had to blow the stuff that had slid off the roof in order to get a bit of volume in the blower.

You need to head to Durango, Colorado as they've gotten about 4-feet of the white stuff the past few days courtesy of the storms from California. Wolf Creek ski area east of Durango has gotten 64" in the past week.

That should be a good test!

Looks good!
 
   / Snowblower Conversion - Pics #31  
You are very talented. A machinest and artist. Good job.
 
   / Snowblower Conversion - Pics #32  
oh...and a heck of an engineer too
 
   / Snowblower Conversion - Pics
  • Thread Starter
#33  
You need to head to Durango, Colorado as they've gotten about 4-feet of the white stuff the past few days courtesy of the storms from California. Wolf Creek ski area east of Durango has gotten 64" in the past week.

That should be a good test!

Looks good!

Ha. Up the hill the past week's storm has laid down 8 to 10 feet! We used to live another 1000ft elevation higher. I do miss the snow but I don't miss THAT much snow!

Thanks guys for the compliments. Since my initial trial it has been trying to snow some more but it has just been 1/3 snow, 1/3 slush, 1/3 rain so we've ended with no more additional accumulation to play with.
 
   / Snowblower Conversion - Pics #34  
Ha. Up the hill the past week's storm has laid down 8 to 10 feet! We used to live another 1000ft elevation higher. I do miss the snow but I don't miss THAT much snow!

Thanks guys for the compliments. Since my initial trial it has been trying to snow some more but it has just been 1/3 snow, 1/3 slush, 1/3 rain so we've ended with no more additional accumulation to play with.

I have the very same snowblower that I would like to match with my Kubota B7200.

I may go the v-belt way with 2 facing pulleys and 2 idler reusing most of the original setup from the mtd blower and only have to find a pto driveshaft and a pulley. changing the ratio will be as simple as changing the pulley.
 
   / Snowblower Conversion - Pics
  • Thread Starter
#35  
I have the very same snowblower that I would like to match with my Kubota B7200.

I may go the v-belt way with 2 facing pulleys and 2 idler reusing most of the original setup from the mtd blower and only have to find a pto driveshaft and a pulley. changing the ratio will be as simple as changing the pulley.

Smog,

I got my PTO shaft from Surplus Center, $54+/- as I recall. They have a good variety of pulleys too.

I'd be very interested in seeing a sketch of your design. Others would too as a pulley system would certainly be a cheaper retrofit than my gear design.

I considered a two facing pulley system but couldn't get the design off the ground. My problem was I could get the speed increased OR the direction changed with a belt and pulleys but not do both at once with one belt, two pulleys and two idlers.

My belt design had a PTO shaft powering a horizontal shaft mounted small 4" (?) pulley . The belt went over the top of this pulley and down to idler turning pulleys then up and over an 8" (?) pulley. The problem was aligning idlers between the two different sized pulleys. The idlers must be angled to accomplish this task at no matter how I tried to align them on CAD it seemed that the belt would certainly jump a pulley or idler. Another problem was vertical space limitations did not allow the belt enough length to twist while changing directions. As the belt comes off the small pulley the idler must be angled outward to intersect the large pulley diameter and the resulting twist in the belt is greater than 90 degrees. As I considered adding extra components (shafts, idlers, etc) to compensate for the radical changes in direction the design l became more complex and physically longer. After a few more alignment attempts per the original concept I canned the idea as being way too fussy and committing too much fabrication for a questionable outcome.

When I get to my other computer tomorrow I'll post my CAD pulley design to better illustrate the problem. But who knows. I could have been barking up the wrong tree and you've got a design concept different than mine that would work. That's what these discussions are all about anyway...what works and what doesn't.
 
   / Snowblower Conversion - Pics
  • Thread Starter
#36  
Here is that failed belt drive design drawing.

View attachment Snowblower Belt Drive_111909.pdf

Notice the contortions the belt needs to traverse to change speed and direction. I found it unworkable.

The botom portion of the drawing is a top view where I was trying different idler positions to keep the belt from apparently jumping the pulleys. The pillow bearing is not shown in the correct orientation; it was just a place holder for this step of the design.

The Xed out designs had the drive and driven pulleys further apart and I played with moving the idler. When neither of these worked I moved the two pulleys closer together so they were the same distance apart as the angled idler. Still no luck.

I see at this phase I was using a 5" blower pulley and a 10 3/4" PTO pulley shooting for a bit more than a 1:2 speed increase. Maybe other pulley and idler sizes would reap different results but I still see this as a difficult and questionable design.
 
   / Snowblower Conversion - Pics #37  
RedDirt:

I think you made a wise choice going with gears. Besides the hassles of changing directions by twisting the belts, there would be mechanical efficiency loss due to belt slippage, which could be problematic on a snowblower.

I know I don't like the belt & pulley system on my JD L130 lawn tractor, and there isn't a direction change involved in powering the deck.

Like you, I'd be curious to see Smog's design for a belt & pulley system.
 
   / Snowblower Conversion - Pics #38  
Glad I found this thread--
I picked up a used Craftsman 46 inch blower--while looking for parts for another project-- want to mount it on my PT425 that has hydraulic PTO--
I want to power the blower with hydraulic motor-- Anyone have any idea what the input RPM for this type of blower might be so I can size a suitable hydraulic motor
 
   / Snowblower Conversion - Pics
  • Thread Starter
#39  
Glad I found this thread--
I picked up a used Craftsman 46 inch blower--while looking for parts for another project-- want to mount it on my PT425 that has hydraulic PTO--
I want to power the blower with hydraulic motor-- Anyone have any idea what the input RPM for this type of blower might be so I can size a suitable hydraulic motor

Arnie,
The general consensus at TBN seems to be to look at impeller tip velocity rather than a catch-all RPM. I chose a 4000ft/min tip velocity which calculated to 1090 RPM for my 14" dia impeller.

Some guys use as high as 5000ft/min velocity and I've calculated some commercial units to be as low as 3000ft/min so for me the 4000ft/min was a happy medium.

To calculate needed RPM find your impeller circumference in feet and divide the design velocity by that number. EG. for me, 14" dia impeller = 3.67ft circumference. 4000/3.67 = 1090RPM.

The 4000ft/min worked OK for me. We never got enough snow last season to give it a workout so at one light snow I had to test it at the eave drop of my roof. This is some wet, slushy stuff.

Test Run.JPG

And I just finished painting last season's 7 build projects. Here's the blower.

SB painted.JPG SB painted2.JPG

Good luck with your blower project.
 
   / Snowblower Conversion - Pics #40  
Arnie,
The general consensus at TBN seems to be to look at impeller tip velocity rather than a catch-all RPM. I chose a 4000ft/min tip velocity which calculated to 1090 RPM for my 14" dia impeller.

RedDirt--
Great response--I talked to so many people--and no one had the foggiest idea
My impeller is 16 inch and square with beveled corners--so I measured 16 inches across the bevels (End of shovels??)-- and now I will play with your formula--and should be on my quest for a suitable hydraulic motor. I've got several choices including using the existing pulley with some more math (9 inch) to a whatever dia pulley on the motor or direct to the shaft (thrower) impeller behind the second stage if I get a Motor RPM close enough --the key is to come close to the ~4K velocity for the tips.

Here in Tug Hill we do get a fair amount of snow--( Google--Tug Hill Snow--and or Lake Effect) but is is usually pretty fluffy for a while. If it is thick and heavy-- I can use the 52 inch plow or bucket--etc.
Thanks again
 

Tractor & Equipment Auctions

Michelin CARGOXBIB High Floatation Tires (SET OF 4) (A56438)
Michelin CARGOXBIB...
2017 KOMATSU D155AX-8 CRAWLER DOZER (A60429)
2017 KOMATSU...
2022 John Deere 5055E (A60462)
2022 John Deere...
(APPROX. 20) 4' X 8' X 3/8" SHEETING (A52706)
(APPROX. 20) 4' X...
2015 Dodge Journey Van (A59231)
2015 Dodge Journey...
Roll of 2-inch Vacuum Hose (A57454)
Roll of 2-inch...
 
Top