Gordon Gould
Super Member
- Joined
- Apr 1, 2007
- Messages
- 6,817
- Location
- NorthEastern, VT
- Tractor
- Kubota L3010DT, Kubota M5640SUD, Dresser TD7G Dozer
EDIT: I couldn't figure out how to make the photos work but they are down in Post #7 all glumped together. Sorry.
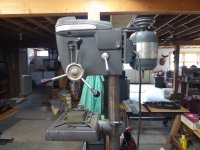
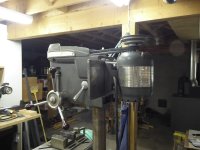
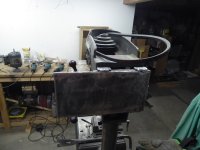
I have been running this Craftsman Drill Press since I was 14 years old. At that time, 60 years ago, it belonged to a man down the road who built metal tables with ceramic tile tops as a side business. I worked for him part time. 8 years later he became my FIL and I finally ended up with the drill in my shop.
View attachment 651259
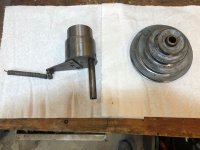
I often wished that it would turn slower than 560 RPM. Wanting an indoor project recently, I decided to slow down the drill - finally. A factor of 3 seemed about right for what I do. So I ordered a set of pulleys and a 1/2" shaft 12" long from McMasterCarr. The pulleys were 1-1/2" and 4-1/4" pitch to give a 2.83 speed reduction ratio and a 200 RPM low speed and 1900 top speed. I also ordered 2 flange bearings and an A21 drive belt from Surplus Center.
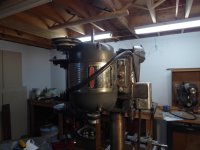
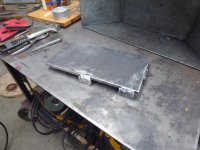
First I made a 6-1/4" X 12" motor mount pad with ears on it so it would fit snugly over and be supported by the drill press mounting pad built into the casting. Then remounted the motor so I could continue using the drill.
View attachment 651260
View attachment 651262
View attachment 651263
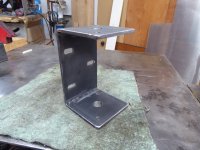
Next I welded up the C-Frame for the spindle from 4 X 1/4 bar. I pre-drilled the end plates for the bearings and managed to keep it square during welding. This is the first of 2 passes.
View attachment 651264
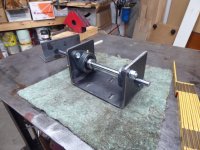
I added slotted holes to adjust the pulley tension and assembled the bearings and shaft.
View attachment 651265
View attachment 651266
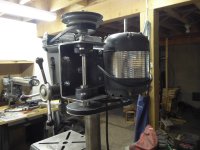
Then mounted the new spindle to the motor mount pad putting the speed reduction pulley on the bottom and the original 4 way drill pulley on top. I had to cut a notch out of the side of the drill casting for the main belt.
View attachment 651267
View attachment 651268
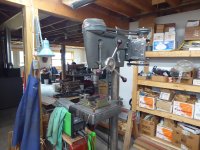
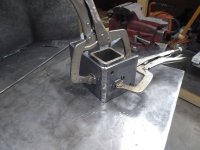
While I was at it I mounted a switch box to another ear on the motor mount pad so I could attach a grounded power cord. Another thing I have been thinking I should do for a long long time.
View attachment 651269
Turned out to be an interesting project and works as it should. Drilling 1" plus holes will no longer be the adventure it once was. Don't know why I waited so long.
gg
I have been running this Craftsman Drill Press since I was 14 years old. At that time, 60 years ago, it belonged to a man down the road who built metal tables with ceramic tile tops as a side business. I worked for him part time. 8 years later he became my FIL and I finally ended up with the drill in my shop.
View attachment 651259
I often wished that it would turn slower than 560 RPM. Wanting an indoor project recently, I decided to slow down the drill - finally. A factor of 3 seemed about right for what I do. So I ordered a set of pulleys and a 1/2" shaft 12" long from McMasterCarr. The pulleys were 1-1/2" and 4-1/4" pitch to give a 2.83 speed reduction ratio and a 200 RPM low speed and 1900 top speed. I also ordered 2 flange bearings and an A21 drive belt from Surplus Center.
First I made a 6-1/4" X 12" motor mount pad with ears on it so it would fit snugly over and be supported by the drill press mounting pad built into the casting. Then remounted the motor so I could continue using the drill.
View attachment 651260
View attachment 651262
View attachment 651263
Next I welded up the C-Frame for the spindle from 4 X 1/4 bar. I pre-drilled the end plates for the bearings and managed to keep it square during welding. This is the first of 2 passes.
View attachment 651264
I added slotted holes to adjust the pulley tension and assembled the bearings and shaft.
View attachment 651265
View attachment 651266
Then mounted the new spindle to the motor mount pad putting the speed reduction pulley on the bottom and the original 4 way drill pulley on top. I had to cut a notch out of the side of the drill casting for the main belt.
View attachment 651267
View attachment 651268
While I was at it I mounted a switch box to another ear on the motor mount pad so I could attach a grounded power cord. Another thing I have been thinking I should do for a long long time.
View attachment 651269
Turned out to be an interesting project and works as it should. Drilling 1" plus holes will no longer be the adventure it once was. Don't know why I waited so long.
gg
Last edited:
")