Split rail fencing the DIY (and budget) way

   / Split rail fencing the DIY (and budget) way #1  

Domush

Platinum Member
Joined
Jun 30, 2011
Messages
793
Location
Kentucky, US
Tractor
1981 Yanmar 336D
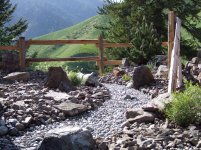
I was just finishing up a fenced in area for my horse and was walking down my driveway and saw just how ugly wire fencing really is. It makes my house look trashy, but I couldn't figure out any other means of making it look nice.

The next day I went to Lowes for something and while wandering around I found landscape timbers were on sale for $1.97 (usually $3.97), so I had an "aha!" moment.. homemade split rail fencing!

Now, this isn't a new idea for me, as I did exactly this at my last house and it looked awesome. Since then, though, landscape timbers went way up in price and I was feeling poor. But a bit of good timing came my way and I found myself buying 99 timbers for my fence.

IMG_20120528_195744.jpg

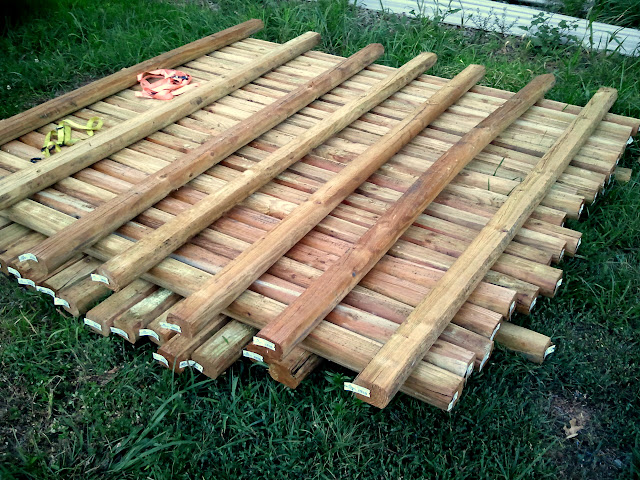
The pile of timbers. I stacked them this way hoping they wouldn't warp quite as much, but it's really hot here recently, and I'll be lucky is they stay reasonably straight. Any tips on keeping them from warping (besides bringing them inside)?

IMG_20120528_192321.jpg

I used my table saw to slice 1/2 of them down the center.

Unfortunately, my 14amp Ryobi table saw wasn't too keen on my slicing them during 95F heat and melted down on me. My fencing project just got a lot more pricey. :(

I managed to find a used Craftsman 3HP table saw on CL for $100, which was less than a new cheapy Ryobi, so I ran down to get it. A few pulley fixes later and I now have my first real table saw!

Now, if anyone has ever used one of these 'real' table saws, you'll know the top is cast iron which means for a heavy move, especially for a single guy. I always love a reason to use my tractor..

IMG_20120528_195821.jpg

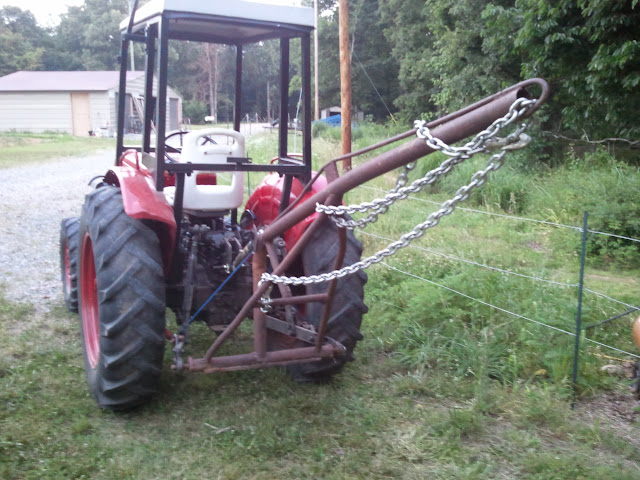
Notice the current wire fencing in the background. That is what I'm looking to pretty up.

IMG_20120528_192343.jpg

Now that my table saw is in place I began making angular cuts in order to make the 'split' in the rails. Nothing complex, just cutting notches out.

IMG_20120528_192315.jpg

Here is the result

Tomorrow I'll be drilling holes in the posts for the rails to slip into.
 
   / Split rail fencing the DIY (and budget) way #2  
Congrats on the great price on a good saw. Nothing beats a good old cast iron table for accuracy. Find a permanent place for it though. As you found out, they aren't a 'portable tool'. 2 things I have learned about landscape timbers: Since they are made from peeler cores, each one is the heart of the log and wants to twist and turn as they dry. That's what causes the checking (cracks). Not much you can do about that, other than keep them damp and shaded from the direct sun until you get them installed.


It just adds character to the fence. Another thing to look at is the treatment process. The ones around here are only surface treated for appearance, not pressure treated. You may be OK there using these for posts, but here in the wet coastal climate, they may only last a couple of years in the ground. Show us a picture or two when you get it done. I'd like to get rid of some of our ugly wire horse fence too.....Dan.
 
   / Split rail fencing the DIY (and budget) way #3  
I am looking forward to seeing your finished fence...
 
   / Split rail fencing the DIY (and budget) way #4  
The only problem with Craftsman and some others is their horse power ratings.. Their motors are about the size of a 1/2 hp and claim 3 hp. Their air compressors are a joke. My Quincy has a five hp motor that weights nearly a hundred pounds and contains a magnetic starter. It must be a totally new formula for comparison and I wonder how they can claim these ratings that seem so far fetched. Size may not be the only factor. Just stick a hardwood 4x4 on the saw and see if the three hp can breeze through it. My one hp Rockwell does not have a problem cutting it.
 
   / Split rail fencing the DIY (and budget) way #5  
The only problem with Craftsman and some others is their horse power ratings.. Their motors are about the size of a 1/2 hp and claim 3 hp. Their air compressors are a joke. My Quincy has a five hp motor that weights nearly a hundred pounds and contains a magnetic starter. It must be a totally new formula for comparison and I wonder how they can claim these ratings that seem so far fetched. Size may not be the only factor. Just stick a hardwood 4x4 on the saw and see if the three hp can breeze through it. My one hp Rockwell does not have a problem cutting it.

would that be a Oak 4"x4", or an Aspen 3 1/2" x 3 1/2" :confused2:
 
   / Split rail fencing the DIY (and budget) way #6  
I hope you have better luck with these landscaping timbers than I did. They are not as good as they where years ago. The split rail fence I built rotted in the air from the inside out in two years. I have never seen this happen before.
 
   / Split rail fencing the DIY (and budget) way #7  
Can't see pics, anyone have a clue as to why. They come up as black squares with a minus sign in the middle. Never have issues with other posts.
 
   / Split rail fencing the DIY (and budget) way #8  
Can't see pics, anyone have a clue as to why. They come up as black squares with a minus sign in the middle. Never have issues with other posts.

Same here. No can see. :confused:

Joe
 
   / Split rail fencing the DIY (and budget) way #9  
No pics here either..........
 
   / Split rail fencing the DIY (and budget) way #10  
Those pictures are not hosted here on TBN and look like they were blocked by google for some reason.
 
   / Split rail fencing the DIY (and budget) way #11  
Yep. They were there yesterday.

Harry K
 
   / Split rail fencing the DIY (and budget) way
  • Thread Starter
#12  
Sorry all, fixed the images
 
   / Split rail fencing the DIY (and budget) way
  • Thread Starter
#13  
The only problem with Craftsman and some others is their horse power ratings.. Their motors are about the size of a 1/2 hp and claim 3 hp. Their air compressors are a joke. My Quincy has a five hp motor that weights nearly a hundred pounds and contains a magnetic starter. It must be a totally new formula for comparison and I wonder how they can claim these ratings that seem so far fetched. Size may not be the only factor. Just stick a hardwood 4x4 on the saw and see if the three hp can breeze through it. My one hp Rockwell does not have a problem cutting it.

I don't know how these makers manage to downright lie in their advertising. The front says 3HP, yet the motor itself (which is original) says 1.5HP. I'm interested to hear how a 1.5HP motor makes 3HP. :confused2:

I have one of their compressors from back when they didn't lie as bad about their HP ratings and it works well (17 years and counting). It is 110v and claims 5HP, which I don't think is even possible with standard 110v outlets.

Either way, 1.5HP is about 3 times more powerful than my cheesy Ryobi saw.
 
   / Split rail fencing the DIY (and budget) way #14  
For those really interested in a bargain, here in my neck of the woods (Eastern Washington) we have the ability to go to the local telephone companies and get old utility poles that they have replaced (for free - just make sure you take a chainsaw with you). These are cedar which are great for fences. You can make a custom split-rail fence complete with posts any size you like just by how long you wnat the rails and how high the posts are. Just get a splitting maul and a series of wdges and follow the splits in the poles. Here is a photo of a project using the aforementioned material and method.
 

Attachments

  • Lanscape 1(1).jpg
    Lanscape 1(1).jpg
    1.1 MB · Views: 1,283
   / Split rail fencing the DIY (and budget) way
  • Thread Starter
#15  
Finally found some time to get back to the fence build.

I managed to find a person to lend me a 3-pt post hole digger (yay!), but my little Yanmar couldn't lift it high enough, so a neighbor brought his tractor over to help out. Thank you awesome neighbor! :thumbsup:

IMG_20120610_163311.jpg

The auger was a 10", far too large for my needs, but it meant no hand digging, so we went ahead and dug 'em all.

Note the roots in the hole. There were a few times I wasn't sure we were going to get that auger out! It would get caught on a root and lift the front end of the tractor off the ground. Luckily my neighbor is a 3-pt ninja and worked it out each time.

IMG_20120610_163322.jpg

The first set of posts in the ground.

IMG_20120610_163343.jpg

In progress..

IMG_20120610_174050.jpg

Ready for rails!

I still have about 15 more posts to go, but it's forward progress.

I'll show you how I made the holes in the posts tomorrow, as I have some more to make.

Cheers!
 
   / Split rail fencing the DIY (and budget) way #16  
Maybe I missed it but how did you make the pockets. Seems lik ea lot of work drilling them all out even with an electric drill.
 
   / Split rail fencing the DIY (and budget) way #17  
You asked about HP ratings, so here goes. Many manufacturers now, depending on whether they want to be completely dishonest, use a LRHP figure. That means locked rotor horsepower, which is the maximum hp it can make by locking the rotor for a split second. It is completely unsustainable, as the motor would burn out very quickly. Many years ago, audio amplifier companies did the same thing for a while with PIP, which was peak inverse power, the max amount that an amplifier could put out for a fraction of a second before blowing up.
 
   / Split rail fencing the DIY (and budget) way #18  
Wating to hear how you drilled out the pockets for the rail????? I have a similar project and am interested to see how ya did it.
 
   / Split rail fencing the DIY (and budget) way
  • Thread Starter
#19  
Wating to hear how you drilled out the pockets for the rail????? I have a similar project and am interested to see how ya did it.

Here ya go:

I finally found some time to drill out the rest of the posts today.

IMG_20120614_132729.jpg

To make each slot I drilled three 1.5" holes in line.

Once I finished drilling the set of posts I went back and flushed the drill bit curves with my chain saw. I plunged the saw through the hole on each side.

All of this sounds time consuming, but in practice it only takes one minute per post if you line them up as I did. Plus, I like the look of these timbers a whole lot better than the bulky split rail fences they sell. These don't block your view nearly as much. Rub a coat of cedar color stain on them and they look gorgeous.

For the first section of fence I installed all of the posts before installing the rails, this turned out to be a mistake. I quickly learned doing it that way caused the posts to be slightly out of measurement and some rails fit where others were too long and needing trimming. On the next set of posts I'll install the rails on the ground and bury the posts with rails already installed. It'll be tougher getting the posts in, but the work will be over once they are.

IMG_20120614_132749.jpg

As for the drill bit, I used an auger bit. It's important to note the archaic drill I'm using. That's because it is a high torque drill which spins the bit slower. These auger bits dig really fast, putting way too much torque on even mid-range drills. I have a decent rigid hammer drill and it barely makes it through a post. I borrowed this one from a neighbor. It looks rough (and is rough), but nothing beats the torque it puts out.

As for the auger bit, be sure to keep the edge sharp using a diamond home, as any dullness at all will make the drill feel the pain. Plus, these landscape timbers are the center of the tree, so they are often sopping wet and hard as nails. I used all of the dry pieces for the rails in order to avoid them warping after slicing them, which means all of the holes were drilling in the heavy, wet ones. If you don't have a high torque drill, it may cost less to replace rails which warp than risk drilling into wet, heavy timbers and burn out your drill. Something to keep in mind.

I'll be installing the last sections tomorrow.

Cheers!
 
   / Split rail fencing the DIY (and budget) way #20  
Nice looking project. I agree that a rail fence looks so very nice, particularly when compared to wire. Was your wire electric? If so, will you be putting it back on the inside of the rail fence?

Note to "Wedge" - fab looking job you did there.
 

Tractor & Equipment Auctions

SD Launch SDLB25 (A53317)
SD Launch SDLB25...
2017 Ford Transit 350 Passenger Van (A59230)
2017 Ford Transit...
2019 John Deere 310L EP Backhoe (A53485)
2019 John Deere...
(INOP) MASSEY FERGUSON 1552 TRACTOR (A59823)
(INOP) MASSEY...
Case Titan 3530 (A56438)
Case Titan 3530...
UNUSED FUTURE FT36C STAND ON SKID STEER (A52706)
UNUSED FUTURE...
 
Top