Talk to me about the rear remote hydraulic valve type...mx5200

   / Talk to me about the rear remote hydraulic valve type...mx5200 #11  
I can't think why one would want non-returning valves in typical farming scenarios. They have uses, like for log splitters and hydraulic motors. I did not see such when I ordered my tractor. One did have the option for one detent valve of the three.
 
   / Talk to me about the rear remote hydraulic valve type...mx5200
  • Thread Starter
#12  
I can't think why one would want non-returning valves in typical farming scenarios. They have uses, like for log splitters and hydraulic motors. I did not see such when I ordered my tractor. One did have the option for one detent valve of the three.

I didn't know what I would end up using my rear hydraulics for so I didn't research that aspect of tractorology. I just told them to give me a rear outlet.
 
   / Talk to me about the rear remote hydraulic valve type...mx5200
  • Thread Starter
#13  
You are over thinking this.

As tractor wheels move over uneven ground Three Point Hitch mounted implements undulate 3" to 4" continuously.
Utilizing tractor hydraulic position control and the hydraulic Top Link control you have all the adjustment you can use.
Minute adjustments are useless with 3" to 4" undulations.

After getting site reasonably level with BB, most would transition to FEL bucket in back drag for final smoothing or, if rich in implements, connect a roller to the drawbar via ball or pintle hitch. Not unitized to the tractor, roller will not be affected by tractor undulations.

I always appreciate your viewpoint but I don't think that I'm overthinking this at all. I just want to know how to accomplish what I want. I won't be "leveling" any single space. I'll be smoothing a very very hilly almost mountainous area with roads transitions and lots of uneven areas that meet up with bulldozed ridges. I'll be trying to smooth out the edges where bulldozers have cut roads and trying to make it look like more natural terrain. I'll basically be putting a french curve to a bunch of hard edges if you will. There will be some flattening or grading of areas, but for instance, the main flat entrance meets very abruptly with the long incline that leads up our mountain. This area frequently has mud deposits from rains, and until I get grass grown up and ditches properly dug to route the runoff from down the mountain, I'll have to scrap up the soft dirt accumulation and get back down to hard pan. I've done this once already. It didn't take long, but when I was done, I wanted to run the top link way out so as to use the back blade to smooth (going forwards) over some other parts where I had left tracks, but didn't want to cut into the ground at all, I just wanted to push it down. I'll back drag some, but a 600lb 7 blade will be far more effective than a 300lb 6 bucket.

Maybe my use of the word "minute" is what did it. Okay, let me rephrase; I'll be making often and numerous changes to the angle of the blade.

I'm here to learn, so tell me now if you still think I'm overthinking it.
 
   / Talk to me about the rear remote hydraulic valve type...mx5200 #14  
Okay, I am putting in a hydraulic top link and I will be mainly using the rear of the tractor for bush hogging and box blading. I put a hydraulic remote in place when I bought the tractor new because it would give me options. I didn't specifically ask for a spring centered valve.....

Tell me what I might not be considering. I'm familiar with hydraulics, but not tractor hydraulics.

Thanks for the input.
It looks like you have not even installed the "quick disconnect" fittings in in the hyd. ports yet, what makes you think that your valve is not spring centered? I don't know for sure, but I thought that Kubota only offered spring centered with OR without a detent.
I'd take it one step at a time, get your hyd. top link, see what it needs thread wise. Then start with 2 hoses approx 1.5 times as long as a straight measurement between the cyl. ports and the tractor outlets. Next is the hyd couplers (these should have been part of the dealer installed option) you'll need 2. I like to put a 90* fitting on the retract port (the end away from the tractor) to lessen hose strain. Now for convenience it would be nice to have the same "fittings" thread wise throughout but I find regular old pipe thread or jic fittings & hoses are the simplest and both can be found "on the shelf" at many stores. The tractor side of the (hyd) quick connect looks to be an internal (female) thread, probably metric and you may want to see them for that side, I ordered 3 (pairs) outlets on my tractor, they all came with the female quick connect that was a standard Pioneer or Safeway agricultural "pattern" that MUST match your end that you put on the hoses. Put it all together and see what you have going on, filling an empty double acting cylinder can be a little tricky. You'll need to work the air out of it and a little "bleeding" while you fill it (with the tractor hydraulics) speeds this up. I like to assemble everything, plug in the extend hose with the male q/c fitting on the other (retract) loose or completely off. Then operate your tractor valve either direction until you find which way is "extend", continue until you have oil all over the place then stop. Tighten or install the male q/c and plug it into the tractor. Operate, tighten any leaks, clean up the mess:laughing::laughing: I seriously doubt that you'll need anything else. You'll love having the hyd top Link!
 
Last edited:
   / Talk to me about the rear remote hydraulic valve type...mx5200
  • Thread Starter
#15  
It looks like you have not even installed the "quick disconnect" fittings in in the hyd. ports yet, what makes you think that your valve is not spring centered? I don't know for sure, but I thought that Kubota only offered spring centered with OR without a detent.
I'd take it one step at a time, get your hyd. top link, see what it needs thread wise. Then start with 2 hoses approx 1.5 times as long as a straight measurement between the cyl. ports and the tractor outlets. Next is the hyd couplers (these should have been part of the dealers

It has a detent. It just doesn't return to center by itself. I have not installed anything in the qd fittings yet. I have only worked the lever once or twice.
 
   / Talk to me about the rear remote hydraulic valve type...mx5200 #16  
It has a detent. It just doesn't return to center by itself. I have not installed anything in the qd fittings yet. I have only worked the lever once or twice.

Sorry, I hit "post" way before I was finished.
 
   / Talk to me about the rear remote hydraulic valve type...mx5200 #17  
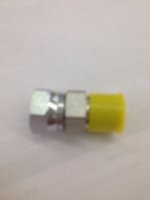
MechanicalGuy, unless there's something unusual about the rear remote valve your dealer installed, you shouldn't need an adjustable flow control fitting just to allow fine adjustments on your hydraulic top link. A simple "restricted orifice adapter" like this from Tractor Supply for $6.00 (Sku. no. 1256783) should slow the flow down enough for that. CountyLine 1/2 in. Male Pipe x 1/2 in. Female Pipe Swivel Restricted Orifice, 8MP-8FPXR-TSC at Tractor Supply Co.

Pics below, though not very clear.

You can get away with just one if you wish, but if you do, I suggest you install it on the hose to the cylinder end of the cylinder, between the male quick-connect and the hose. That will reduce the risk of cavitation as the weight of the implement tries to extend the rod. There's some debate as to whether a second one, on the hose from the rod end of the cylinder, adds anything, but the adapters are so cheap, I'd go ahead and do it while you're assembling things. I've done this on hydraulic top link and side link cylinders on three CUTS and it makes fine tuning very easy.

Flow restrictor2.jpgFlow restrictor3.jpgTSC flow restrictor1.jpg
 
Last edited:
   / Talk to me about the rear remote hydraulic valve type...mx5200
  • Thread Starter
#18  
It looks like you have not even installed the "quick disconnect" fittings in in the hyd. ports yet, what makes you think that your valve is not spring centered? I don't know for sure, but I thought that Kubota only offered spring centered with OR without a detent.
I'd take it one step at a time, get your hyd. top link, see what it needs thread wise. Then start with 2 hoses approx 1.5 times as long as a straight measurement between the cyl. ports and the tractor outlets. Next is the hyd couplers (these should have been part of the dealer installed option) you'll need 2. I like to put a 90* fitting on the retract port (the end away from the tractor) to lessen hose strain. Now for convenience it would be nice to have the same "fittings" thread wise throughout but I find regular old pipe thread or jic fittings & hoses are the simplest and both can be found "on the shelf" at many stores. The tractor side of the (hyd) quick connect looks to be an internal (female) thread, probably metric and you may want to see them for that side, I ordered 3 (pairs) outlets on my tractor, they all came with the female quick connect that was a standard Pioneer or Safeway agricultural "pattern" that MUST match your end that you put on the hoses. Put it all together and see what you have going on, filling an empty double acting cylinder can be a little tricky. You'll need to work the air out of it and a little "bleeding" while you fill it (with the tractor hydraulics) speeds this up. I like to assemble everything, plug in the extend hose with the male q/c fitting on the other (retract) loose or completely off. Then operate your tractor valve either direction until you find which way is "extend", continue until you have oil all over the place then stop. Tighten or install the male q/c and plug it into the tractor. Operate, tighten any leaks, clean up the mess:laughing::laughing: I seriously doubt that you'll need anything else. You'll love having the hyd top Link!

I would have bought something already, but it's really difficult for me to find exactly what I'm looking for. Kubota did something a little weird with the MX tractors. They put cat 2 rear end 3pt hook ups on the tractors, but the top link can only be 1 3/4" wide at the tractor side. Cat 2 is normally 2". So what that means is that most cat 2 hydraulic cylinders won't fit. I've found a few at agristore that will fit, they call them cat2/1 cylinders. They have bsp ports. I've found Magister cylinders makes a perfect 12" stroke cylinder with a 2.5" bore that I like, but it has #8 SAE ports. The width of both ends is really skinny for clearance on lots of stuff (I think it's 1.5" or something).

What I really want is a 12" stroke cylinder with female npt ports that has a minimum length of 22" and a maximum length of 34". I waffle back and forth on the check valve thing. It seems like the extra bulk could get broke off or damaged easily, but it does provide a factor of safety.

I have a local shop that can make hoses with SAE on one end and NPT on the other end if I need. My qd connectors going into the tractor are #8 fnpt.

I just haven't decided what pile of crap I want to deal with yet. I really don't want to grind a cat 2 ball down to fit into my tractor end of 1 3/4", and I'd rather not get hoses with different fittings on one end and the other, and I'm told that I'll want or need an orifice, if I don't put out the bucks for a needle flow control.

I'm leaning towards a $136 Magister 12" stroke cylinder with #8 SAE ports and some custom hoses to mate them to #8 fnpt qd ends to the tractor. That would only leave me needing to find an orifice to go in between the fnpt qd and the male npt hose end.
 
   / Talk to me about the rear remote hydraulic valve type...mx5200
  • Thread Starter
#19  
MechanicalGuy, unless there's something unusual about the rear remote valve your dealer installed, you shouldn't need an adjustable flow control fitting just to allow fine adjustments on your hydraulic top link. A simple "restricted orifice adapter" like this from Tractor Supply for $6.00 (Sku. no. 1256783) should slow the flow down enough for that. CountyLine 1/2 in. Male Pipe x 1/2 in. Female Pipe Swivel Restricted Orifice, 8MP-8FPXR-TSC at Tractor Supply Co.

Pics below, though not very clear.

You can get away with just one if you wish, but if you do, I suggest you install it on the hose to the cylinder end of the cylinder, between the male quick-connect and the hose. That will reduce the risk of cavitation as the weight of the implement tries to extend the rod. There's some debate as to whether a second one, on the rod end of the cylinder, adds anything, but the adapters are so cheap, I'd go ahead and do it while you're assembling things. I've done this on hydraulic top link and side link cylinders on three CUTS and it makes fine tuning very easy.

View attachment 628457View attachment 628458View attachment 628459

that would get me going with an orifice. CHeap too. thanks.
 
   / Talk to me about the rear remote hydraulic valve type...mx5200 #20  
Got a buddy with a welder?
I just make my own and save a few bucks, also can "dial in" the perfect size/stroke for my use. Surplus center has a jazillion different size & length cylinders. Somewhere here on TBN I have a post with pics.
 

Tractor & Equipment Auctions

STIHL TS420 CUTQUICK SAW (A47001)
STIHL TS420...
BAND SAW (A47001)
BAND SAW (A47001)
2013 INTERNATIONAL DURASTAR 4300 (INOPERABLE) (A47001)
2013 INTERNATIONAL...
2012 WESTERN STAR 4900 (A45046)
2012 WESTERN STAR...
2021 CLUB CAR  CARRYALL 1700 (A45046)
2021 CLUB CAR...
School Bus (A46683)
School Bus (A46683)
 
Top