Henro,
Are you and Harv distant relatives or something? /forums/images/graemlins/grin.gif You each have exceptional skills (I know, Harv, you call it luck) at fabrication, yet you both take these skills to another level by (and I really am tired of this phrase, but it fits here) "thinking outside of the box". Solving problems in unique ways to meet your particular needs.
Bill, if you get bored this winter, I'll ship my TC29 up your way and you can do all the modifications you would like to. Kind of like Monster Garage. (Hey, Harv - What could be better for your Monster Garage audition tape than you and Bill doing a makeover of my CUT?) Of course, with you to conspiring, I might get a nitro-powered Zamboni with a 300 lb. Texas-shaped rock as a hood ornament. /forums/images/graemlins/grin.gif Not that there's anything wrong with that. But I probably wouldn't have much use for it in Georgia.
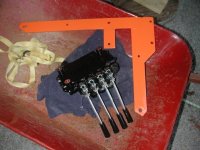
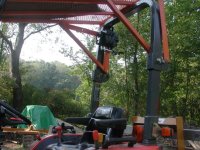
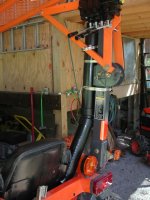
Again, nice job, Bill.