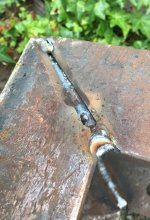
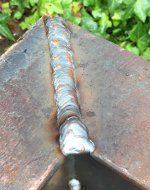
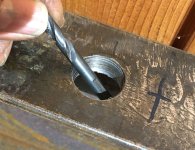
Today's Welding time!

   / Today's Welding time! #11  
What sort of amperage does it take for material that heavy?

And - is one pass like this sufficient to make a weld as strong as the material?
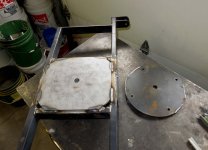
These were 3 passed and I was running somewhere between 200 to 250 amps with a lot of preheat of the plate first. It wasn't required to have 100% pen or be super duper strong they were that heavy in order to be machined after welding to be square.
 
   / Today's Welding time! #12  
Here's a video of a lift I built a year ago for a small museum in town. We had a problem carrying heavy loads up a flight of stairs that was built about 100 years ago. Since most of our volunteers are senior citizens, who probably wouldn't fair well falling down a flight of stairs that wouldn't even come close to passing a building code today, this is what we came up with. Since this video was made we added a self-closing door. The welding was all tig/mig. The pipes guiding the lift are also supporting the entire structure, they're 1 1/4" pipe. We're using a Harbor Freight 880lb winch. The guides were made out of 3/4" UHMW. So far, a year later, it's been working flawlessly.

20160205 112749 - YouTube
 
   / Today's Welding time!
  • Thread Starter
#14  
Here's a video of a lift I built a year ago for a small museum in town. We had a problem carrying heavy loads up a flight of stairs that was built about 100 years ago. Since most of our volunteers are senior citizens, who probably wouldn't fair well falling down a flight of stairs that wouldn't even come close to passing a building code today, this is what we came up with. Since this video was made we added a self-closing door. The welding was all tig/mig. The pipes guiding the lift are also supporting the entire structure, they're 1 1/4" pipe. We're using a Harbor Freight 880lb winch. The guides were made out of 3/4" UHMW. So far, a year later, it's been working flawlessly.

20160205 112749 - YouTube
Now that is a different welding project! :thumbsup:
 
   / Today's Welding time! #16  
Here's a rack I just built for the little truck. Been making them lately out of sq. material, so much easier but felt like the challenge of a "classic" pipe reck with all the coping and such.
DSCN8604.JPG


DSCN8521.JPG


With a plastic bed, I didn't want to load the sides so it sit's in the bed on the frame location.
 
   / Today's Welding time! #17  
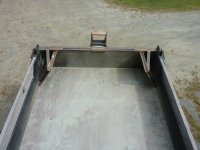
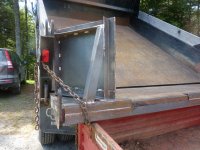
This was a fun project I showed before - a chute on my one ton tail gate so I could dump directly into my trailer.

P1140759.JPG

P1140858.JPG

Left1.JPG

P1140807.JPG

It actually works pretty good

TrailerLoading - YouTube

gg
 
   / Today's Welding time! #18  
toboggan repairs

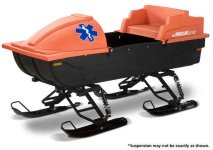
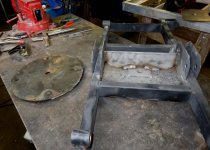
We have a rescue toboggan we use for hauling cargo in and found it needed some repairs. The front ski assemble was poorly designed and subsequently bent. In the middle photo you can see the round 1/4" plate the manufacturer had used. What you can't see is the cone shape it was bent into. It was replaced with a square piece that's already been welding in which was thicker at 3/8. The original pivot bolt was also increased for 3/4 to 7/8th. In the next photo the assembly is upside down but shows a rib we added. The last one is ours in use.

I welded in the energy business for 15 years. Now just piddle at in our locale high schools metals shop.
 

Attachments

  • rescue14.jpg
    rescue14.jpg
    20.6 KB · Views: 196
  • IMG_5270.jpg
    IMG_5270.jpg
    225.1 KB · Views: 205
  • IMG_5267.jpg
    IMG_5267.jpg
    183.5 KB · Views: 200
  • IMG_5030.jpg
    IMG_5030.jpg
    175.6 KB · Views: 253
   / Today's Welding time! #19  
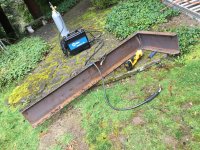
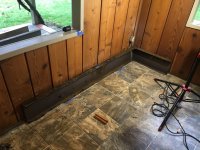
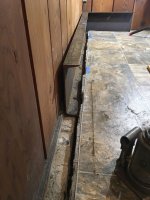
Welded a foundation fixture today. 10-inch channel.

502338d1489635117-todays-welding-time-steel1_img_8294-jpg


502339d1489635117-todays-welding-time-steel2_img_8297-jpg


Will jack the house up and support it with 2x2x3/16" steel posts on this channel.
The 2x2x3/16" posts will go up to the main floor, to the roof beams
I'll furr out the wall over the steel structure.

502340d1489635117-todays-welding-time-steel3_img_8299_steel_end-jpg


Foundation broke loose from the floor slab, and sunken 2 inches.
The foundation has been stabilized by a company that uses "push piers".
It has a 25 year guarantee against further settling.

502341d1489635117-todays-welding-time-steel4_img_8291_ikea-jpg


Had to fill a big gap. I remembered seeing evidence of a burn pile where
the IKEA furniture had left its droppings. Swedish/chinese screw/fastener part has a 2nd life filling the gap in a foundation support fixture weld. :D

502342d1489635117-todays-welding-time-steel5_img_8293-jpg


Closed up.

502343d1489635117-todays-welding-time-steel6_img_8300quarter-jpg


This is pretty thick stuff for 120v. All welded on 120V with a Miller MultiMatic200 (portable suitcase welder). With just a little trouble to make an extension cord I coulda used 240V from a nearby dryer, but decided to just use 120V. It's FINE!
That's a 1/4" drill bit.
 

Attachments

  • steel1_IMG_8294.jpg
    steel1_IMG_8294.jpg
    266.1 KB · Views: 770
  • steel2_IMG_8297.jpg
    steel2_IMG_8297.jpg
    144.1 KB · Views: 768
  • steel3_IMG_8299_steel_end.jpg
    steel3_IMG_8299_steel_end.jpg
    116.2 KB · Views: 778
  • steel4_IMG_8291_ikea.jpg
    steel4_IMG_8291_ikea.jpg
    140.5 KB · Views: 766
  • steel5_IMG_8293.jpg
    steel5_IMG_8293.jpg
    136.8 KB · Views: 774
  • steel6_IMG_8300quarter.jpg
    steel6_IMG_8300quarter.jpg
    137.8 KB · Views: 781
   / Today's Welding time! #20  
Wife bought new chairs awhile back for our new sunroom. One of them had cracks around the welds for the back legs. I thought I'd give it a go with the new HF DC Inverter and some 1/16" E7014 sticks. I'd gotten some respectable beads practicing on flat scrap at about 55A, so I decided to start there. This chair is constructed of 1/16" steel tube, by the way. I used a steel brush wheel chucked into my 18V Dewalt drill to clean off the powder coat around the welds on both sides. Once I struck an arc on the first side, it burned a hole right through that tube like it was a McDonald's drink straw. :grumpy: So, I turned it down to about 40A, and did nothing but stick the rod. It acted like it wanted to arc a couple of times, but no deal. At about 42A, it finally struck and burned at a reasonable temperature to fill the hole I'd just made and repair the crack. It also heated up the surrounding paint enough to ignite that, too. :fiery:

In the end, the repair was completed. The second side went much better, albeit with some flaming paint there, too. I used the new HF paddle switch grinder to clean up the hideous welds a bit, and cleaned the scorch marks with some Four Monks vinegar cleaner (pretty good stuff). The Wife is looking for some touch-up paint to match now. It's definitely not pretty, but it's fixed.

Edit: for clarity, it's 3/4" tube with 1/16" wall thickness.
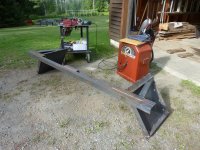
 
Last edited:

Tractor & Equipment Auctions

2004 Chevrolet C5500 Shuttle Bus (A50323)
2004 Chevrolet...
Wolverine BC-13-72W, 72" Skid Steer Brush Cutter (A52384)
Wolverine...
Chery 6' 10 Drawer Workbench (A50121)
Chery 6' 10 Drawer...
John Deere LA110 (A50121)
John Deere LA110...
Michelin CARGOXBIB High Floatation Tires (SET OF 4) (A52748)
Michelin CARGOXBIB...
2005 Ford F150 XL Triton (A50120)
2005 Ford F150 XL...
 
Top