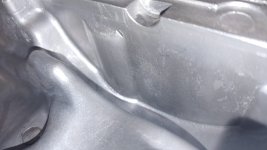
I got the transmission back on the mower today and it seems to work good now. The problem had nothing to do with the dump valve pin. I could tell from the wear marks on one of the surfaces on the center block that I didn't flatten it well enough. The block I used to flatten it had a low spot in the middle so I ended up making it lower towards the center where all the pressure is. I found a better technique for surfacing the center block by first flattening the motor block on a surface plate with sandpaper, then I glued sand paper onto the motor block surface that I flattened using a medium strength spray adhesive and put the splined shaft through it and into the center block the way it goes together when assembled. That held it in place so I could just rotate the motor block and flatten the surface of the center block. I covered the surface with marker to measure the progress. The other side looked okay so I didn't do it but I think the same technique could be used on the other block as well by removing the shaft from the case and doing the same process. The glue is easily cleaned off with Wd40 or PB blaster. I used 400 grit paper and finished with 600 grit. If I were to do it again I think I would polish the surfaces with finer paper. I'll have the owner let me know how it holds up and update if there are any issues with the rebuild. If it holds up then that saves $400 in parts.
You are using an out of date browser. It may not display this or other websites correctly.
You should upgrade or use an alternative browser.
You should upgrade or use an alternative browser.
TuffTorq K46 Repair Guide with Pictures
- Thread starter LotsofGreenGrass
- Start date
- Views: 1926829
More options
Who Replied?
/ TuffTorq K46 Repair Guide with Pictures
#1,021
tom3
Silver Member
Kind of scratching my head on gluing the paper to the block, but I think I get what you were doing, matching the surfaces.
Yes, just matching the surfaces. I cut a square out of sand paper and sprayed adhesive on the back and put the block on it and let it dry for a few minutes then cut the excess off and cut a hole in the center for the shaft. The first time I used the piston side of the motor block without putting the shaft through it and just sanded in a circular motion but I didn't realize the block was slightly raised in the center and that sanded more out of the center.
The owner of the mower is happy with it but I don't think it works like new. I probably should have done the other surfaces again using the better method. My main concern is that it might create fine shavings from the uneven surfaces. I'm going to have him mow a few hours then I'll drain the oil and maybe put in synthetic 20w-50. His transmission had the magnet upgrade so hopefully any metal gets picked up. If I do have to do it again I'm pretty sure I can get it going even better. I don't know how it was when new but I thought it would drive a little faster and climb a little stronger, although it does climb hills even with the lever halfway and if you push it all the way it will speed up. When it's all the way up it will move back a little when going uphill if you don't hold it in place. I might be able to fix that by tightening the spring on the linkage.
stevem5215
Platinum Member
- Joined
- Jul 9, 2006
- Messages
- 967
- Location
- Pittsburgh, Pa
- Tractor
- Steiner 420 - Black Craftsman Pro 24hp - Simplicity 48 ZT-2500 - Simplicity Citation XT 61" - Chainsaw CS-5720 - FarmerTec G660 90cc's
K46's aren't the most powerful transmission even when new. They are adequate for flat surfaces and on hills it's just not like a more powerful version of a Hydrostat trans. I have 3 here. A K46 Black Craftsman 24hp a ZT2800 based ZTR Simplicity and a ZT3400 based ZTR Simplicity. The best is the ZT3400 transmission. It is a great transmission. The other two are lesser. And you can notice that less ness when going up hills.
molarski
New member
- Joined
- Aug 5, 2023
- Messages
- 1
- Tractor
- Castle garden, k46 trans
Hey guys, I have K46 trans, for me the loss of power happened rather rapidly. I was wondering if there is anything inside center case that could be broken as I was trying to flatten its surfaces and the revolvers like 4 times but unsuccessfully. I am loosing my mind with this trans. Does anyone have any spec for the diameters of the revolver small cylinders? They are rather tight in here but would like to compare to the new ones. Already changed the belt, not sure what else can be wrong there. Thanks in advance.
Kyle_in_Tex
Super Star Member
Did your kit help it out?just to keep this thread going. I have ordered a rebuild kit. I guess i could have sanded it down, but after 375 hours this mower really doesn't owe me anything. I've only ever changed belts on it. Mow 2 acres, once or twice a week for 11 years. Started getting bad after i dragged a harrow around for a while landscaping the front yard. Right after that the power was never the same and over the 3 years after that landscaping it was a struggle up any incline and it was hit and miss for power. If it was hot out forget it, the thing was like a turtle. Fall and spring were okay. I changed out to a heavier gear oil last week to see if i could salvage it, but it just made more noise than it ever did. Hoping this $450US dollar fix kit works. Here's some photos of what i pulled apart.
stevem5215
Platinum Member
- Joined
- Jul 9, 2006
- Messages
- 967
- Location
- Pittsburgh, Pa
- Tractor
- Steiner 420 - Black Craftsman Pro 24hp - Simplicity 48 ZT-2500 - Simplicity Citation XT 61" - Chainsaw CS-5720 - FarmerTec G660 90cc's
Well, the K46 in my 2009 Black Craftsman Professional quit working again. This time though it had broken off the two mounting bolts from the cross frame member to the K46. And dropped the belt and popped off the fan ! I pulled the transmission out today and easy outed the two bolts (one was rusty and broken for quite a while it looked) the other had the old bolt laying on top of the mower deck. I drilled them and easy outed the studs and bought new Grade 8 bolts and cut them to size and cleaned up the holes. I cleaned up the transmission asm (it was pretty filthy oily and dusty oil encased on the housing). Drained out the oil (the last time I worked on this was back in 2011). This time there was no synthetic 5w-50 available so I used 5w-40 Euro spec. Fixed all the bent pieces on the frame and put her all back together. Changed the engine oil and filter and fuel filter while I was at it. Works like new again. Now it needs a bath and some wax on the metal and back to sleep till spring ! Another K46 still operational.
dieselscout80
Veteran Member
Well we bought a Husqvarna YTH24K54 back 2013 and mow more than two acres in SC so mowing season is long and it has 623 hours on it. It has only been used for mowing no towing or implement work period.
It has started not being able to go up hills after it has been mowing for say 20 to 30 minutes. I put a new belt on it and that helped a little, but still quits going up hill and it is much slower than it used to be.
The rest of the mower is kind of worn out too.
How long do there K46 rebuilds last?
Last edited:
Kyle_in_Tex
Super Star Member
I took mine apart at least a couple of years ago. I cleaned everything really good, lapped the important faces with fine sandpaper on a surface plate.
I put it back together with 15W-50 mobil 1 because it is relatively cheap (and so am I). I put a new top seal on the prop shaft, used the yamabond semi drying glue to seal it up. I did driil and tap an 1/4" NPT and plug the bottom so I can drain it.
2 years later, it will still almost burn rubber or almost pop the front end up(not quite but it does lurch forward quickly) when you press the forward pedal.
I had bought the replacement spider gear set, but my originals with only about 500 hours still looked great. (I'm a machinist by trade and know how to inspect things like this.) So I went back in with the originals, because the replacements were the pressed powder heat treated type and the originals were all nice and polished with very little wear.
bob11x
Bronze Member
At this age - check the belt and the tensioner arm. I seem to recall some models had something odd with the pivot and double pulley? It hit the frame rail and didn’t travel fully.
Also I seem to remember there were 2 belts- and the catalogs were wrong. 144959 and ? One is 1/2” shorter and keeps the idler from hitting the frame rail.
Also I seem to remember there were 2 belts- and the catalogs were wrong. 144959 and ? One is 1/2” shorter and keeps the idler from hitting the frame rail.
dieselscout80
Veteran Member
I just put new belt on it.At this age - check the belt and the tensioner arm. I seem to recall some models had something odd with the pivot and double pulley? It hit the frame rail and didn’t travel fully.
Also I seem to remember there were 2 belts- and the catalogs were wrong. 144959 and ? One is 1/2” shorter and keeps the idler from hitting the frame rail.
I guess it may be worth dropping out and changing the oil and maybe sanding the mating surfaces.
bob11x
Bronze Member
I wouldn’t sand- it will just wear the belt.I just put new belt on it.
I guess it may be worth dropping out and changing the oil and maybe sanding the mating surfaces.
Remove mower and move the clutch pedal while checking the double idler pivot to be sure when you release the clutch that it it not hitting the frame. If it is the belt may be the wrong one. 1/2” makes a huge difference.
If it’s not hitting I believe there are a couple of holes in the frame where the idler spring could go. Make sure it is in the furthest slot to put the most tension.
Hello all, I purchased my JDX354 6 years back and only have 55 hours on it. My property is small but needed a ride on with AWS as medical issues made walking (and pushing) impossible. Thankfully, Im probably 80% back...
So I wanted to change the fluid because I do use the JD to pull empty light weight motorcycle and loaded jetski trailers in and out of the back yard from time to time. I though it would be a good idea to get ahead of any issues by adding 2 drain plugs. I also thought that at 50 hrs it would be like the 1st oil change on a new engine, kinda important...
Everything went amazingly well except for two items. One im actually embarrassed about. First Im mechanically inclined. I have rebuilt many things in my life, my very first full time job was at a machine shop and the Bridgeport was my primary workstation after school and summers. That said, I used a drill press to drill the drain plug holes. I guess the case needed a better seat on the drill press table as one hole is slightly off axis, causing the head to make contact non uniformly just enough. I put a copper crush washer on and problem solved for now.
The biggest issue now is one of the center case bolts (33 ft lb) must be stripped.
I torqued by hand to barley snug every bolt, then torqued in an alternating pattern each to half of the 17 or so ft. lb. including the center case bolts, worked up slowly to the 17, then on the center case bolts went to 25 Ft. lbs., That last darn setting at 33 went fine on one and the other just didn't feel right.
I worried that I may have left oil in the hole and didn't want to hydro crack the case, so backed it out to inspect. The only thing I could find was the tiniest amount of rtv, no metal chunks, no oil.
I had zero galling on the threads of any of the bolts on removal. Put it back in, and from finger tight to wrench snug then trying to get to 33 ft lbs really feels like Im turning the wrench handle more than I really should.
SO The question I now have, do I try to helicoil it with a helicoil that would fit the existing thread and use a slightly skinnier case bolt OR just worry about it next time I open it up ????
Kyle_in_Tex
Super Star Member
Can you drill and tap it bigger to a 1/4" NPT or 3/8 NPT thread? Buy a matching plug. These are tapered threads, so don't tap too deep.
If I took it all apart again, there could be a bunch of repair methods. I don't remember how much meat was around the threaded shaft.
If there is enough aluminum I could drill and tap one size up.
Im unsure of how the NTP 1/4" or 3/8" would work out, will have to look into that...
Would be great if anyone has a k46 apart that can give a birds eye view of what the center case bolts screw into with a good view of how much meat is around the internal threads...
Also as a precaution, is anything behind those two holes that would be a problem if I drilled more deeply to engage more thread?
Kyle_in_Tex
Super Star Member
What diameter thread did you tap already?
