Chipper WC-6 Chipper Photos

   / WC-6 Chipper Photos
  • Thread Starter
#11  
Hahaha, you guys remember the "tent shop" then?
Yeah, that's now empty and most of that stuff is in the barn/shop now. What a difference!
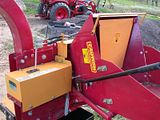
The first mod I'll make is to have the chute swivel around. Maybe limit it 180 degrees right to left but not back towards the tractor? When I get to that, I'll try to make it as easy to do and post it.

We're going to chip as much as possible since we are scared to death about burning here. Even when it's burning season, there is so much timber and brush it could still get out of hand. Some of the older piles we will burn for sure, but the new stuff we will most likely chip up now.
So how are you guys liking your Jinma chippers?
It's raining today so I'll wait until next week to chip a bunch of large branches from some Oaks I took down about 3 months ago. Do you guys save the chips? What do you use them for?
 
   / WC-6 Chipper Photos
  • Thread Starter
#12  
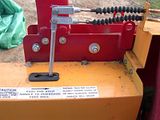
The other thing is drill some large holes in the base so I can get to the grease fittings underneath and also use them for inspection holes.

What about that gear box Ken was talking about?
I don't remember seeing anything like that in my instructions? There is the clutch box assembly for the feed roller. Are there gears in there?
Is that where to drain and add new oil?
 
   / WC-6 Chipper Photos #13  
The other thing is drill some large holes in the base so I can get to the grease fittings underneath and also use them for inspection holes.


Rob,
Great photo and a great suggestion for greasing and inspection.

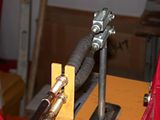
Could you describe more about the cables that control the feeder drive? Is that about the same size as the ones used on push lawnmowers? From the picture, it looks bigger but it might just be the perspective. As you might guess, I'm thinking about another mod. :rolleyes:
 
   / WC-6 Chipper Photos
  • Thread Starter
#14  
Rob,
Great photo and a great suggestion for greasing and inspection.

Could you describe more about the cables that control the feeder drive? Is that about the same size as the ones used on push lawnmowers? From the picture, it looks bigger but it might just be the perspective. As you might guess, I'm thinking about another mod. :rolleyes:

I'll try...
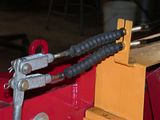
You do have a lever or something that disengages the feed roller, a clutch box or worm gear drive thing? My lever have 2 cables going to it. I could reach over and pull the lever too if I wanted and that would disengage the feed roller.
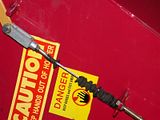
All those cables on mine do is attach to that lever. One is connected to the small yellow handle located above the feed chute. When you push that handle down the cables pull the lever to disengage the feed roller. You are right, the cables are like those on a lawn mower, but really more like a clutch or throttle cable on a motorcycle. The don't need to be very heavy duty but need that adjustment where you can take up the slack. I guess a bicycle brake cable would do it?


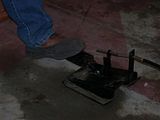
The other cable connected to that lever goes to the foot pedal. When you step on the foot pedal it does the same thing ... disengages the feed roller. It's a secondary device in case you can't reach the lever on the clutch box or the lever on the top of the feed chute.


These are the only other photos I have of the cables.


I saw on another forum where Larry added a foot pedal to lift the feed roller when clogged. It's in addition to the lift handle on the left side. Another good suggestion I got was to add hinged covers to replace those held down with all those little nuts and bolts. That would make it a lot easier for servicing, greasing and inspection etc.
Rob-
 
   / WC-6 Chipper Photos
  • Thread Starter
#15  
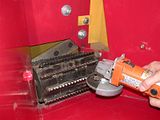
One thing I forgot to post is that the first thing we did is sharpen the feed roller teeth.
Loretta was able to get the 4" angle grinder inside and put a sharp edge on every row of teeth. No need to take the roller out on this model. It was easy to do. I rotated the flywheel using the PTO drive until each row was in the same place. We got the same angle on each row that way. Plus, the roller itself was held steady for grinding purpose.

 
   / WC-6 Chipper Photos #16  
One thing I forgot to post is that the first thing we did is sharpen the feed roller teeth.
Loretta was able to get the 4" angle grinder inside and put a sharp edge on every row of teeth. No need to take the roller out on this model. It was easy to do. I rotated the flywheel using the PTO drive until each row was in the same place. We got the same angle on each row that way. Plus, the roller itself was held steady for grinding purpose.


Thanks Rob, the cable description helps. I'll refrain from any comments about getting my wife to crawl into the chute of a chipper with a grinder. :D
 
   / WC-6 Chipper Photos #17  
Do you guys save the chips? What do you use them for?
There is a guy that we have worked for in the past not that far from us that puts most of his wood chips on his dirt roads. Says that it works out good for him.
 
   / WC-6 Chipper Photos
  • Thread Starter
#18  
There is a guy that we have worked for in the past not that far from us that puts most of his wood chips on his dirt roads. Says that it works out good for him.

Funny you mentioned that Brian,
Today it rained so the ground got pretty muddy and soft. Loretta and I were walking over to the barn and she walked over that small pile of chips we made. She commented how that spot was pretty good ... not muddy or soft like the surrounding area.
Makes a guy think???
 
   / WC-6 Chipper Photos #20  
There is a guy that we have worked for in the past not that far from us that puts most of his wood chips on his dirt roads. Says that it works out good for him.


We have been using wood chips on the roads around our farms and in some parking areas. I will caution you that if they are not driven on regularly, they will start to rot, and the ground will get very punky and soft. But the roads we drive on all the time seem to stay fair.


Top