OP
You are using an out of date browser. It may not display this or other websites correctly.
You should upgrade or use an alternative browser.
You should upgrade or use an alternative browser.
Yanmar SA Mods
- Thread starter sa324owner
- Start date
- Views: 32087
More options
Who Replied?
/ Yanmar SA Mods
#21
OP
sa324owner
Member
OP
sa324owner
Member
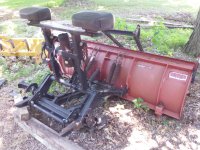
I have stared at the plow and tractor for a total of three evenings and I finally came up with a plan using stuff I had laying around.
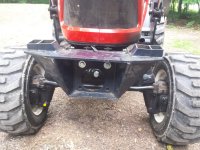
Strongly considering the size and weight of the plow, I've decided to build a subframe on the front of the tractor. The previous owners of my property must have had an Allis-Chalmers 5220 or 5230 because they left the brand new ROPS in the barn. Lucky me! The beefy ROPS has become the basis for the subframe. I don't think I could have asked for a more perfect thing to start with.
The subframe will (tentatively) attach at the rear mid-mount mower lift point, the front mid-mount mower lift point (rear of the front-end loader mounts), and the front "bumper". The primary issue that the hacked-up ROPS is going to solve is clearing the front axle with the axle at full articulation and steering at full lock. The mock-ups I've done make it seem VERY promising.
Attachments
OP
sa324owner
Member
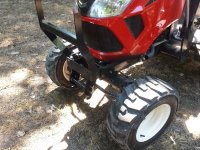
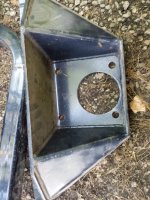
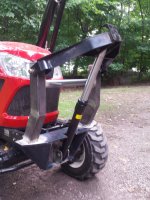
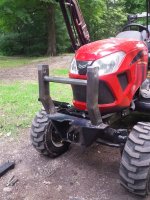
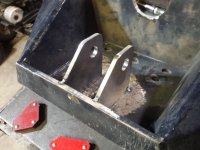
I've also mulled over how to handle the plow lift mechanism on the tractor side. Some more staring lead me to the leftover mount of the repurposed ROPS. It is going to become the new permanent front bumper on the tractor. I drilled some holes and did a quick test fit. I lifted the front of the tractor with the loader and check for clearance between the tires and bumper. Plenty of room and it looks like some monster off-road bumper you'd find on a Jeep!
The "bumper" will be fitted with two upright arms to support the plow's lift arm. It will ultimately look sort of like a brush guard and function as one since the original will have to be removed. The plow lift arm and plow lift cylinder will pin-on so they can be removed when the plow is not attached.
The "bumper" will be fitted with two upright arms to support the plow's lift arm. It will ultimately look sort of like a brush guard and function as one since the original will have to be removed. The plow lift arm and plow lift cylinder will pin-on so they can be removed when the plow is not attached.
Attachments
OP
sa324owner
Member


OP
sa324owner
Member
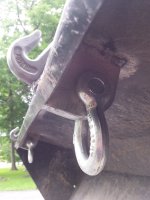
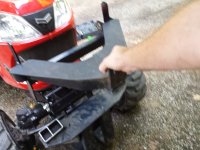
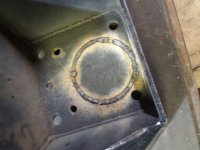
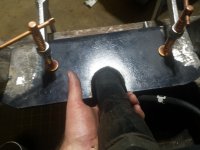
The lift cylinder that was on the plow had some pitting/peeling on the cylinder itself, so I ordered a replacement. I decided to go with a 1.5" x 10" (instead of the stock 8" stroke) so that the lower mount worked out a little better. I don't think I'll actually need the extra lift height unless I'm making some big snow mounds.
I also got the brush guard cross bar installed.
The entire lift mechanism pins on and can be installed/removed in a matter of minutes.
Due to the extended lift height, I had to notch out the back of the lift arm to make room for the cylinder.
I also got the brush guard cross bar installed.
The entire lift mechanism pins on and can be installed/removed in a matter of minutes.
Due to the extended lift height, I had to notch out the back of the lift arm to make room for the cylinder.
Attachments

MACflyer
Bronze Member
The lift cylinder that was on the plow had some pitting/peeling on the cylinder itself, so I ordered a replacement. I decided to go with a 1.5" x 10" (instead of the stock 8" stroke) so that the lower mount worked out a little better. I don't think I'll actually need the extra lift height unless I'm making some big snow mounds.
I also got the brush guard cross bar installed.
The entire lift mechanism pins on and can be installed/removed in a matter of minutes.
Due to the extended lift height, I had to notch out the back of the lift arm to make room for the cylinder
Is the plan to remove the bucket and use those hydraulic lines for the plow?
OP
sa324owner
Member
Yes! The overall idea is to make the plow and components as quick-attach as I possibly can. Using the tractors existing hydraulic system helps make that possible. I'm shooting for < 5 minutes on/off.Is the plan to remove the bucket and use those hydraulic lines for the plow?
All the hydraulic hoses on the plow need replaced anyway, so I'll replace them with lines long enough to run to the existing connections on the tractor.
OP
sa324owner
Member
I've been making slow plow progress because I had to divert to reconfigure my leaf collection equipement to prepare for Leaf-ageddon 2021.
I took a few days off work to (hopefully) make some progress.
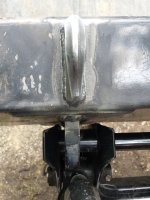
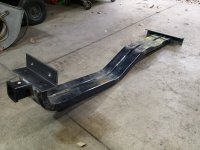
I welded up the main rails of the subframe yesterday. I was able to tack it in place to test clearances. My primary concern was the subframe-to-driveshaft clearance. Nothing hits so far!
I took a few days off work to (hopefully) make some progress.
I welded up the main rails of the subframe yesterday. I was able to tack it in place to test clearances. My primary concern was the subframe-to-driveshaft clearance. Nothing hits so far!
Attachments
Willieintn
New member
- Joined
- Dec 28, 2021
- Messages
- 2
- Tractor
- Yanmar SA324
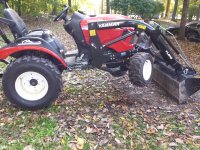
I just bought a SA324. I have a similar cross drawbar that you show above. The problem is that it is 3" too long to fit between 2 bottom links. I want this to lug around my splitter. The drawbar that came with it is very low, for my old back to deal with.I bought my SA324 back in April and I've been scouring the Internet ever since looking for modifications to make. I wanted to share what I've done so far and I'd like to see what other people have done as well.
View attachment 573119View attachment 573120View attachment 573128
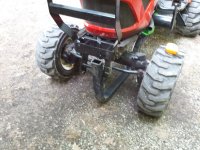
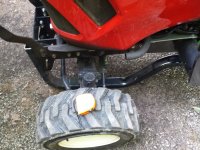
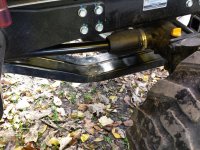
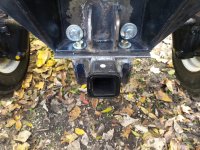
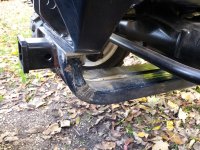
Fabricated 2 Inch receiver in place of original drawbar. Most accessories I already have for my truck fit a 2" receiver so this was far more useful to me. Used a cargo carrier I fabricated for my wife's old car to carry a large cooler. We would fill the cooler full of water for watering plants around the yard.
View attachment 573121View attachment 573122View attachment 573123
T-slot aluminum for ROPS-mounted lights. T-slot aluminum for versatile mounting for shovels/rakes/gas trimmer, etc. Wiring for lights is fully integrated into the main wiring harness at uses fused accessory circuit. Switch fits perfectly in pre-existing hole.
View attachment 573124
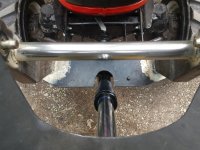
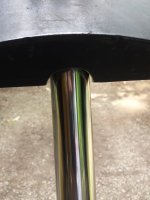
Obligatory steering knob.
View attachment 573125
Cross drawbar from TSC. I drilled out the two outer holes to fit some shackles. Seems to work well for general purpose stuff, including pulling small trees with the 3-point.
View attachment 573126View attachment 573127
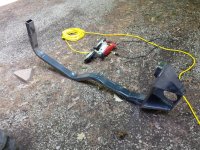
Last, and certainly not least, a lever in place of the brake pedal-actuated differential lock. In my opinion, this (or something like it) is how the tractor should have come equipped originally. The lever gives a MUCH improved positive feedback on whether or not the differential lock is engaged. As an added bonus, the lever will engage the lock if moved forward OR backward. The 3-point sliding lock can also be used to lock the new lever in the locked position if need be. I rebent the 3-point height control lever so the handle grip angles inboard so the two levers do not interfere with one another. The lever is currently unfinished. I will likely 3D print a handle grip similar to what's already on the machine. Since the brake pedal no longer does double-duty, I took all the slack out of the braking mechanism. The brake now operates as you'd hope/expect.
Now... show me what you've come up with!
Similar problem on the old box blade I have. The bottom links on the 3pt need to open to 29inchs, which won't happen. So, I'm gonna have to remove 2 big pins to get the box on. Lining up the hole could be a pain, and I don't have a 1 5/16" socket. Is it worth it to look for a quick connect?
So far during the breaking 50 hr period I've not challenged this little tractor at all, but carrying around and using the 450# box might just be that challenge. I'm wondering if I'm going to need weight other than the FEL in the front.
