OP
eepete
Platinum Member
With the pad poured, it's time to do the electrical. This took way to long, and being a one man band didn't help. I brought three circuits from the house. A 15 amp light circuit that is on the whole house generator, a 20 amp outlet circuit also on the generator, and a 100 amp sub panel circuit that comes off of the breaker box _before_ the transfer switch (so it is not on the generator).
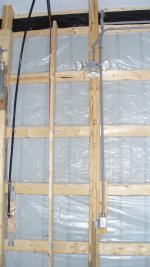
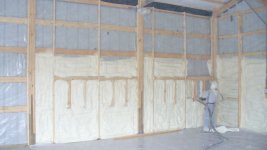
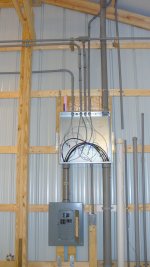
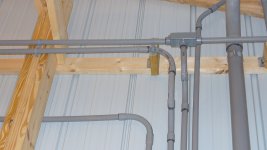
The 1st picture shows the 3" conduit from the house going into a 24" square junction box. You can see the big #2 wires going down to the breaker box. A pricing quirk at the big box stores had the #2 wire cheaper than the #4 wire, so I went with #2 including the ground. I love overkill. You can also see a disconnect switch for the two circuits off the generator just to the right of the breaker panel box. The 2' box and disconnect is where working with my buddy the electrician helped. I'm sure that most inspectors could help too, I've had ours out for a consultation when I'm at a point like this and it's been very helpful. No point in doing something twice when you could have asked and got it right the 1st time.
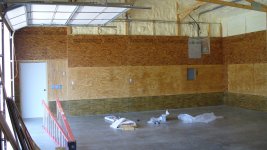
The 2nd picture is a close up the area above the big honking 2' box. Some pipe went on the outside of the poles, some on the inside. I probably could have heated and bent the conduit instead of using the pre-formed pieces, but it was easy to use the pre-formed and helped me in one man band mode. The big 2.5" goes to the other side of the garage both to get power to the future air compressor in the inverter shed, and as a general way to get "stuff" over to the other side for any future escapades.
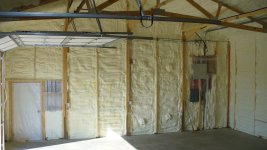
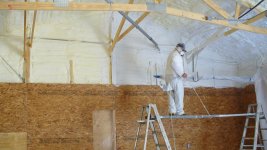
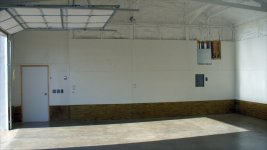
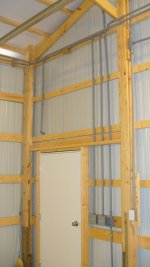
The 3rd shot shows the switches for the lights at the door. There is also a box for low voltage for a phone and door switch for security. You can see a pipe going down by the hinge of the door- this is for an outside light on a motion detector.
The four switches: The 1st switch goes to 2 60 watt incandescent flood light bulbs. This lets me get a little light so I can see to get something from the garage. The 2nd switch goes to 7 24 watt compact fluorescent flood light bulbs for when I really need to light the place up. Since they take a while to get to full brightness (more time if it's cold), I will only use these if I'm going to be in the building for a while. All compact fluorescents are like well pumps. The may run forever but they only start so many times. So being able to choose between the cheap incandescent and the fluorescents is a win. The next two switches are outside flood lights, a set on each side of the building.
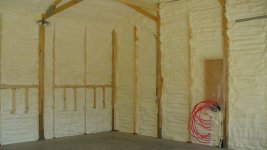
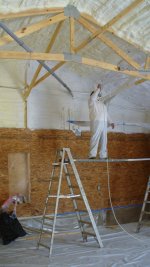
The 4th shot is a close up of the are above the switches, showing the two drops to the boxes. Yes, I could have just used one drop and then connected the boxes. There are many ways to run the conduit. I suspect if I did it for a living it would be completely different. The best feature of all this conduit and wiring? It works")
Why conduit over just stapling romex to the wood? Well, I do like overkill. I also liked the physical protection I get. And if I have to add something else after everything is buttoned up I can pull more wire in conduit. Finally, and this is very fuzzy and subjective, I like the 10,000 volt insulation of the conduit in case the building gets hit by lightning. Can't prove it would work, but it can't hurt.
BTW, the rebar in the pad has a wire that comes up and ties to the AC ground.
The 1st picture shows the 3" conduit from the house going into a 24" square junction box. You can see the big #2 wires going down to the breaker box. A pricing quirk at the big box stores had the #2 wire cheaper than the #4 wire, so I went with #2 including the ground. I love overkill. You can also see a disconnect switch for the two circuits off the generator just to the right of the breaker panel box. The 2' box and disconnect is where working with my buddy the electrician helped. I'm sure that most inspectors could help too, I've had ours out for a consultation when I'm at a point like this and it's been very helpful. No point in doing something twice when you could have asked and got it right the 1st time.
The 2nd picture is a close up the area above the big honking 2' box. Some pipe went on the outside of the poles, some on the inside. I probably could have heated and bent the conduit instead of using the pre-formed pieces, but it was easy to use the pre-formed and helped me in one man band mode. The big 2.5" goes to the other side of the garage both to get power to the future air compressor in the inverter shed, and as a general way to get "stuff" over to the other side for any future escapades.
The 3rd shot shows the switches for the lights at the door. There is also a box for low voltage for a phone and door switch for security. You can see a pipe going down by the hinge of the door- this is for an outside light on a motion detector.
The four switches: The 1st switch goes to 2 60 watt incandescent flood light bulbs. This lets me get a little light so I can see to get something from the garage. The 2nd switch goes to 7 24 watt compact fluorescent flood light bulbs for when I really need to light the place up. Since they take a while to get to full brightness (more time if it's cold), I will only use these if I'm going to be in the building for a while. All compact fluorescents are like well pumps. The may run forever but they only start so many times. So being able to choose between the cheap incandescent and the fluorescents is a win. The next two switches are outside flood lights, a set on each side of the building.
The 4th shot is a close up of the are above the switches, showing the two drops to the boxes. Yes, I could have just used one drop and then connected the boxes. There are many ways to run the conduit. I suspect if I did it for a living it would be completely different. The best feature of all this conduit and wiring? It works
Why conduit over just stapling romex to the wood? Well, I do like overkill. I also liked the physical protection I get. And if I have to add something else after everything is buttoned up I can pull more wire in conduit. Finally, and this is very fuzzy and subjective, I like the 10,000 volt insulation of the conduit in case the building gets hit by lightning. Can't prove it would work, but it can't hurt.
BTW, the rebar in the pad has a wire that comes up and ties to the AC ground.
Attachments

Last edited: