my kubota rebuild

   / my kubota rebuild #51  
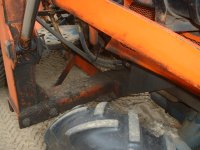
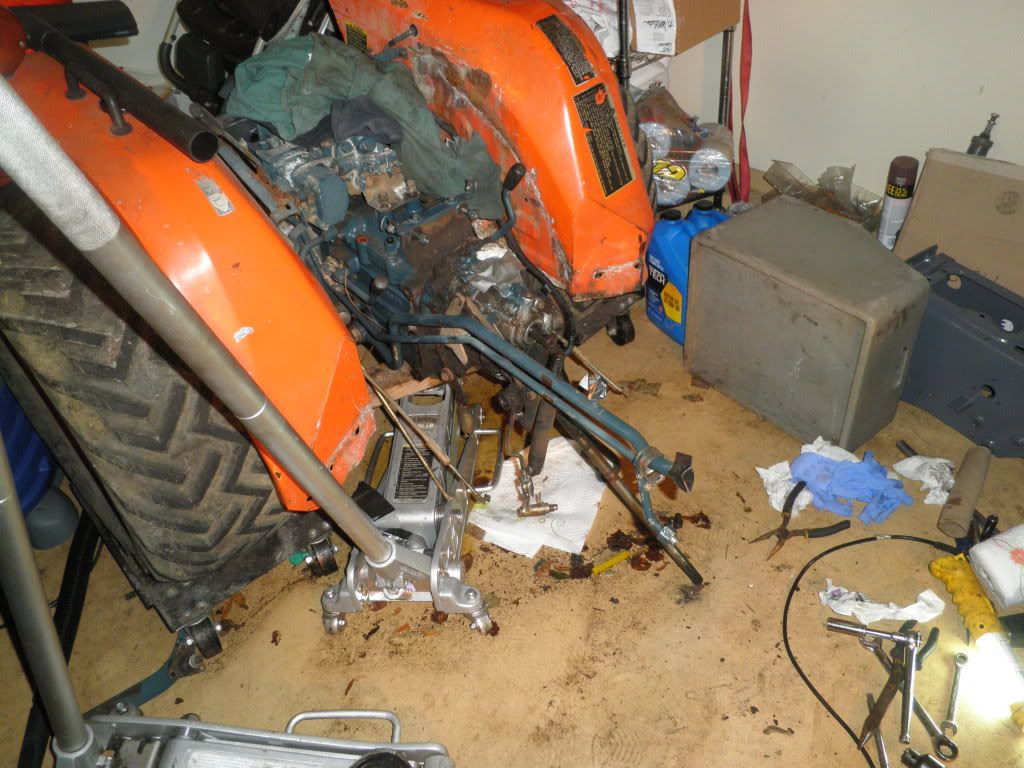
I do have another little problem also...
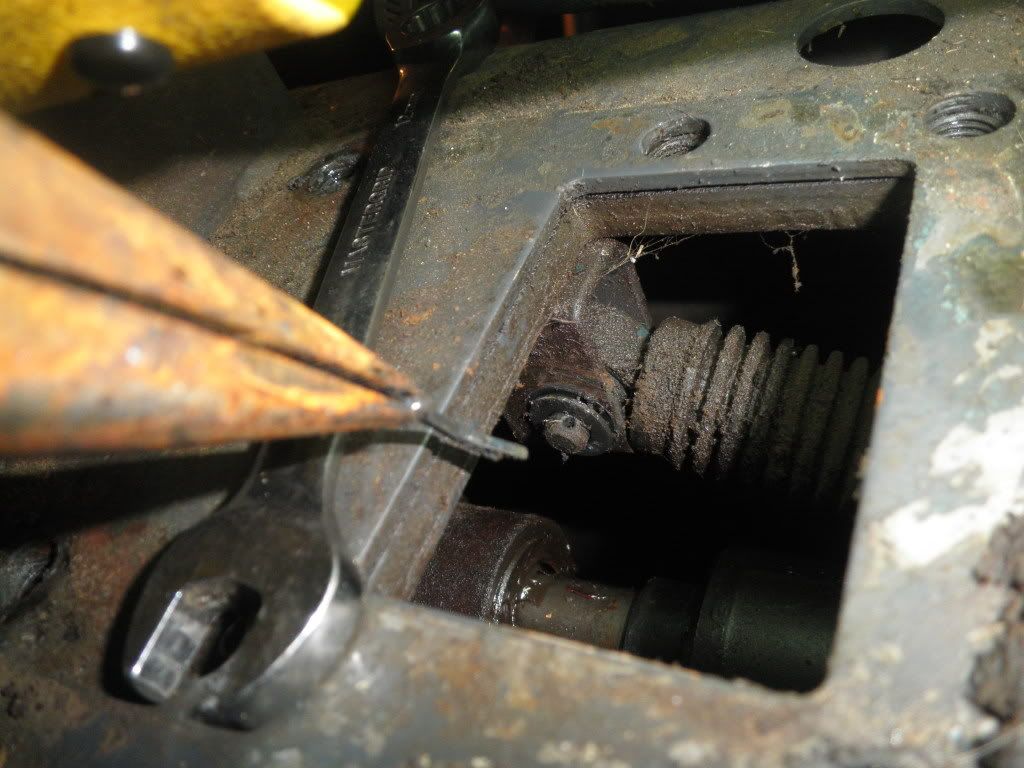
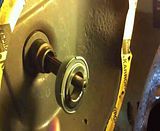
In my factory kubota service manual it speaks of a metal shim or gasket, in the shape of a circle, that the 5 flywheel bolts go through when bolting on the flywheel.
It had been a month or so since I had pulled the flywheel, and I didn't remember removing such a thing.
I know for a fact that this shim/gasket didn't go on the outside of the flywheel, as I had pictures from pulling it off.
so that would mean that it would have to be on the inside, between the crank and the flywheel.
So, after searching the garage and coming up empty, I went to the dealer to order it up.
The dealer couldn't find it anywhere in the schematics on the computer. I looked over his shoulder and sure enough there isn't anything there on the parts breakdown?

Does anyone have any first hand knowledge about this ?

Should I just bolt the flywheel up and call it a day?

I'll take a picture of the service manual instructions and post them up...in about an hour or two
thx

On my B7100 there is a metal tab washer with a tab for each bolt head which is to be bent against each head as a lock. Your machine has probably been apart before and it was left off. I you torqued the bolts to spec they shouldn't give any trouble.
 
   / my kubota rebuild
  • Thread Starter
#52  
On my B7100 there is a metal tab washer with a tab for each bolt head which is to be bent against each head as a lock. Your machine has probably been apart before and it was left off. I you torqued the bolts to spec they shouldn't give any trouble.


hey, thx for responding.
I have already torqued the flywheel on, along with the clutch/pressure plate.
I've been, ironically, replacing the clutch on my wife's daily driver honda for the last week (pulled flywheel, rear main seal, etc), so havent had time to post on the tractor.

I'll update soon though.
thx
 
   / my kubota rebuild #53  
Hey Matt, how's things progressing? I didn't forget about getting subframe pictures. Here they are, hopefully give you some ideas. The bottom one is looking down from the seat area. You can see the horizontal pieces can separate here for ease of removal or splitting the tractor.
 

Attachments

  • DSCF0044.JPG
    DSCF0044.JPG
    321.7 KB · Views: 496
  • DSCF0045.JPG
    DSCF0045.JPG
    327.9 KB · Views: 388
  • DSCF0046.JPG
    DSCF0046.JPG
    322.7 KB · Views: 407
  • DSCF0047.JPG
    DSCF0047.JPG
    326 KB · Views: 623
  • DSCF0048.JPG
    DSCF0048.JPG
    328.1 KB · Views: 359
  • DSCF0049.JPG
    DSCF0049.JPG
    318.3 KB · Views: 416
   / my kubota rebuild
  • Thread Starter
#54  
Hey Matt, how's things progressing? I didn't forget about getting subframe pictures. Here they are, hopefully give you some ideas. The bottom one is looking down from the seat area. You can see the horizontal pieces can separate here for ease of removal or splitting the tractor.

hey, thx for the pics!
those are going to be a really big help.

I have had other projects get in the way up until now, and am now ready to hit it again.
I will post up here with progress in the next few days

thx again
 
   / my kubota rebuild
  • Thread Starter
#55  
Ok, had a bit of a break from the tractor due to replacing a clutch :laughing: on my wifes DD, along with rear main seal, flywheel, etc....and then making another trip to our 10 acres up in the mountains of western NC...among other things.

so, back at it...

working to get the clutch cover the rest of the way off...it is still attached to the HST here, and I have some more linkages and such to detach...

017.jpg


001-9.jpg


002-11.jpg


006-6.jpg


here is a quick shot of the other side and the new pressure plate/clutch/etc...

005-6.jpg


more of stuff to take off before pulling clutch cover

011-5.jpg


013-2.jpg


020.jpg


here is the cover starting to come off...

023-1.jpg
 
   / my kubota rebuild
  • Thread Starter
#56  
clutch cover is off..

027.jpg


plenty to pull off the old cover, clean, paint, grease, and reinstall on new cover...

029-1.jpg


and had to take some parts to the welder to get cracks fixed...this one is of the seat bracket where I had found two hairline cracks...they did a good job

034-1.jpg


this is the FEL's mounting bracket...left side...that had several weld pops and a spot where the actual steel was cracked...
035-2.jpg


here is where the crack was...they took a peice of steel and patched over it and then welded...should hold well..
036-1.jpg


037-1.jpg


So, next step is to pull the HST. I had found lots of metal shavings in the metal filter and suspect damage in there. I will pull it and maybe do some disassembly, but will probably take into the dealer to let them rebuild...will post up later
 
   / my kubota rebuild
  • Thread Starter
#57  
sorry for the delay...not that anyone is sitting on the edge of their seat waiting for me to update :laughing:....

anyways, I'm trying to make the tractor project a priority right now...lets see how long that lasts.

I took the HST off and could get a look inside the tranny.
everything looked great in there.
The oil was clean, the gears that I could see were shiny like new with no scratches or broken teeth, etc.

I took the HST in to get it rebuilt and had a long talk with the service guy who was very experienced...and he basically told me that he thought I should just bolt it all back up and go from there.
His response to the main metal screen filter having lots of metal shavings on it was that many owners dont even know about it and often neglect to maintain it.
I mentioned that the previous owner didnt seem to care much for the tractor, and he thought this was the most probably explanation...thinking it had maybe never been cleaned since new.
When I told him the tranny looked good inside, he told me that he thought I would be fine just putting it all back together.

I told him about the sound like a bunch of bolts shaken in a metal bucket that would come and go, and as soon as he said clutch I laughed and told him how the clutch crumbled into many peices when I pulled the pressure plate :laughing:
I had almost completely forgotten about this since it had been almost a year since I started this whole thing.

so I bought a new input shaft oil seal...it fits into the tranny where the hst meets up with it...and then a new gasket with a very small film of "great stuff" silicone...dabbed some hyd oil onto the gears and shaft...and bolted the hst back up...

034-2.jpg


I noticed that there is a strut that comes off the hst, that is on some linkage for I think the neutral selector or some such...I have to look in the manual to remember... This strut seems to work okay, but I'm going to price one at the dealer anyways and if not too expensive, I'll replace it.

036-2.jpg


here is the rebuild kit for the universal joint for the 4wd that comes off the hst and is hidden up in the clutch cover when assembled...cost me 50 bucks, but is easier to do now then after it is all back together.

035-3.jpg


I also have a rebuild kit for the main driveshaft...it is not a universal joint...is some kind of design I havent seen before...and it cost me a hundred bucks...
I will post pics of it later...

and this shaft comes off the hst on the side and would be completely inaccessable once the tractor is back together, so I'm replacing the rubber flat ring on the end and will grease...and there is a little bearing in the middle of the shaft/lever and I'm going to get a new one from the dealer next week.

037-2.jpg
 
   / my kubota rebuild
  • Thread Starter
#58  
took some time off for other projects, but have been picking away slowly at this kubota tractor sitting in my garage...
just havent kept up with pics and posting on the forum...but now plan to get back in the groove here...


below is the new shiny, sandblasted, and painted trans tunnel installed
142_zps43937ae1.jpg


here is a shot, on the right side of pic, of a safety wire on the roll pin for the driveshaft...factory manual said to safety wire the roll pins, so I did...
143_zps5218af6a.jpg


below is a shot of some of the shiny new factory stickers that I will be replacing on the tractor
145_zps84288299.jpg


here is the new clutch release bearing...from what I can tell it just sits on the driveshaft right there? There doesnt seem to be any way to fasten it on there? The original was a disintegrated mess and I couldnt tell from the pics I took back then...and the factory manual is unclear in directions with this
144_zps18ffd099.jpg
 
   / my kubota rebuild
  • Thread Starter
#59  
I'm back...
after a long layoff, I'm committed now to finish this project

I had the bell housing bolted back up, but immediately noticed that the clutch arm felt a little off after the first press into the pressure plate by hand.

it didn't feel like I was actuating the clutch with the pedal.
everything seemed to move okay, but it didn't feel right.

I took a couple of video's after I re split the bell housing from the engine....


I'm perplexed by the oil seal spring that I found. I don't remember there being an oil seal in there?

I cannot be certain if the orientation of the throwout bearing is correct either.

is there anything else that I'm missing here?

I'm thinking of driving to the nearest Kubota dealer and asking them if they can print out the parts diagram for these parts
 
   / my kubota rebuild
  • Thread Starter
#60  
okay, heard from someone on another forum that the throw out bearing was on backwards.
Like I said, I had no good picture of it installed in the factory service manual....if you can believe it.

Also, it doesn't seem to slide over the output shaft when going on the proper way?

that might be why I installed it backwards, as it slide on much more easily that way.

anyways, I pulled the clutch plate/pressure plate just to make certain all was well as it had sat for over a year in florida humidity and I didn't want to get it all back together and find it welded with rust.


Tractor & Equipment Auctions

Quick Attach Pallet Forks (A47384)
Quick Attach...
2013 Doyle Dry Fertilizer Tender Trailer - Kubota Diesel, 3 Stainless Compartments, Side Discharge (A52128)
2013 Doyle Dry...
2018 Caterpillar 416F2 4x4 Extendahoe Loader Backhoe (A50322)
2018 Caterpillar...
3014 (A50657)
3014 (A50657)
2017 GENIE GTH-636 TELESCOPIC FORKLIFT (A51242)
2017 GENIE GTH-636...
HANG ON 48" CATERPILLAR FORKS (A51242)
HANG ON 48"...
 
Top