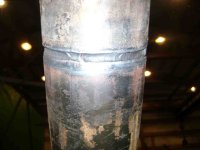
The as welded part doesn't look to bad. Being as it is the very end of the weld, and you don't have a foot pedal, I'd say you need to turn the amps up a little bit.
This is the bottom, (overhead) of a 6-G Tig weld I made sometime ago. See how the weld flows into the side walls more so than your weld?
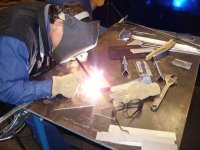
Remember now when Tig welding 6-G pipe, you have to know how to weld with both hands!
")