My NX5510H

   / My NX5510H #151  
Can anyone suggest a suitable hose to use for mocking-up running hydraulic lines to the FEL (from rear remotes)?

Folks have suggested garden hose, but I'll be running 3/8" lines and I only see 3/8" soaker hose.

If you want, hit your home improvement store and purchase 3/8" vinyl hose. I used garden hose.
 
   / My NX5510H #152  
Do you have a air hose laying around?
 
   / My NX5510H
  • Thread Starter
#153  
Folks, I did a quick search on a local big box store's web site and didn't see any 3/8" garden hose (other than drip). I had some old crap air hose but I think I pitched all of it: my shop is a total disaster zone -new garage is being built- and I risk injury every time I go in there (and I'm not home much lately these days to really look).

One box store has 50' of 3/8" vinyl air hose for $15. This might be my best bet.
 
   / My NX5510H
  • Thread Starter
#154  
In the process of installing my cameras and monitor.

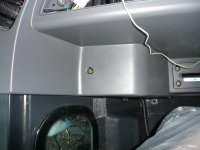
Can anyone tell me what it takes to remove these bolts:

P1120780.JPG

Removed all the others except those. Can't get any of my sockets down in the recessed plastic!

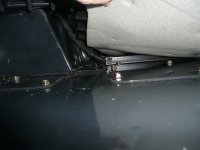
Is this the channel that folks are referring to for running the cable from the monitor (back to the fuse box)?

P1120781.JPG
 
   / My NX5510H
  • Thread Starter
#155  
OK, success in locating something to remove those recessed bolts: had a cheap-o screwdriver bit set that had some sockets and a 1/4" adapter for a socket wrench. :thumbsup:
 
   / My NX5510H #156  
In the process of installing my cameras and monitor.

Can anyone tell me what it takes to remove these bolts:

View attachment 487923

Removed all the others except those. Can't get any of my sockets down in the recessed plastic!

Is this the channel that folks are referring to for running the cable from the monitor (back to the fuse box)?

View attachment 487924

1/4" 10MM socket with a six inch extension on my Panasonic drill driver set on its lowest setting.

Anyway, 10mm socket.

If your sockets are too fat, hit one with a grinder to shave it down.
 
   / My NX5510H
  • Thread Starter
#157  
Eric, yeah, got it!

Also wanted to note that I measured for hoses for my 3rd function, from rear remotes to FEL. Going to route on the LEFT side of the tractor/loader, mimicking the FEL hoses on the RIGHT side- the flex loop and I am also figuring in for a bulkhead connection at the loader attachment point. Being just on the generous side I get:

7' 9" from top rear remote (will be 90 degree facing/routing left) to the loader attachment point
10' 8" from the loader attachment point to about the middle of the torque tube (I may keep it shifted to the outboard side)

Probably can take off a couple of inches from each for the length of fittings.
 
   / My NX5510H
  • Thread Starter
#158  
Hydraulic stuff ordered. I'm knocking myself for not picking up some sleeve material: I might look to get it before I install things. The hose has a higher abrasion rating, so maybe that will be good enough.

So, when I was mucking about with installing my cameras I discovered that prying the cap top up required, well, PRYING! I'd removed all the nuts and was just looking to bump up the rear part of the cab. I e-mailed the dealer and asked if they RTV'd the cab top in order to rectify the leak. They DID! :thumbdown: So, now if I have to go to remove the top I'm facing battling with RTV.
 
   / My NX5510H
  • Thread Starter
#159  
Got the monitor installed and the cameras. Waiting to get an RCA barrel jack to make the video connection for the rear camera.

Front camera - notice the high tech mounting solution- electrical tape! :D It's off center a bit. When I determine what location is best for viewing my pallet fork work I'll make things more permanent.
View attachment 488105

Tried being fairly tidy with the wiring. Ran the front stuff through a piece of loom I had kicking around (and taped it up). I ran the wires/cables through the grommet that runs up under the radiator (though no loom through there). Wires are then just laying inside the battery box area and then out along where the hood closes and up and along the brush guard.
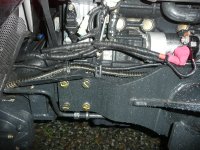
P1120785.JPG

Rear camera was mounted under the rear lip of the cab top. It's currently dangling there. I wasn't sure if the angle would work, so no permanent mount yet. I'll likely tape it first to check.

Here's the monitor in action (front camera- crooked!):

View attachment 488108

I sifted through a ton of screws looking for four matching self-taping ones. Only ones I had were shiny, Phillips head that were, I figured, too big. Had to run some errands anyway so I stopped at one of the big box stores and bought, well, a big box of black, hex head self-taping screws: $5 for four screws, but, I'll be looking at this for a LONG time!:)
 
   / My NX5510H
  • Thread Starter
#160  
Not much happening on the tractor front. Attached the pallet forks and moved a pallet of wood up to the house. First use of the new camera/monitor set up; I didn't have a very good angle of view- need to work on, probably opt for increasing cable length and doing temporary camera mounts (use magnetic base).

Showed the wife why all the fuss with this camera stuff. Having her sit behind the wheel allowed her to "get it."

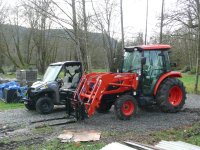
Tractor and Polaris are currently parked side by side and I thought I'd grab some pictures of them after noticing how much smaller the front profile of the tractor is with the bucket off (had the pallet forks on).

For some reason I thought I'd bought a bigger tractor.
View attachment 488445

Oh! Now I see it!
P1120801.JPG

Does this Polaris make my rear look big? :laughing:
View attachment 488446
 

Tractor & Equipment Auctions

BW RVB3405 20,000lbs 5th Wheel Hitch Base (A50322)
BW RVB3405...
2018 WACKER NEUSON CORPORATION DBA WACKER NEUSON LTV6 LIGHT TOWER (A50854)
2018 WACKER NEUSON...
2000 Dnya RGN (A49461)
2009 UTILITY TRAILER MFG. CO. SEMI TRAILER 57 (A50854)
2009 UTILITY...
2016 CATERPILLAR CT660 TRI AXLE DUMP TRUCK (A51222)
2016 CATERPILLAR...
Caterpillar D7g Bulldozer (A50514)
Caterpillar D7g...
 
Top